Getting ready, E-20 – Casio YA-S10 Setup Guide User Manual
Page 21
Getting Ready
E-20
(1)
On the “Image Shaping” menu, select “Corner Correction” and then press the [ENTER] key.
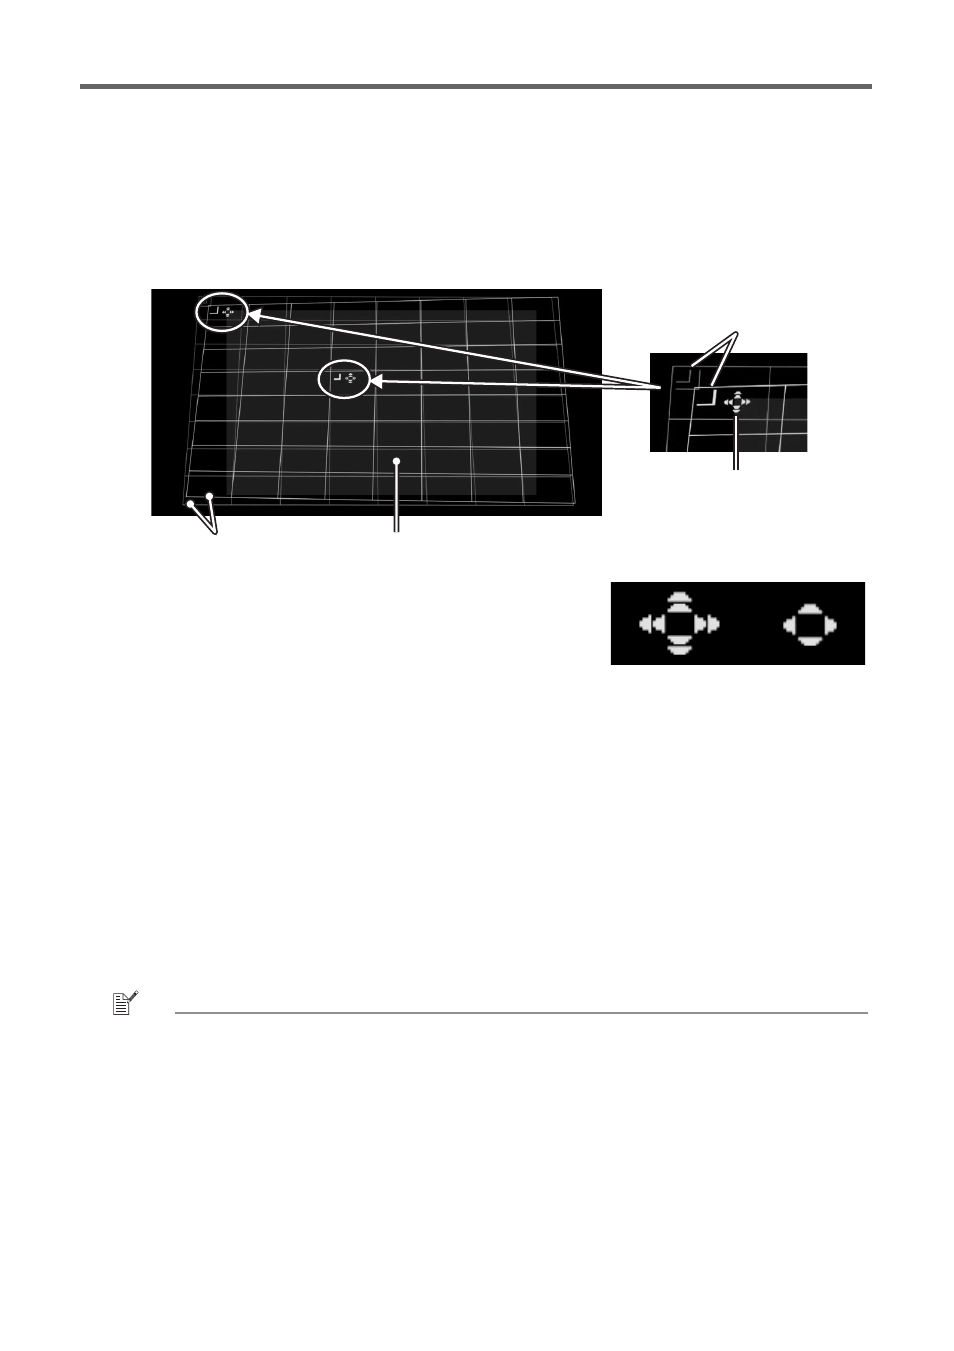
z As shown in the screenshots below, both Projector A and Projector B will project grids and
positioning marks. The yellow grid and mark is the Projector A image, while the light blue
grid and mark is the Projector B image.
z “Shaping cursors” will also be shown in the upper left corner of the yellow grid, and
somewhat above and to the left of the center of the grid. This indicates that the Projector A
grid is currently selected for adjustment. Perform the required shaping operations to align
the Projector A image.
(2)
Use the [S], [T], [W] and [X] keys to move the upper left
corner of the grid so it is aligned with the upper left corner
of the target screen.
z You can toggle the speed of grid movement between
slow and fast by pressing the [CORRECT] key. The
current cursor speed setting is indicated by the shape of
the cursor as shown in the nearby image.
z You can toggle the Projector B image between show
and hide by pressing the [BLANK] key.
(3)
After the upper left corner of the Projector A image is where you want it, press the [POSITION]
key.
z This will cause the shaping cursors to start flashing, which indicates that shifting of the
cursors to a different location is enabled.
(4)
Use the [X] key to move the flashing shaping cursor to the upper right corner of the Projector A
image, and then press the [CORRECT] key.
z This will stop the cursor flashing, which indicates that you are now able to move the upper
right corner of the grid.
(5)
Use the [S], [T], [W] and [X] keys to move the upper right corner of the grid so it is aligned
with the upper right corner of the target screen.
(6)
Repeat steps (3) through (5) above to align the lower right and lower left corners.
NOTE
z Operation of the following keys is disabled while an image from an input source is being
projected: [S], [T], [W], [X], [CORRECT], [POSITION]. For information about selecting the
projection image, refer to “Changing the Projected Image View while Shaping an Image ([IMAGE]
Key)” (page E-18).
(7)
After Projector A image alignment is the way you want, press the [A⇔B] key.
z This will cause the yellow Projector A image shaping cursors to disappear and be replaced
by light blue Projector B image shaping cursors.
(8)
Align the four corners of the Projector B image with those of the target screen.
z Use the same steps as those you performed for the Projector A image.
Shaping cursors
Positioning marks
Grid
Target screen
High speed
movement
Low speed
movement