4 initial utility installation, 5 preparation, 1 configure network by planet ipfinder – PLANET ICA-HM127 User Manual
Page 15
2.4 Initial Utility Installation
This chapter shows how to quick set up your IP Camera. The IP Camera is with the default
settings. However to help you find the networked IP Camera quickly the Windows utility
(
PLANET IPFinder) can search the IP Cameras in the network that shall help you to configure
some basic setting before you start advanced management and monitoring.
Please insert the bundle CD disk into your CD/DVD-ROM drive. When the welcome web page
appears, please click your IP Camera name on the IP Camera list i.e. ICA-HM127. Then click
on the utility
IPFinder to start the program.
2.5 Preparation
You can use your new Network IP Camera by its web user interface via web browser. Currently
the viewing system requirement for Network IP camera is:
■
OS: Microsoft Windows 2000/XP/Vista/7
■
Browser: Mozilla Firefox, IE7 or above, Chrome, Safari
■
Cell phone: 3GPP player
■
Quick Time: 6.5 or above
The IP Camera will use DHCP server on your local network to obtain an IP address
automatically by default. So, you can check your DHCP server’s IP address lease table to find
the IP address of IP Camera.
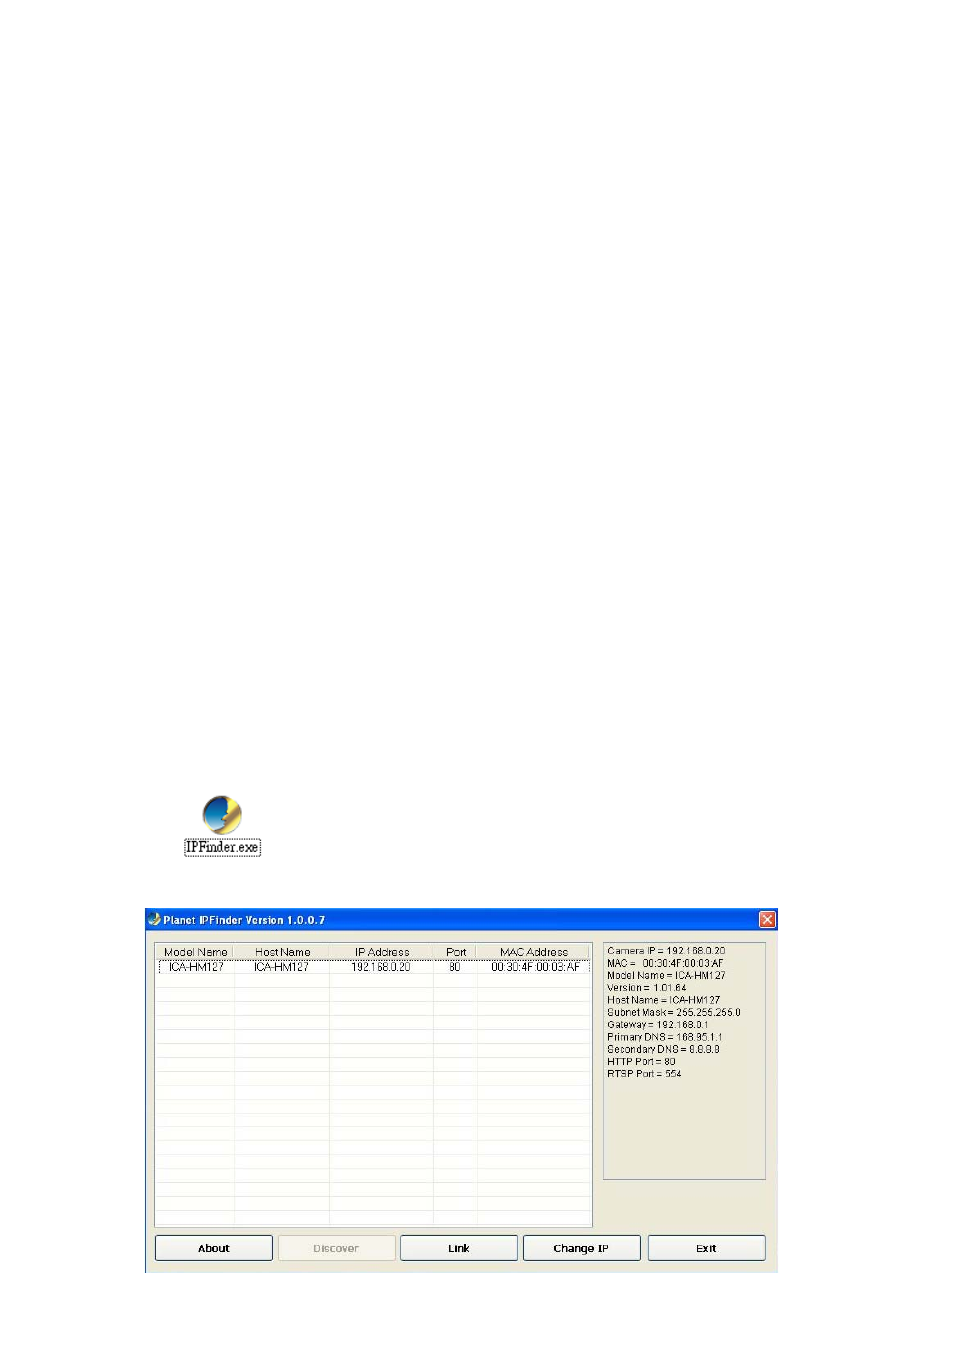
2.5.1 Configure Network by PLANET IPFinder
1. Use “IP Finder” to assign an IP address of IP CAMERA.
The IP Finder software is in the attached CD named" IPFinder.exe ".
2. The GUI of IP Finder is as follows (Default IP: 192.168.0.20).
14