CIRCUTOR computer SMART Series (Available until stock) User Manual
Page 27
M98235701-03-12A
Computer Smart 6/Computer Smart 12
- 26 -
In case there are capacitors that have been disconnected, a third editable parameter (No/Yes) will be
displayed on the setup screen, which can be used to activate the capacitors that have been deactivated by
this alarm.
To configure the first parameter as ON, the E09 must be enabled (from PA1). Once it is On, E12 and E13 will
be automatically enabled (see Table 5.5).
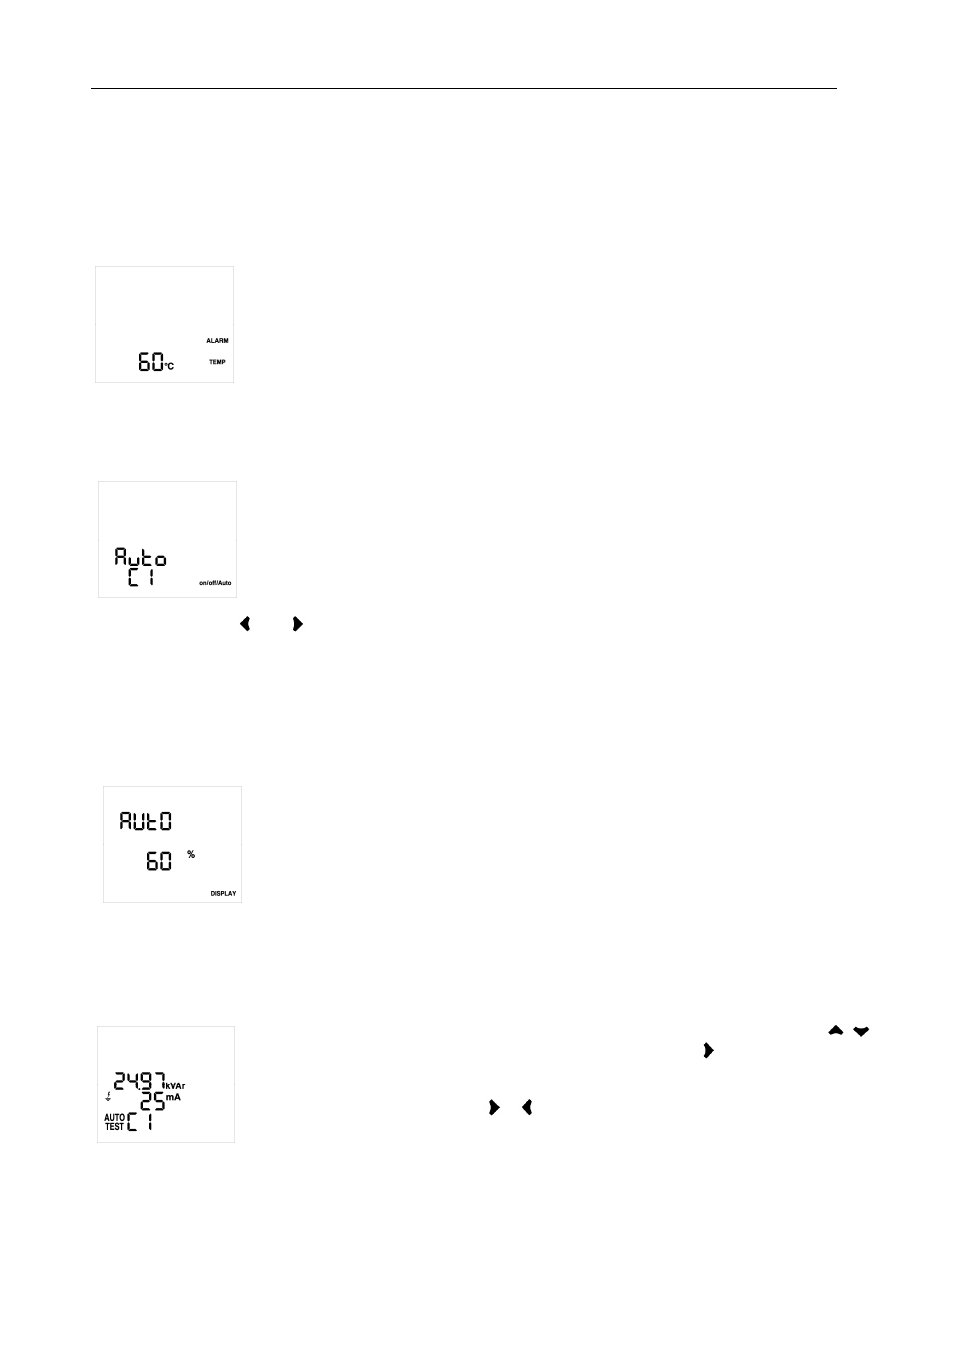
Temperature Alarm Setup Screen (PA5, TypeC2):
This parameter establishes the action limits of the alarm. After the alarm is enabled
(from PA1), the system will show the corresponding error code (see Table 5-5) when
the temperature exceeds the value configured.
The value is configured in ºC and it can vary from 0 to 80ºC.
This alarm is activated with a 20 second delay.
Forced Step Setup Screen, On/Off/Auto (PC10, TypeC3):
This parameter is repeated for each one of the 6 or 12 capacitors and it can force their
state, regardless of the operations carried out by the regulator. The following setup
options are available for each capacitor:
On: Capacitor forced to On, always connected.
Off: Capacitor forced to Off, always disconnected.
Auto: the state of the capacitor depends on the operation performed by the
regulator.
The screen will display C1, C2, etc. to show which of the 12 capacitors is being
configured. Use the
and
keys to run through the different capacitors.
Capacitors are configured in the Auto mode by default. On the measurement screens, the icons of the
capacitors configured as ON (forced connection) will be turned off for 1 second every 4 seconds. Similarly,
the icons of the capacitors configured as OFF (forced disconnection) will be turned on for 1 second every 4
seconds.
Display State Setup Screen (PC11, TypeC2):
This parameter establishes the display's lighting state. The setup options are as
follows:
On: always lit.
Off: always turned off (except when there is an alarm or interaction with the
user).
Auto: turns on when a key is pressed and turns off when no key has been
pressed during a period of 5 minutes.
The brilliance can also be configured from 0% to 100% when the display is on.
The unit's default settings are Auto and 60% brilliance.
Autotest Screen (PC12, TypeC4):
These screens are opened and closed with a special process: hold down the
+
keys on any setup screen (not in the edition mode). Hold down
to manually start and
end the Autotest process.
The Autotest screens (one per capacitor) show the power measured and the leakage
current of each capacitor (press
or
to run through the capacitors). To do so, start
the Autotest process, so the equipment will connect and disconnect the capacitors in
the bank one by one to obtain said measurements. The values displayed are those
obtained during the last Autotest process carried out.
The Autotest process only connects the number of steps configured and does not connect the steps
disconnected by the leakage current alarm or the steps set to OFF in the On/Off/Auto screen.