Chaining off and test sewing, Presser foot markings 20. presser foot lifter – Baby Lock Diana (BL480A) Instruction and Reference Guide User Manual
Page 34
33
Note: The following instructions do not apply to cover stitch.
For instructions on cover stitch, see page 48 "How to
Sew a Cover Stitch."
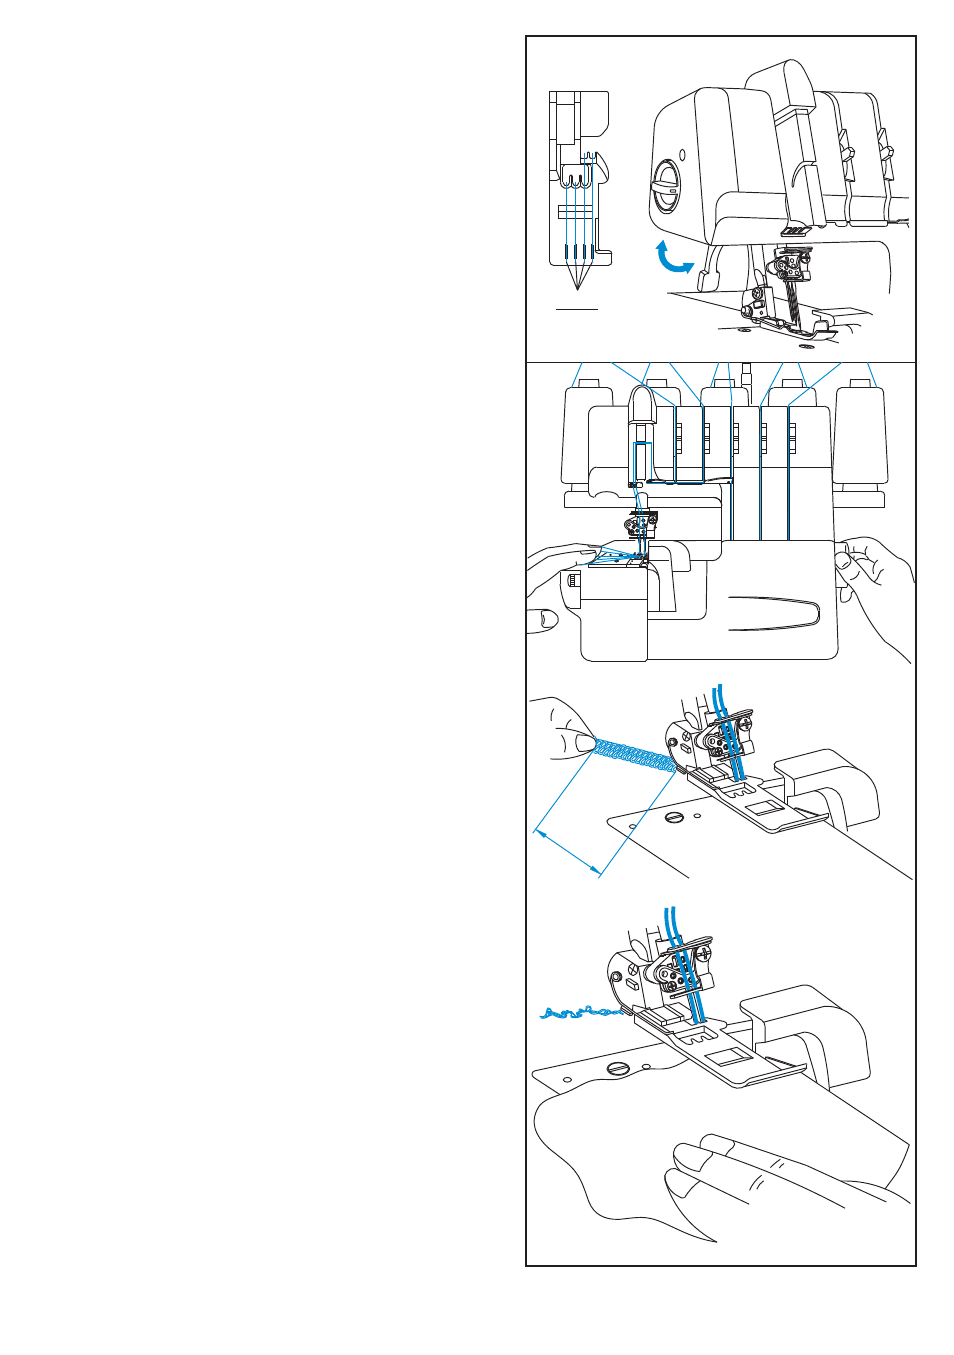
When the machine is completely threaded, bring all of the threads
across the needle plate and slightly to the left under the presser
foot.
Hold the threads and apply a slight tension.
Turn the handwheel toward you 2 or 3 complete turns to start the
thread chain.
Lower presser foot.
Continue holding the chain and press on the foot controller until
the chain is 5~7.5 cm (2~3 inches) in length.
Place fabric under the front of the presser foot and sew a test
sample.
Note:
may deflect
the needle, causing it to break.
Do not pull on the fabric while sewing as this
At the end of the sample, continue to run the machine with the
presser foot down until the chain reaches 15 ~20 cm
(6~8 inches) in length.
Note:
stitching, pull the
fabric lightly backward.
In case it is difficult to chain off when
Note:
always chain
off and sew a sample to test tensions and make
adjustments as necessary.
Anytime you have rethreaded the machine
A mark to indicate the needle location is provided on the front of
the presser foot on this machine. Use these marks as a guide
when sewing.
21. CHAINING OFF AND TEST SEWING
5~7.5cm
(2~3")
Mark
Cut thread.
19. PRESSER FOOT MARKINGS
20. PRESSER FOOT LIFTER
Put the presser foot lifter in the raised position to lower the presser
foot for sewing.
Swing the presser foot lifter down to lift the presser foot.
For bulky fabrics, pull forward on the presser foot lifter to allow
additional clearance under the foot.