Suggested tension setting – Baby Lock Diana (BL480A) Instruction and Reference Guide User Manual
Page 40
39
Medium weight
Fabric
Blue
Yellow Green
Red
Purple
Tension Dial
Note: These are suggested tension settings only.
Tension settings may be effected by:
1) Type and thickness of fabric
2) Needle size
3) Size, type and fiber content of thread
Stitch length for chain stitch should be set at over 2mm.
When the chain stitch needle thread tension is too loose;
-Turn the needle thread tension fine tuning lever (yellow)
toward the “+”.
-Or, turn the chain stitch looper thread tension fine tuning
lever (purple) toward the “-”.
Set auto tension dial to D shown at right and test sew on a
sample of your fabric.
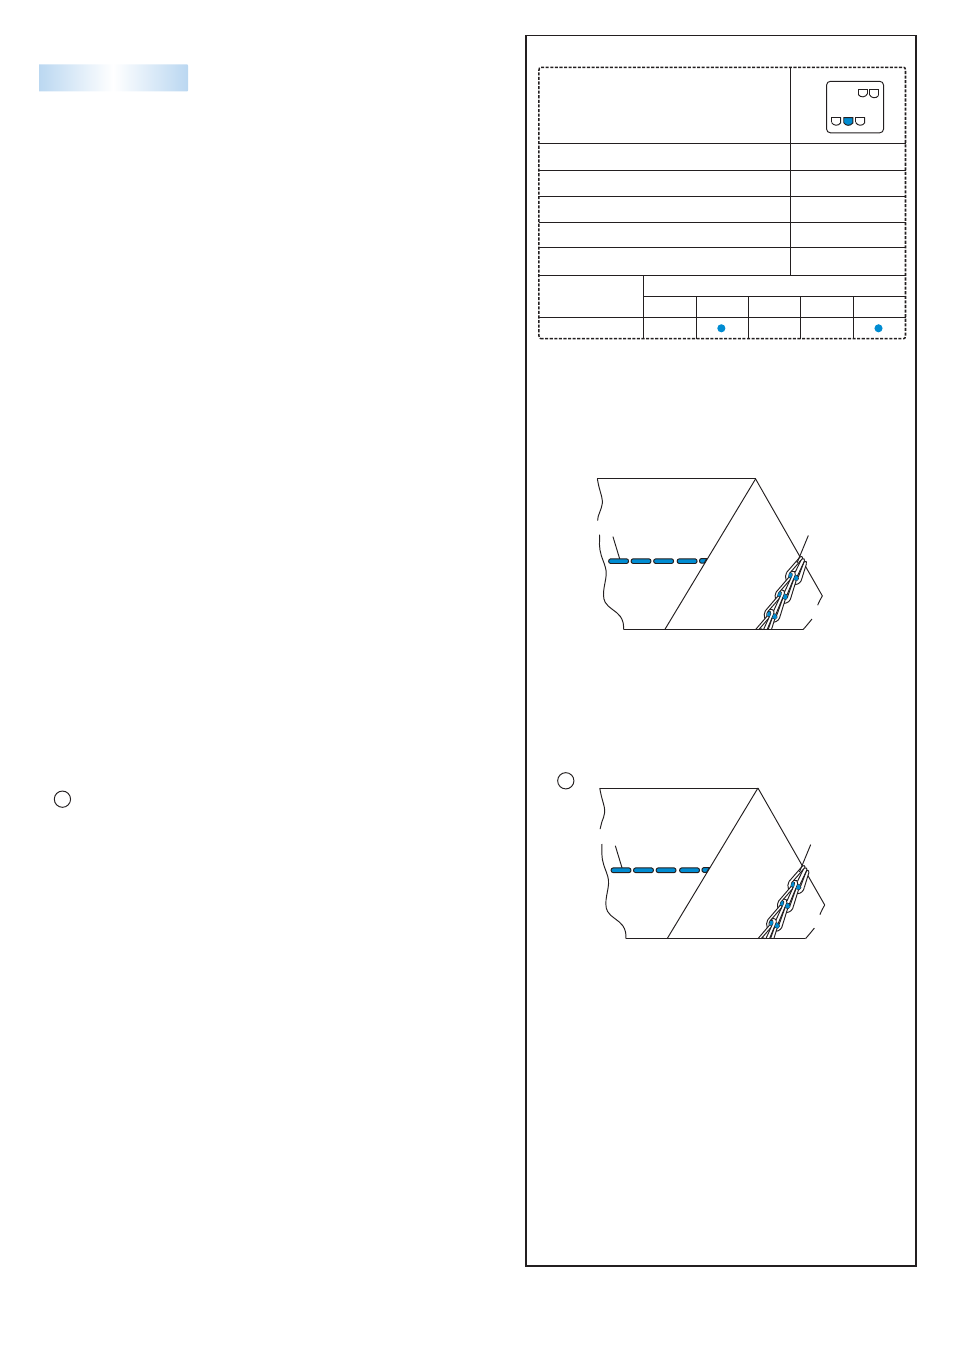
How to Balance
Correct Balance
24. SUGGESTED TENSION SETTING
1) Chain stitch
Needle thread
Topside
Underside
Chain stitch
looper thread
Topside
Underside
Needle thread
Chain stitch
looper thread
STITCH LENGTH
NEEDLE POSITION
SEAM WIDTH FINGER LEVER
DRIVING CULTCH POSITION
C
R
2 ~ 4
CONVERTER
N/A
1
1
Note: If the tension needs to be increased gently move the
tension adjustment lever toward the “+” mark in
increments indicated by the smaller white dots on the
colored fine tuning label on front cover.
If the tension needs to be decreased gently move the
tension adjustment lever toward the “-” mark in
increments indicated by the smaller white dots on the
colored fine tuning label on front cover.
AUTO TENSION DIAL
D
The chain stitch is sewn with 2 threads, one needle and one
looper. Normally, the machine trims the fabric edge while the
seam is being sewn. However, a chain stitch seam can be placed
at a desired distance from edge of fabric by putting the knife in a
nonworking position, disengaging the upper looper and installing
the chain stitch seam guide plate
How to Sew