Baby Lock Diana (BL480A) Instruction and Reference Guide User Manual
Page 56
R
1~2
L
USE
CONVERTER
R
1~2
L
USE
CONVERTER
CONVERTER
Lower looper thread
Needle thread
Topside
Underside
55
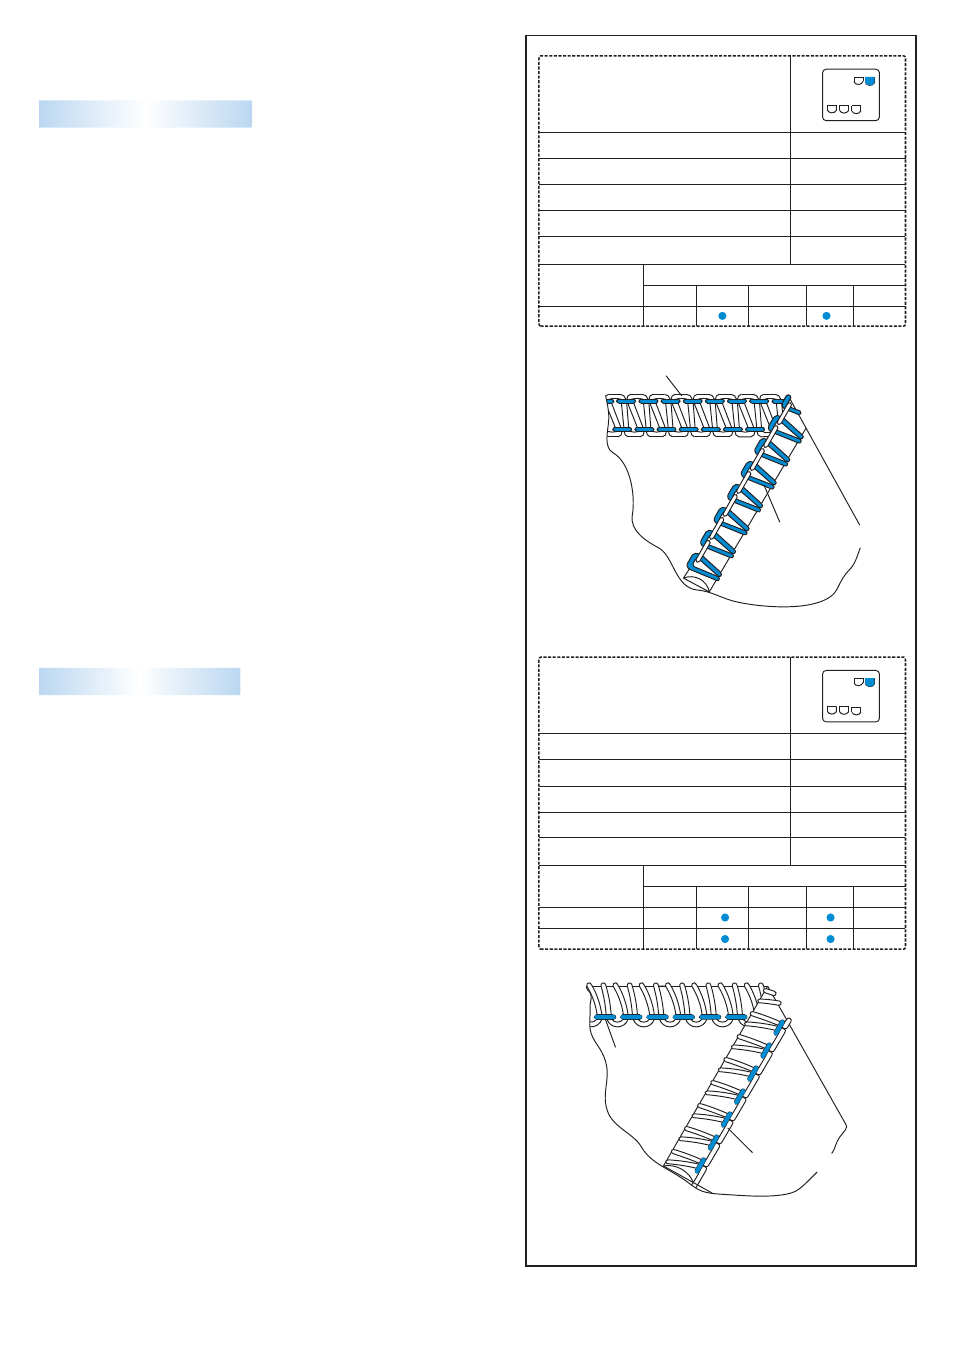
Set auto tension dial to E shown at right and test sew on a sample
of your fabric.
Note:
with wooly
nylon and the needle with lightweight regular thread.
For a beautiful rolled hem, thread the lower looper
Attach 2-Thread converter to upper looper (See page 11)
Set auto tension dial to D shown at right and test sew on a sample
of your fabric.
Correct Balance
Correct Balance
2-Thread Narrow Hem
2-Thread Rolled Hem
Lower looper thread
Needle thread
Topside
Underside
Fabric edge will roll within the stitching.
The lower looper thread will pull the upper looper thread to under
side of your fabric.
Fabric edge will roll within stitching.
Upper and lower looper threads will interlock at the edge of
stitching.
Blue
Yellow Green
Red
Purple
Tension Dial
STITCH LENGTH
NEEDLE POSITION
SEAM WIDTH FINGER KNOB
DRIVING CULTCH POSITION
CONVERTER
AUTO TENSION DIAL
E
Woolly nylon
Light Weight
fabric
STITCH LENGTH
NEEDLE POSITION
SEAM WIDTH FINGER KNOB
DRIVING CULTCH POSITION
CONVERTER
AUTO TENSION DIAL
D
Blue
Yellow Green
Red
Purple
Tension Dial
Woolly nylon
Polyester
Light Weight
fabric
Note:
with wooly
nylon and the needle with lightweight regular thread.
For a beautiful rolled hem, thread the lower looper
Note: If the tension needs to be increased gently move the tension
adjustment lever toward the “+” mark in increments indicated
by the smaller white dots on the colored fine tuning label on
front cover.
If the tension needs to be decreased gently move the tension
adjustment lever toward the “-” mark in increments indicated
by the smaller white dots on the colored fine tuning label on
front cover.