Section 5: how to create rtd sequences, 1 venus 7000, Section 5 – Daktronics Aquatics Interface with Daktronics Matrix Displays User Manual
Page 29: How to create rtd sequences, Venus 7000
How to Create RTD Sequences
25
Section 5:
How to Create RTD Sequences
5.1 Venus 7000
1. Refer to Section 2.3 to verify the necessary Input Template Files are installed.
2. Open the V7 Sequence Designer and create a
new sequence for the appropriate sign
(File New).
3. Go to Frame > Insert > Data Frame.
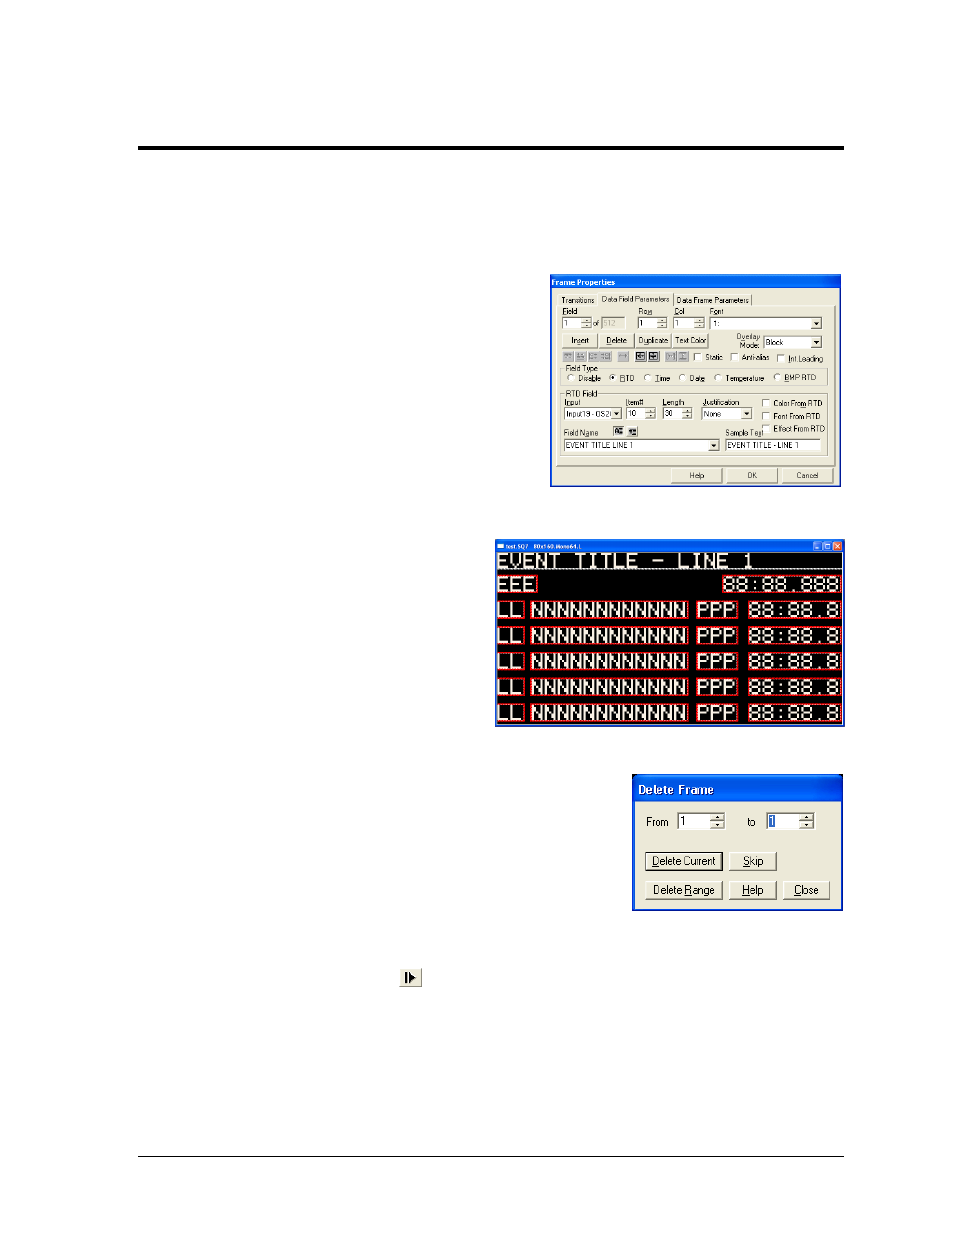
4. In the Frame Properties window (Figure 44),
select the Data Field Parameters tab. Make
sure the Field Type is set to RTD then select a
previously created Input, either for the timer
or for the Hy-Tek computer.
5. Under Field Name, select from the list of
available information. Use the Row
and Col numbers (or click on the
sequence) to adjust the position of
the data field.
6. To add another data field, simply
increment Field in the top left corner
of the Frame Properties window.
Figure 45 shows a complete example
of a Venus 7000 swimming sequence.
7. After creating all of the required fields for the data
frame, click OK. The sequence now contains two frames:
the original Graphic Frame and the new Data Frame; the
first Graphic Frame must be deleted.
Go to Frame > Delete (or press [Ctrl + Del]). Then select
the range 1 to 1 (Figure 46). Click Delete Range and then
click Close. There should now only be one frame, the
Data Frame and the RTD fields it contains.
8. Click the preview button
(or press [F5]). As long as the input source is powered on
and in operation, the correct data should show up in the proper location on the sequence.
Make any adjustments to the RTD fields or input connections as needed.
9. Save the sequence.
Figure 44: Frame Properties
Figure 45: V7 Swimming Sequence
Figure 46: Delete Frame