Exacq exacqVision Virtual User Manual User Manual
Page 21
www.e
x
acq.com
+1.317.845.5710
+44.1438.310163
USA (Corporate Headquarters)
Europe/Middle East/Asia
Page 21 of 44
4/12/2013
Removing a Virtual Disk
If you want to remove a disk, the drive must first be removed from the operating system and then removed from the virtual
machine. Failure to remove the disk from the operating system first will result in the operating system freezing when started.
The 100GB storage drive is also provisioned to be on the same datastore as the server. This might not be desirable for your
specific storage setup. If this is an initial setup, and data has not been written to the default disk, Exacq recommends thin
provisioning the disk and simply disabling the disk as a recording source in exacqVision Client.
In the following example, a 500GB storage drive is added on an external ISCSI storage server and the 100GB default drive is
removed from the same datastore location as the EVA.
NOTE: After storage is removed, any video previously stored on the drive is lost. Any data that you want to preserve or search
must need to be migrated to another drive before deleting the drive.
1. Open exacqVision Client, click on the Config (Setup) icon
, and navigate to Storage. Deselect the 100GB drive to
stop recording to it. Click Apply.
2. Click in the console screen and press Enter to display to the CLI. Log in as admin.
3. If data must be migrated or deleted, you must do that now.
4. Unmount the drive by its label (which is the same as its mount point) using this command:
sudo umount /mnt/edvr/1
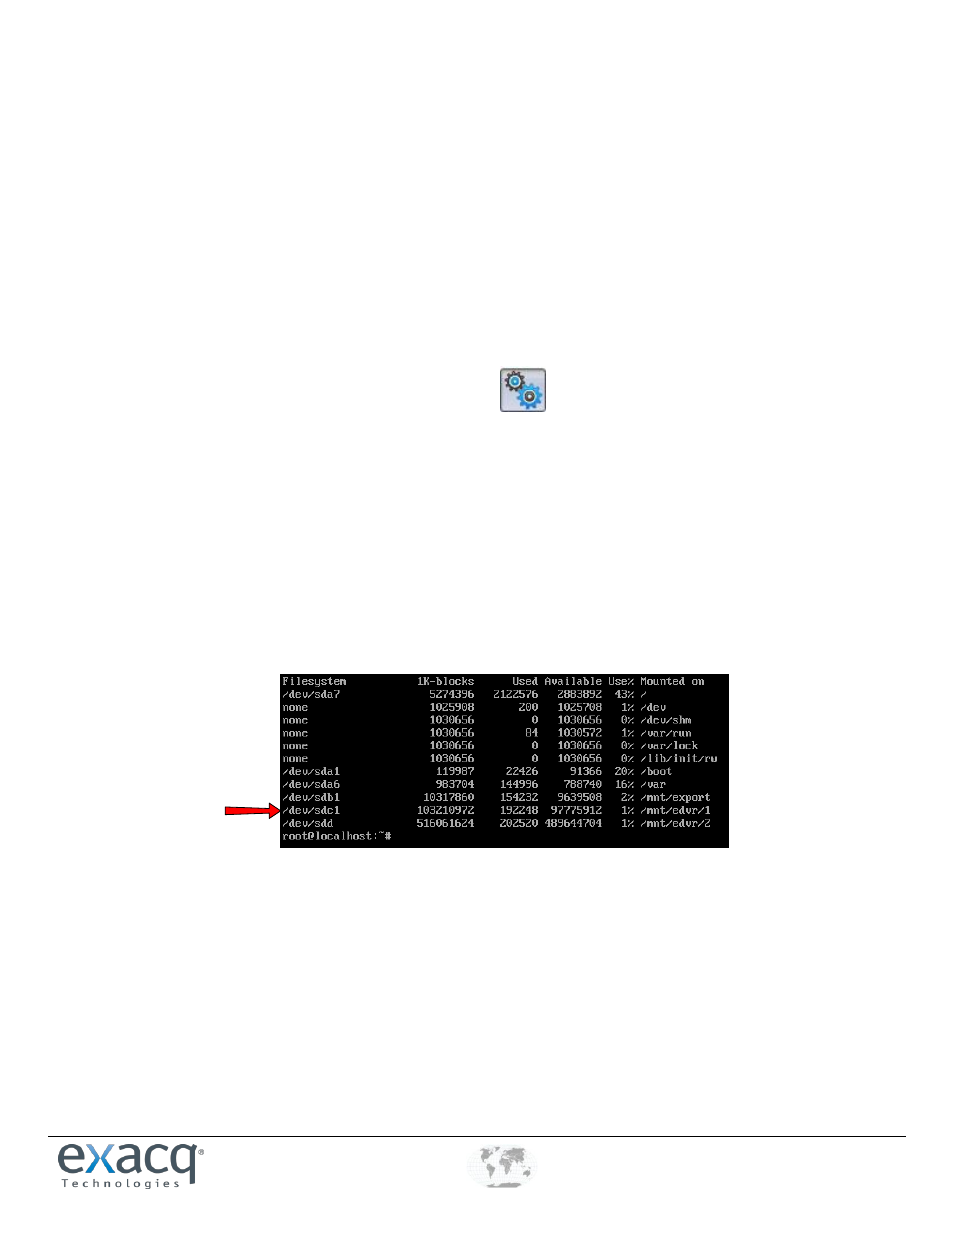
Do not remove the mount point directory. If you are not sure which drive is the correct drive, use the df command to
view the mounted drives. In this case, the drive is sdc mounted on /mnt/edvr/1.
5. The fstab file must be modified to remove the entry for the disk. Open this file by using the Nano text editor as follows:
sudo nano /etc/fstab