Exacq exacqVision Virtual User Manual User Manual
Page 32
www.e
x
acq.com
+1.317.845.5710
+44.1438.310163
USA (Corporate Headquarters)
Europe/Middle East/Asia
Page 32 of 44
4/12/2013
After the appliance is running and the IP address of eth0 has been applied, a second Ethernet adapter can be configured using the
following steps:
1. From the vSphere Client, right-click the exacqVision Virtual Appliance and choose Edit Settings.
2. Click the Add… button.
3. Choose Ethernet Adapter and click Next.
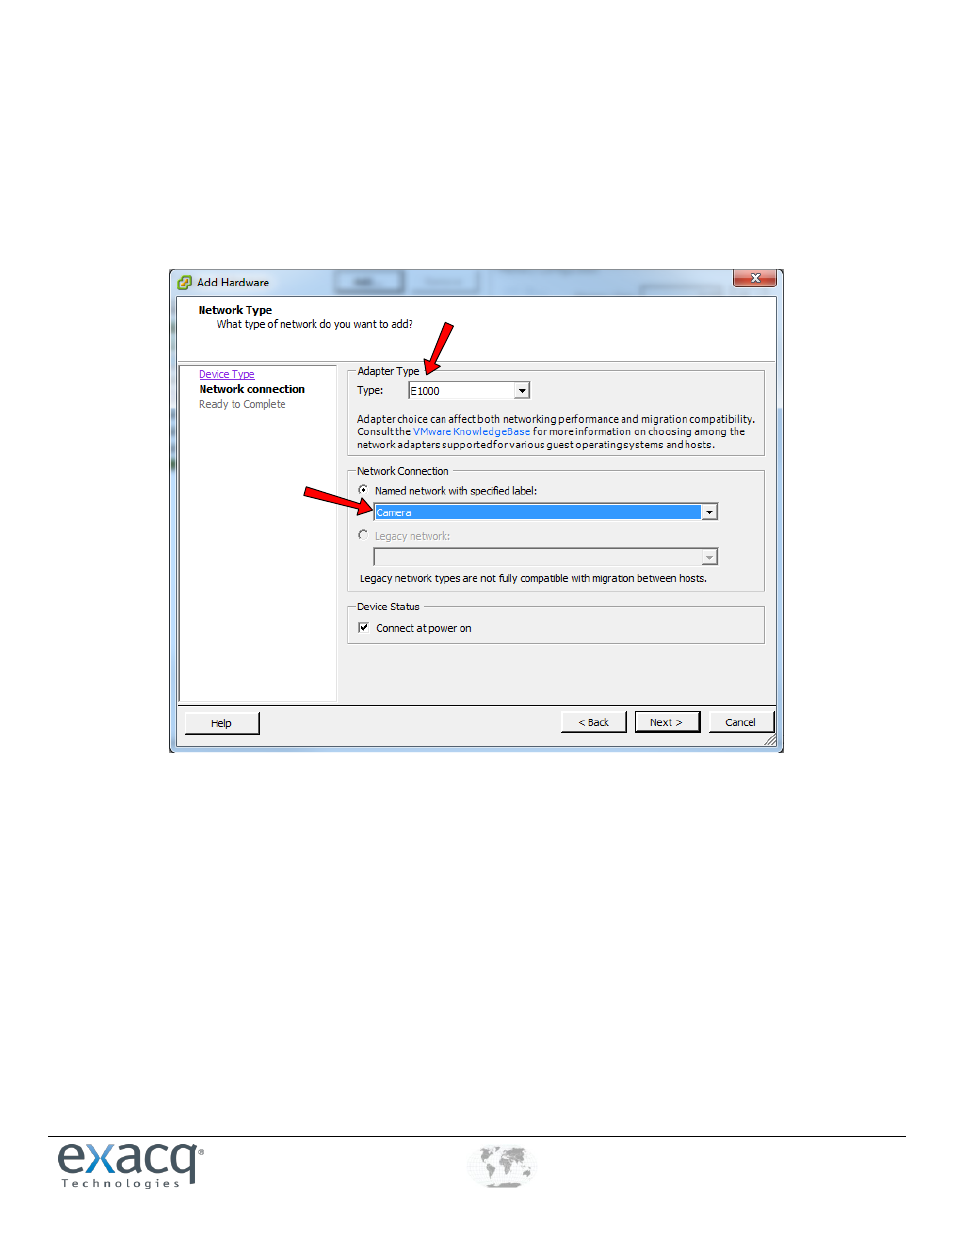
4. Change the adapter type to E1000. Click on the Network Connection drop-down list and choose the network that will be
used for camera traffic. Make sure Connect at Power On remains selected, and then click Next.
5. Click Finish to close the wizard and click OK to complete the editing of the virtual computer.
6. Open a console screen and log in using the admin account.
7. Configure the new interface using the vami_set_network command. This allows you to set a static IP address on the new
interface that was just added.
If your exacqVision Virtual Appliance is Version 5.4 or later, then you can run the Vami configuration script:
sudo /exacqscripts/VamiNet.sh
Otherwise, use this command:
sudo /opt/vmware/share/vami/vami_set_network <eth#> STATICV4 <ip address> <net mask> <gateway>
In the following example, we add one new adapter, which is eth1. The camera network is in the 10.10.x.x network with a
Class C subnet mask. The new adapter address is 10.10.1.30, and the gateway is 10.10.1.254. The full command would be: