Exacq exacqVision Virtual User Manual User Manual
Page 41
www.e
x
acq.com
+1.317.845.5710
+44.1438.310163
USA (Corporate Headquarters)
Europe/Middle East/Asia
Page 41 of 44
4/12/2013
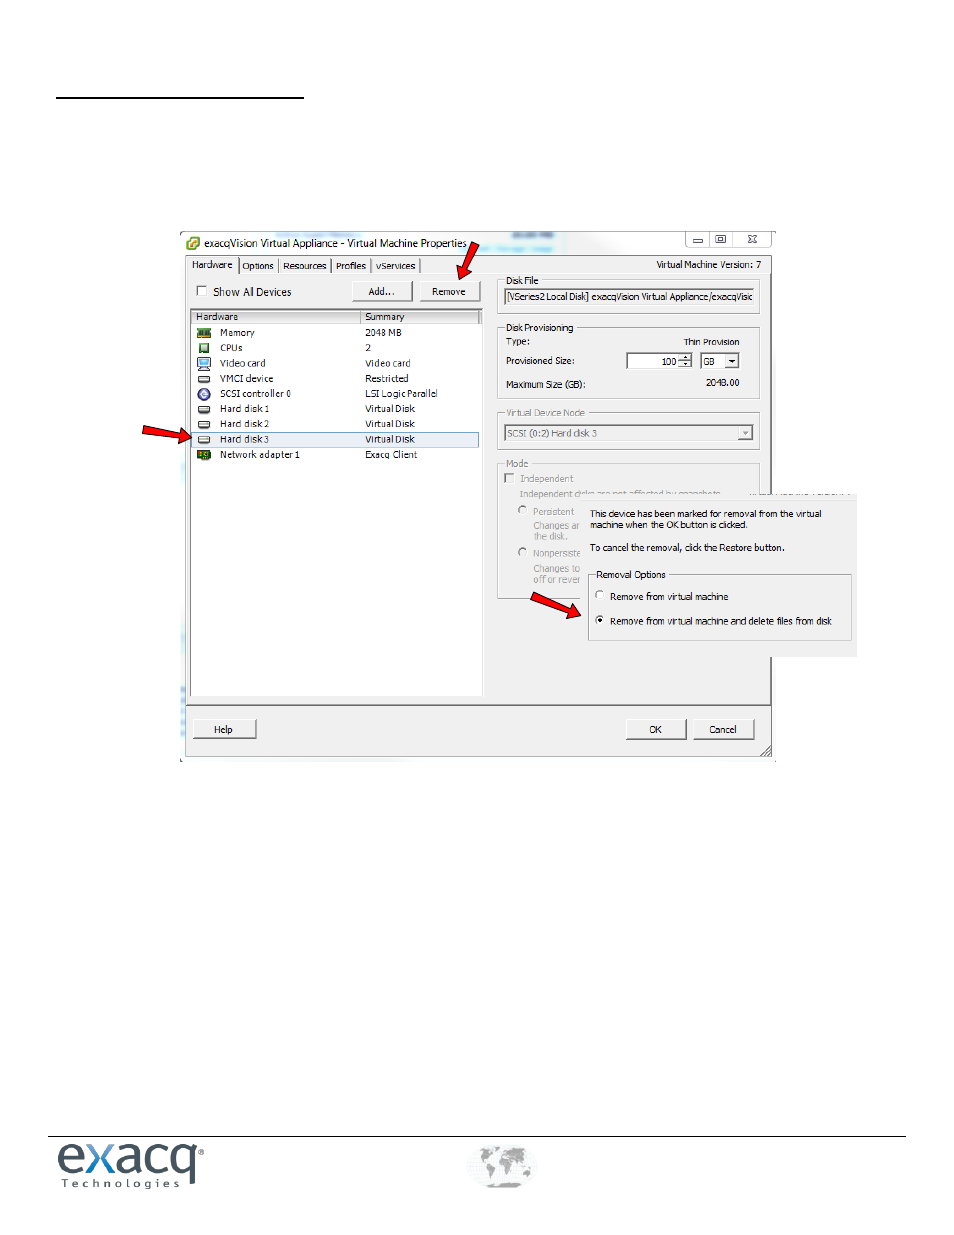
Reconfigure The New Appliance
1. Right-click the newly deployed server and choose Edit Setting.
2. Select Hard Disk 3 and click Remove.
3. When you see a list of Removal Options, select Remove From Virtual Machine and Delete Files From Disk. Click OK to
apply the changes.
4. Open the datastore browser window and click the refresh icon at the top. The newly deployed appliance is displayed
with the same name as the old server.
5. Open the disk folder created earlier and select all the migrated disks. Right-click and follow the instructions.
6. After all the disks are moved, click on the disk folder and click the red X to remove the folder. Close the Datastore
Browser.
7. Right-click your appliance and select Edit Settings.
8. Click on Memory and change it to the value from line 9 of the Pre-Migration Data Sheet. Click Next.
9. Click on CPUs and change it to the value from line 9 of the Pre-Migration Data Sheet. Click Next.
10. Click on Network Adapter. On the right side, under MAC Address, click Manual. Enter the last three octets from the
address recorded on line 3 of the Pre-Migration Data Sheet. Click Next..
NOTE: Be sure to put a colon (
:
) between each octet. Do not erase the first three octets.