MacroSystem Photo-Studio User Manual
Page 14
14
15
You will see the three areas of “Solid”, “Color/
Pattern” and “Bleed”.
You can toggle between these functions by
using the appropriate buttons named above in
the respective area. The active button will turn
blue. Toggling will then take place automatically
when a corresponding option is selected. The
preview window located in the upper left-hand
corner shows the result currently selected.
Under “Solid” you can select one of the six
predefined “inkwells” making it possible to
change between frequently-used colours quickly.
Open the paint box with the “Change color”
button to define a new colour. If you click “Ok”
in the paint box, the colour of the current inkwell
will be replaced by the one just defined.
In the “Color/Pattern” area, use the “Select
pattern” button to choose the image pool from
which you want to select a pattern.
Note: No pattern will yet have been selected if
you have just installed Photo-Studio. Click the
“Color/Pattern” button in the “Palette“ window
to open the image pool directly, from which you
can select a colour and pattern. After you have
made a selection for the first time, the “Color/
Pattern” button will change to the Preview
window. You can now open the image pool with
the “Select pattern” button.
You can set shading under “Bleed”, in a process
similar to the image pool. However, you can also
set a shade direction by clicking “Direction”.
The direction is selected by automatically
placing a guideline in the video image, so
that the direction can be matched to certain
specifications. The initial and final colour may be
freely adjusted, including alpha transparency.
When you have selected a colour or pattern,
close the window by clicking “Ok”.
You can then set the “Border width” in mm and
the “Blur” of the frame as a percentage, and exit
from the “Border” menu window by clicking
the symbol in the bottom right-hand corner or
clicking the right-hand trackball button.
Please note that the mm measurement refers to
the subsequent printout and not the display on
the TV screen.
Clicking the “Shadow” button in the “Edit
image” option of the “Collage” menu will
display a new button bar. You can open the
paint box by clicking the coloured box to specify
a shadow colour, select one of eight possible
directions in which the shadow can fall by
clicking the “Direction” button and use the
slider to set a “Distance” for the shadow. If you
move the slider fully to the left, the shadow will
be “off”. Then exit from the “Shadow” menu
and the “Edit picture” button bar by clicking the
menu symbol.
- “to front” and “to back”. If the boxes overlap,
you can use this button to specify which box is
to be in the foreground and which one in the
background. If there are already several boxes in
the collage, the buttons can be clicked until you
obtain the desired sequence.
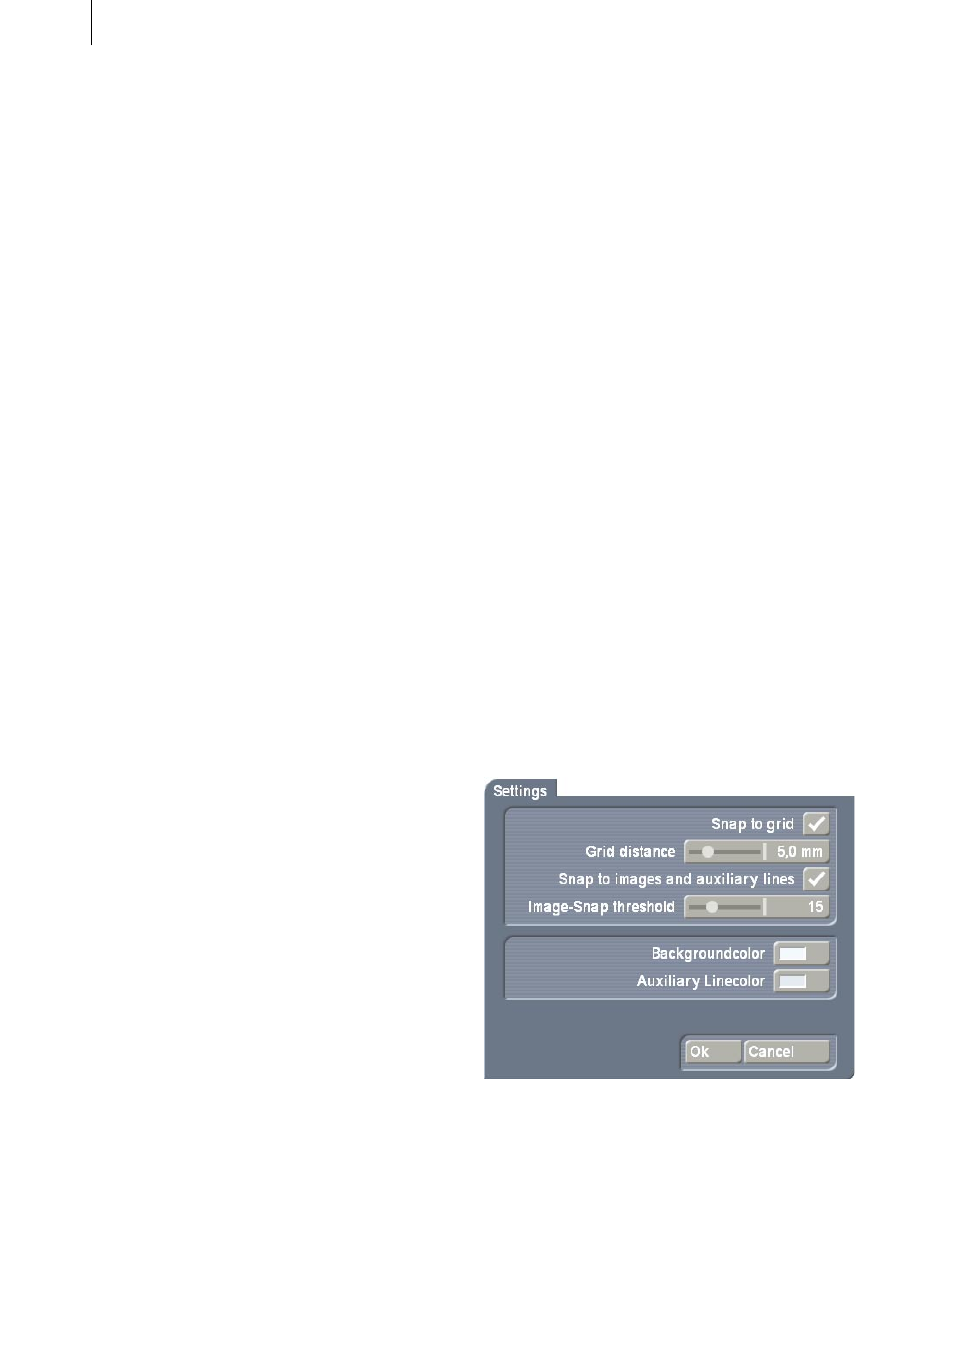
- “Settings”: Clicking this button will open a
window which will be familiar to users of the
“Caladan” program.
Clicking the “Snap to grid” function will activate
an invisible grid. This makes it possible to align
the edges of boxes with an invisible grid during
generation, making positioning easier. Click the
box again to uncheck it and thus remove the
grid.