MacroSystem Photo-Studio User Manual
Page 23
22
23
You will see that there is already a second point,
i.e. the end of your track, on your photo. Make
sure that this is on the right-hand edge of the
picture and that the size and position are correct.
Then click the “Preview” button to see the
camera track across your photo.
Tip: If you want the camera track to be slightly
“livelier”, simply click the left-hand trackball
button at any point on the dotted track, so that
a small pivot appears. Then move the trackball
until the pivot is in the correct position and click
again on the left trackball button. Add as many
pivots as you wish to extend the camera track.
If you are satisfied with the result seen in the
“Preview” window, it can now be processed.
After processing, which may take some time,
you will see your finished animation at the end
of the scene bin in the “Edit” menu window.
6.5 Animated track across a group
photo
This example enables you to practise the action
you have already learned to create a camera
track. You need a photo of several people. The
example uses a group photo showing three
people, positioned in the centre of the picture.
After you have loaded the photo, click
“Animation” in the main menu window and
select the group photo in the selection window
which then appears.
A warning will appear that the animation
created on the other photo will be lost. However,
as the previous animation has already been
processed, you can click “Ok” in this case. The
“Animation” menu will then appear. There are
two points on your photo again, i.e. the start
and end points. Now click the left-hand trackball
button on the green start point (so that it turns
blue) and move the trackball until the point
reaches the centre of the photo. Click the left-
hand trackball button to confirm the position.
You can now change the size of the box and thus
the size of its content. In the preceding example,
you learned to do this by selecting the corners
directly.
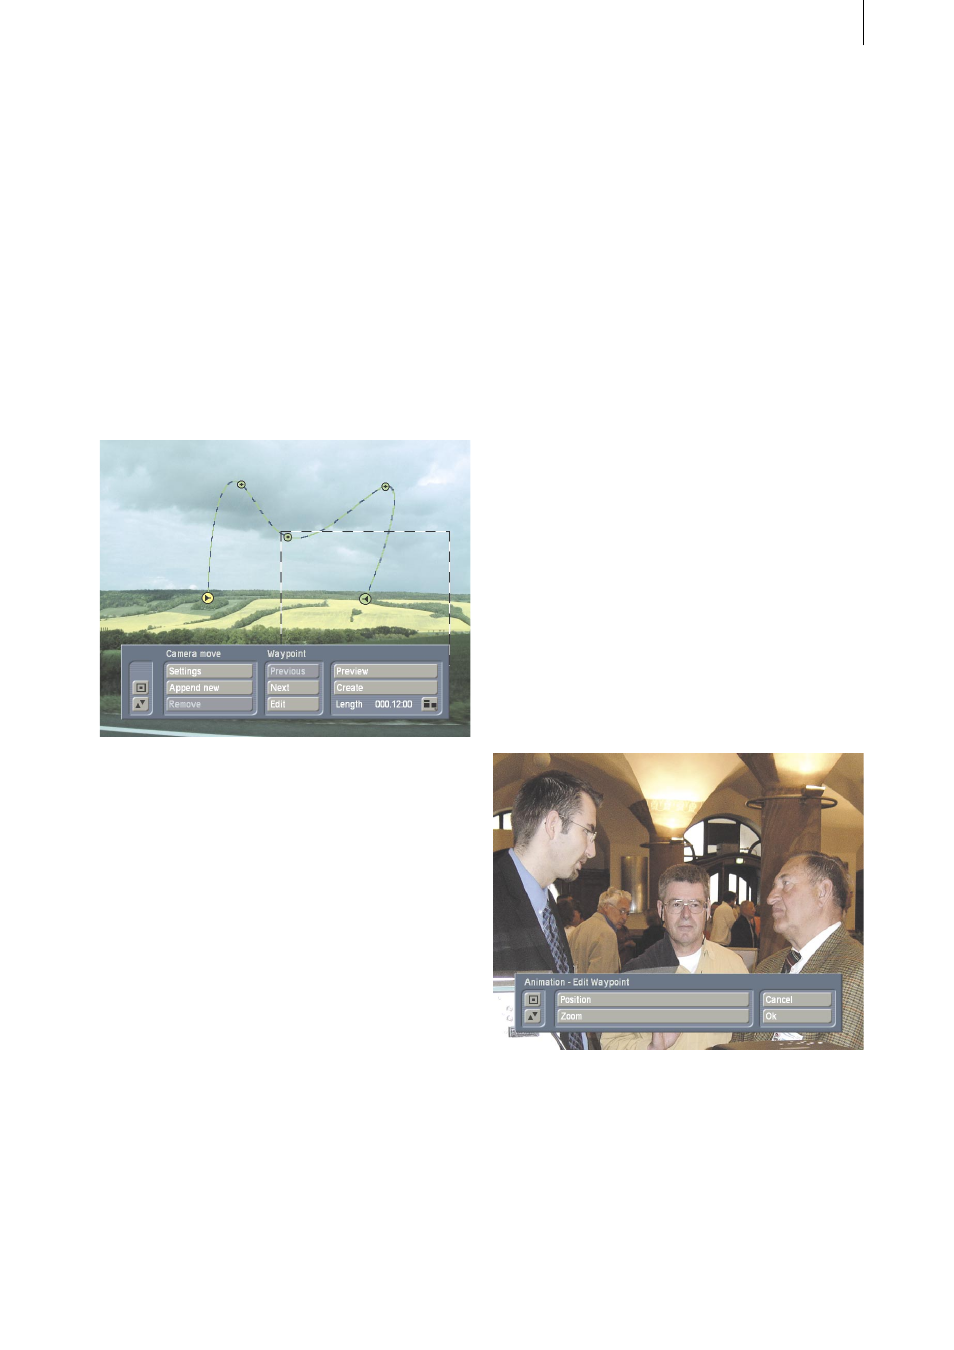
Here you will learn a new method. Click the
“Edit” button to display a new button bar.
The content of the box will be displayed in the
background. Now select the “Zoom” function.
You will see that the factor is “1.00”. Move the
trackball to the right or left to zoom in or out. All
three people should be within the box. Click the
left-hand trackball button to confirm the setting.
You can then use the “Position” button to
determine the exact position of the box on your
full photo and “Zoom” again to define the size
of the selection, if necessary.
Click “Ok” to exit the “Edit waypoint” menu
window and select the “Append new” function.
You will see a new (yellow) point appear just in
front of the end point. Double-click this point, so
that it changes to green then blue. Then move
the trackball until the point is on the head of
the first person (on the left). Click the left-hand
button to confirm and use the “Zoom” function