MacroSystem Photo-Studio User Manual
Page 21
20
21
Then click the coloured box next to “Background
color” to select the desired colour for your
“Collage” background from the paintbox. For
example, select a pale, restrained colour here.
Click “Ok” to close the “Settings” window,
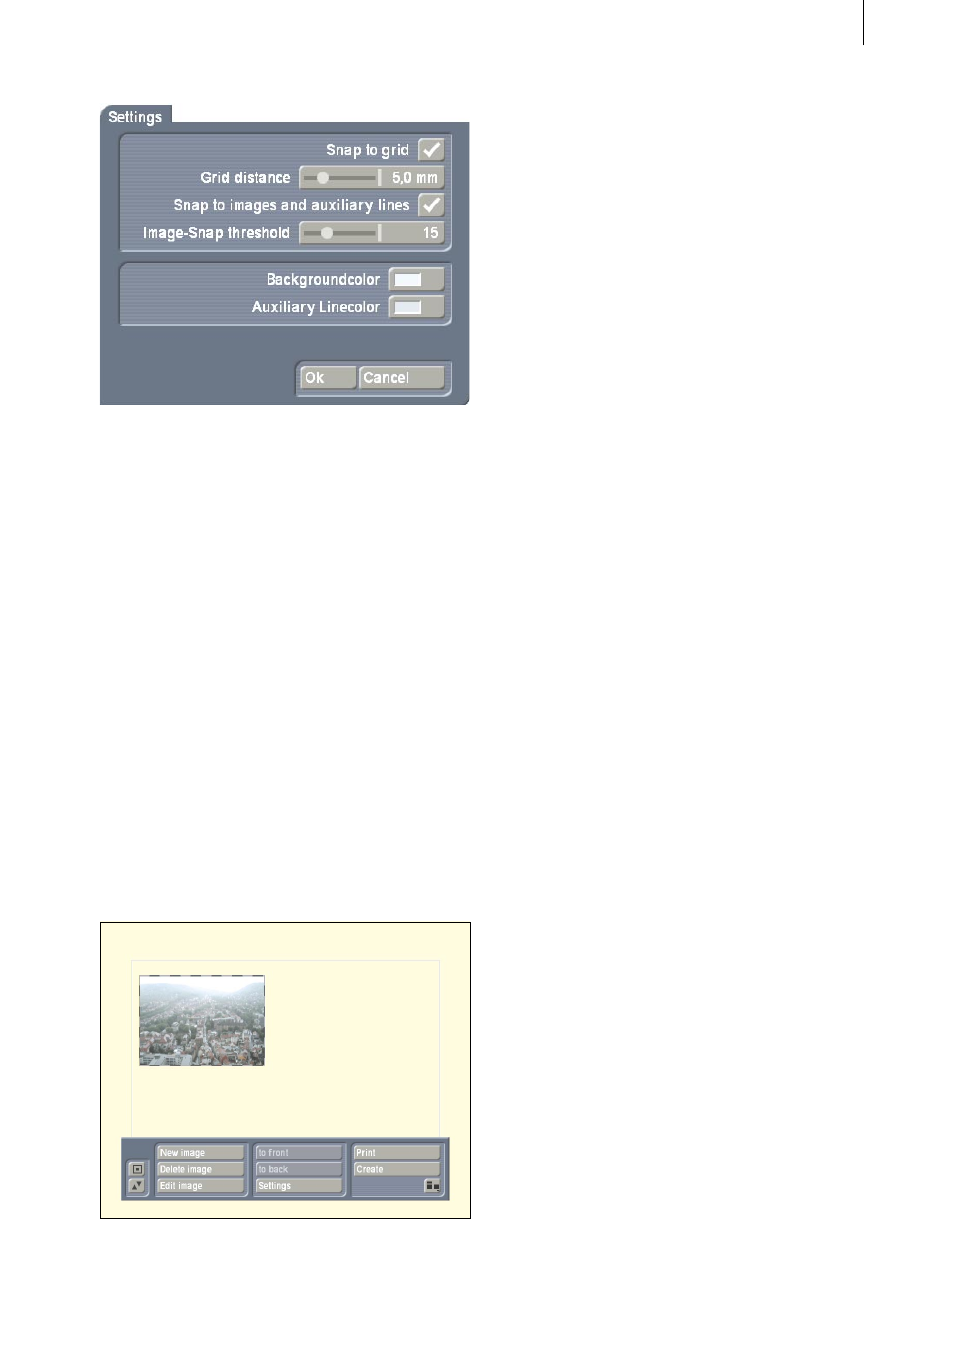
then click the “New image” button to open a
window in which you can select a photo from
your list. Select the photo of your choice and
click “Ok” to confirm. A cross with a small box
will appear. Move the trackball until the cross
(which represents the top left-hand corner of
the box) reaches the desired position (e.g. in the
upper left-hand corner of the background) and
click the left-hand button to confirm. Now move
the trackball again to determine the size of the
box (e.g. 60.5 x 40.00 mm) and thus the position
of the lower right-hand corner and click “Ok” to
confirm. You will then see that the photo of your
choice fills the box you have just drawn.
Of course, you can also reposition the box
later. To do so, activate it and click the left-hand
trackball button again as soon as the cursor
turns into a hand. A cross will appear and you
can move the ball until the box reaches the
desired position. Click the left-hand trackball
button to confirm the position. You can also
adjust the size of the box by positioning the
cursor on an edge or corner, so that it changes
into a double-headed arrow. Then click the left
trackball button and move the ball until the box
reaches the desired size. Click the left-hand
trackball button to confirm the setting.
Now you can begin editing.
To do this, click “Edit image” to retrieve a new
button bar, where you can select the “Rotate
image” function. Now move the trackball to
the left so that the picture tilts to the left. The
angle will be displayed at the edge of the
screen. Select a setting of 15° here. Then click
the “Border” button to create a frame for your
photo.
A button bar will then open, where you can
select the settings for the frame. Click the colour
box to open the “Palette” window, which offers
a selection of colours, patterns and shades
for creating the appearance of the box. Click
“Change color” on the left-hand side to open
the colour box, where you can select bright red.
Click “Ok” to confirm and click “Ok” to exit the
“Palette” window. Now set the “Border width”
to 0.8 mm and “Blur” to 30%. Then click the
“Shadow” button. Select the “Color” black
with 60% transparency, for “Direction” select
the arrow pointing down to the right and a
“Distance” of 3.0 mm.
When you have made these settings, double-
click the right-hand trackball button to return to
the “Collage” main menu window. Select the
“New image” function and select another photo
in the selection window. Click “Ok” to create
a box of the requisite size and in the desired
position for the photo. You can superimpose
photos on top of each other, using the “to front”
und “to back” buttons to change the position at
any time.