Hard drive array (n2 only), Removing a hard drive, Inserting a hard drive – OpenEye Gen5 NVR User Manual
Page 23: Hard drive array (n4 only)
30777AC
23
HARD DRIVE ARRAY (N2 ONLY)
Hard drives in the N2 NVR are arranged top to bottom in the HDD cage. A minimum of one and a
maximum of four hard drives may be installed in the hard drive cage. The hard drive installed in bay one
contains the operating system and if removed will render the NVR inoperable.
Removing a Hard Drive
1. Push the release button for the drive to remove.
2. Pull the release handle outward, sliding the drive tray out of the drive cage.
Inserting a Hard Drive
1. Slide the drive tray into the drive cage.
2. Press the release handle until it clicks, locking the drive tray in place.
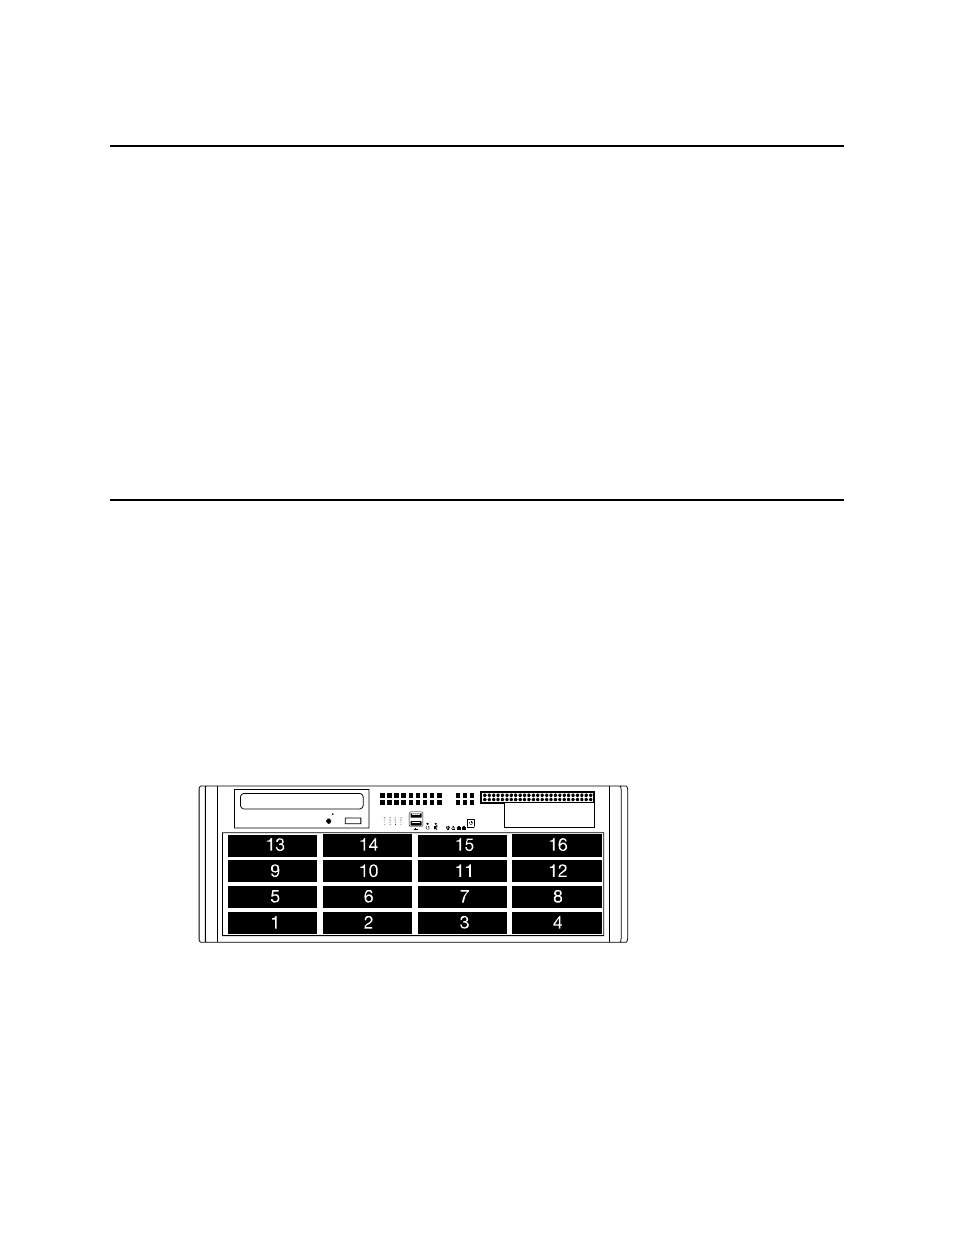
HARD DRIVE ARRAY (N4 ONLY)
Hard drives in the N4 NVR are arranged top to bottom in the HDD cage. A minimum of one and a
maximum of sixteen hard drives may be installed in the hard drive cage. The N4 is shipped with the
hard drives in a separate box. To insert the drives, follow these instructions. The drives must be
inserted in order, 1-16 (depending on how many drives you purchased). The drive trays are marked with
the number of their port. See the diagram for the order of the hard drive ports on the N4.
Inserting a Hard Drive
1. Pull the blue button on the drive tray to release the latch.
2. Slide the drive tray into the drive cage.
3. Close the latch until it clicks, locking the drive tray in place.
12