Digital verifier overview, Installing the digital verifier, Using the digital verifier – OpenEye Gen5 NVR User Manual
Page 92
92
DIGITAL VERIFIER OVERVIEW
JPG images and AVI video files that are exported from the Digital Video Recorder are automatically
embedded with a digital signature. Digital Signatures are a way to verify the authenticity of the images
to ensure that they have not been tampered with or edited in any way. Included on the Software
Installation DVD supplied with the recorder is the Digital Signature Verification program. This program
can be installed on any computer and loads an image in question.
Installing the Digital Verifier
1. Insert the Software Installation CD into the CD-ROM. (Do not install on the recorder.)
2. Select the Digital Verifier option to begin installation.
3. When the Welcome screen appears, click Next.
4. When the Setup Complete window appears click Finish. Installation is complete.
Using the Digital Verifier
1. Open the Digital Verification program by selecting Start > Programs > OpenEye > Digital Verifier
> Digital Signature Verifier.
2. Click the Browse button to load the JPG image.
3. Enter the Site Code of the recorder that the image was originally extracted from. (The Site Code is
specified in the Information Setup menu)
4. Click Verify to continue or Close to close the window without verifying.
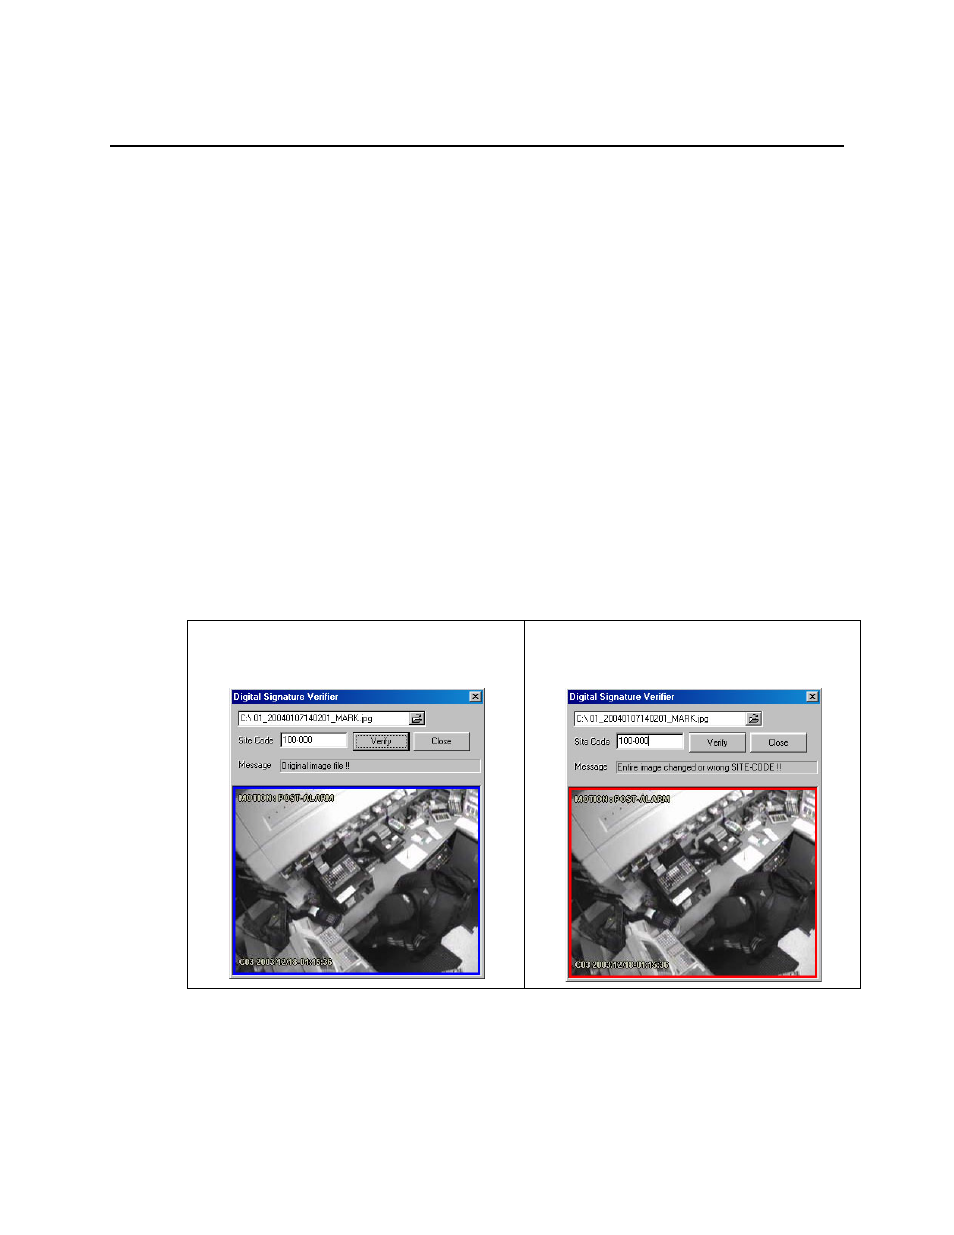
If the image has not been tampered with, a blue
square will appear around the image with the
message “Original image file.”
If the image has been tampered with, a red square
will appear around the image with the message
“Entire image changed or wrong SITE CODE.”