General screen overview, Performing a general backup – OpenEye Gen5 NVR User Manual
Page 77
30777AC
77
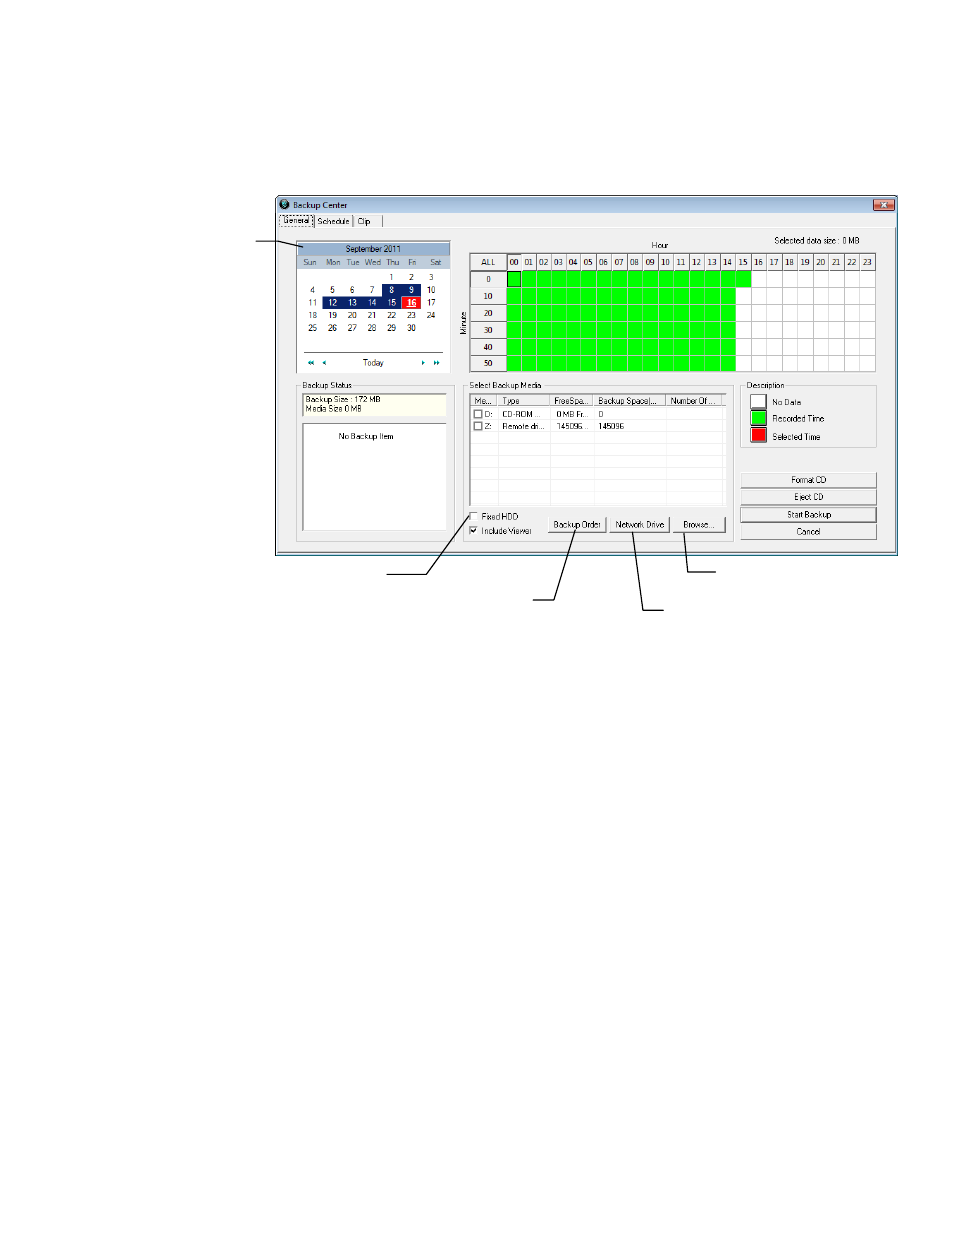
General Screen Overview
The General Backup Screen is used for performing bulk backup of video recorded by all cameras for a
selected period, or periods, to a specified storage location.
Hour / Minutes
Recording data displays in hourly (24 vertical columns) and 10-minute (6 horizontal rows) segments.
Green cells indicate time with recorded video. Red cells indicate time selected for backup.
Backup Status
Displays the size of all video currently selected for backup, the available size of the media currently
selected for backup to, and the dates and times of video currently selected for backup.
Fixed HDD
Display all Hard Drives
Performing a General Backup
1. Click Backup on the Display screen.
2. Select the date or dates to back up using the calendar. Dates highlighted in blue contain recorded
data.
3. Select the blocks of time to back up using the Hour/Minute grid. Blocks of time with recorded video
are highlighted in green. Blocks of time selected for backup are highlighted in red.
4. Select the backup drive or drives under Select Backup Media, or click Network Drive, or Browse.
When selecting the CD-ROM drive you must specify the number of CDs to use for backup.
5. Click Backup Order to set the backup order.
6. Select the Include Viewer check box to include the Backup Viewer Application.
7. Click Start Backup to begin the backup process. A progress bar will be displayed in the lower right
corner of the Display screen.
Calendar
Display all Hard Drives
Select Additional Drive/Folder
Select Remote Network Location
Define Drive Priority