Navigation, Main screen icons and button functions, Smts technical guide 12 – Orion System OE392-10 System Manager TS User Manual
Page 12: Icons and button functions, Zone
Zone
Zone
Navigation
SMTS Technical Guide
12
Main Screen Icons and Button Functions
Icons and Button Functions
System settings and screens are easily accessible by simply touching one
of the six icons on the Main Screen. The subscreens contain yellow high-
lighted data entry boxes with accessible number keypads for data entry
and screen maneuvering buttons such as
<Esc>
,
<Back>
, and
<OK>
.
Main Screen Icons
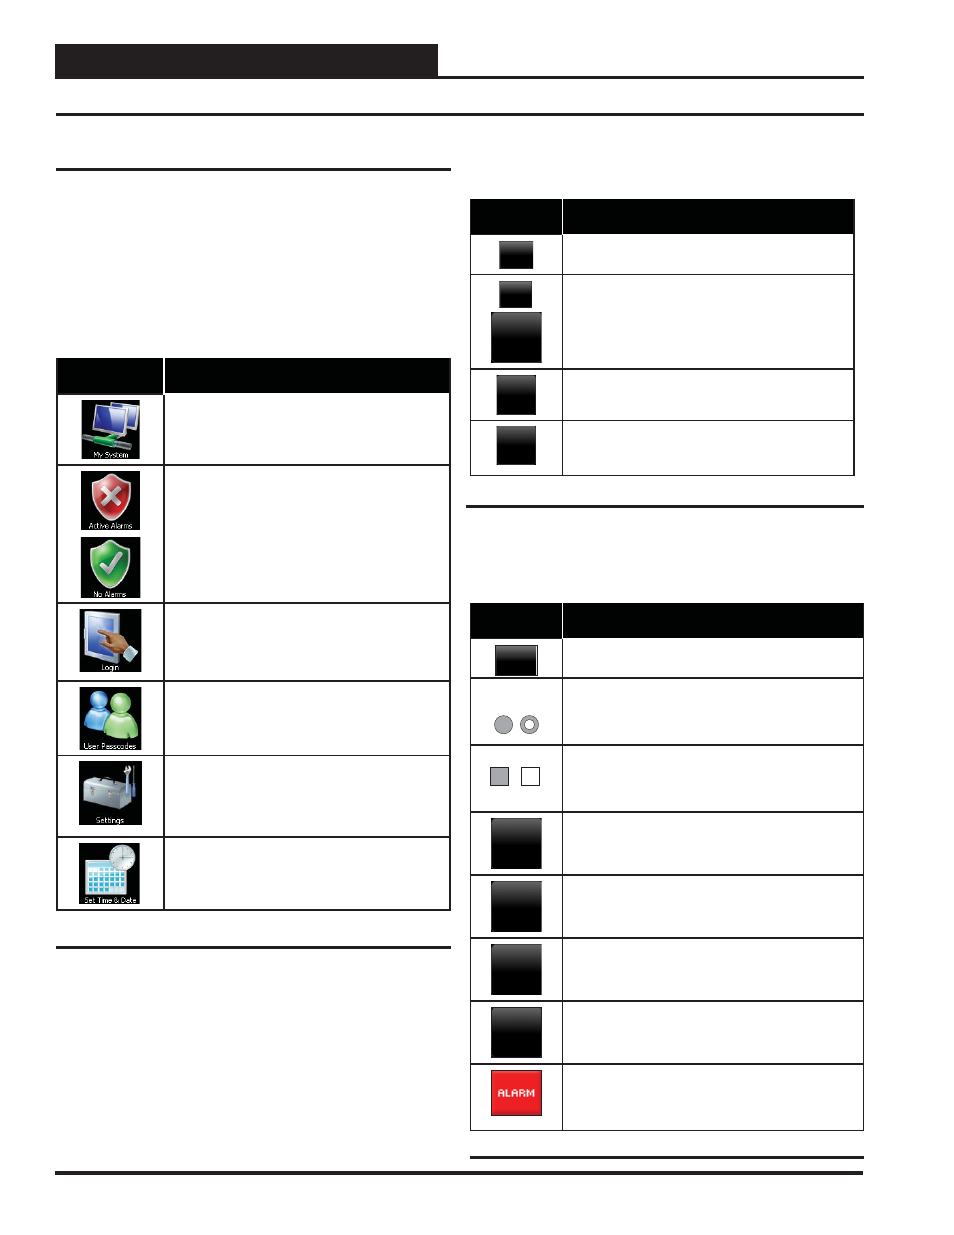
There are six Main Screen icons. See Table 1 for a list of the Main
Screen icons and their functions.
Icon
Main Screen Icons
The
< My System> icon takes you to a Unit
Selection Screen which takes you directly to the
selected controller’s Status Screen.
When bright red, the
< Alarms> icon takes
you to the Alarms Screen. When bright green,
no alarms are present. This icon is only useful
when your SMTS is set for multiple managers or
network mode and you have confi gured alarm
polling using Prism II software.
The
< Login> icon takes you to the Login Screen
where you enter your passcode.
The
< User Passcodes> icon takes you to the
System Manager Passcode Levels Screen if you
are a Level 3 user.
The
< Settings> icon takes you to the System
Settings Screen where you can change the Back-
light settings, set the System Manager address,
and enable alarm polling. System settings are
only accessible to a Level 3 user.
The
< Set Time & Date> icon takes you to the
Set Time and Date Screen. Any level of user can
set the time and date.
Navigation Buttons
See Table 2 for a list of Navigation buttons and their functions.
Button
Function
Esc
Use the
< Esc> (Escape) key to exit from data
entry without saving any new data.
Back
Back
Use the small
< Back> button located in the top
right corner of a Data Entry Screen to return to the
controller’s Status Screen. Use the large
< Back>
button located at the bottom left of other screens to
return to the previous screen.
+
Use the
< +> key to step to the next screen.
-
Use the
< -> key to step to the previous screen.
Selection, Confi guration, and Setpoint Buttons
See Table 3 for a list of Selection, Confi guration, and Setpoint buttons
and their functions.
Button
Function
OK
Use the
< OK> key to save the data you just se-
lected or entered.
Touch
the grey radio button to make your selection.
A white circle will designate that the item is
selected. You can only select one radio button item
per screen.
Touch
the grey square selection box to make your
selection. A white square will designate that the item
is selected. You can make numerous square box
item selections per screen.
Setpoints
The
< Setpoints> button, appearing on the control-
ler’s Status Screen, takes you directly to the control-
ler’s Temperature Setpoint Screen.
Overrides
The
<Overrides> button, appearing on various
controllers’ Status Screens, takes you directly to the
controller’s Force Schedules Screen.
Schedules
The
< Schedules> button, appearing on various
controllers’ Status Screens, takes you directly to the
controller’s Schedule Screen.
Holidays
The
< Holidays> button, appearing on various
controllers’ Status Screens, takes you directly to the
controller’s Holidays Screen.
The
< Alarm> button, appearing on the controller’s
Status Screen, takes you directly to the controller’s
Alarms Screen. If red, alarm(s) are present. If black,
no alarm(s) are present.
Table 2: Navigation Button Functions
Table 1: Main Screen Icon Functions
Table 3: Confi guration Selection Buttons