Using the densitometer, Using the densitometer -28 – Epson Expression 1680 User Manual
Page 48
2-28
Understanding EPSON TWAIN Pro Features
Note:
Although the image in the Preview window changes as you make
settings, the settings do not affect the real image until you scan or rescan
the image.
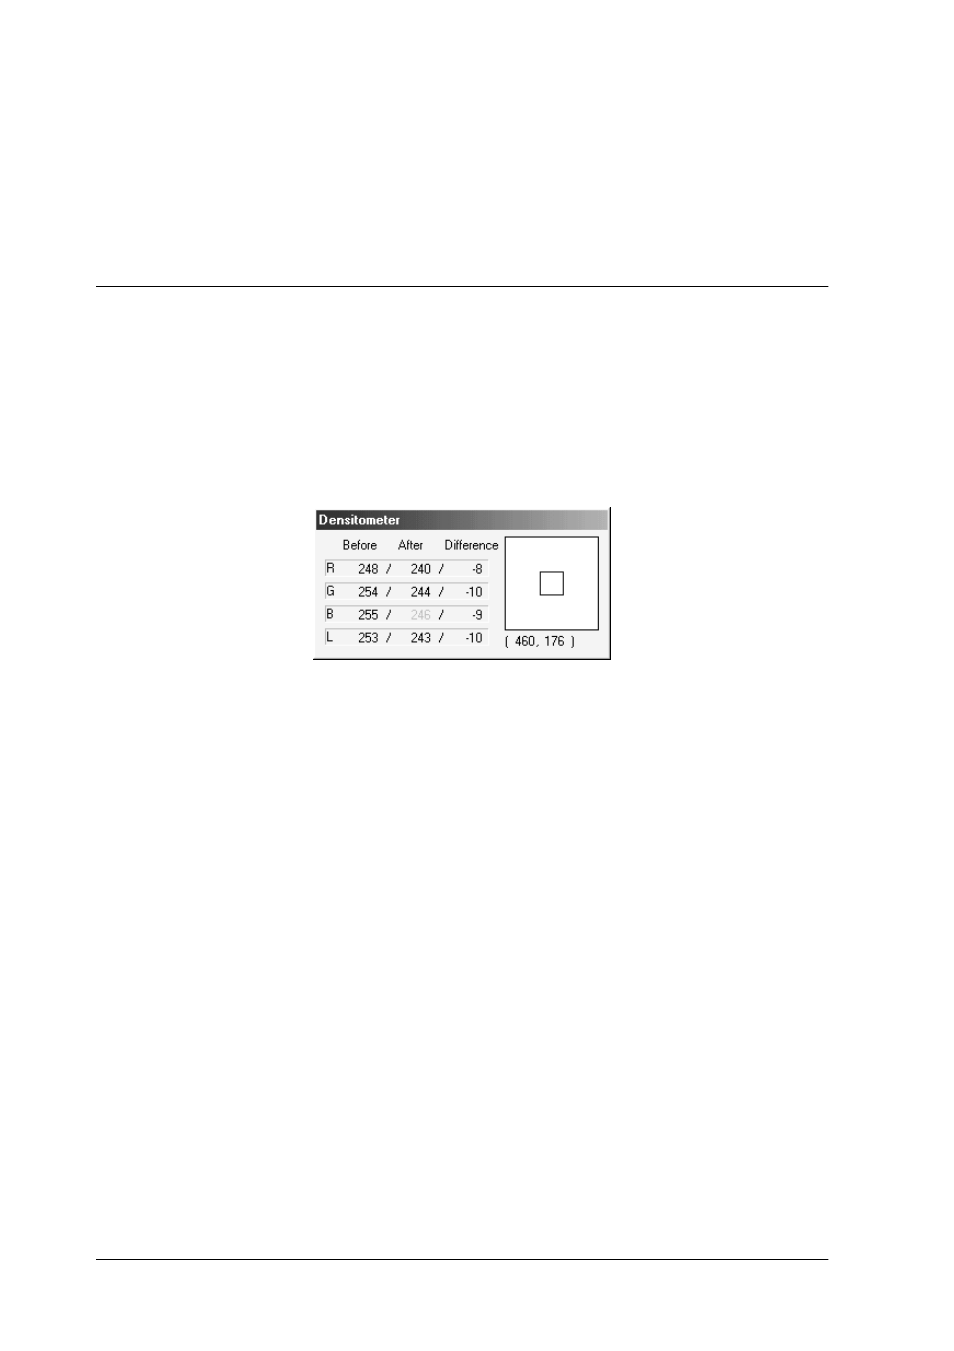
Using the Densitometer
The Densitometer shows the RGB and luminosity (L) values of a
selected pixel or group of pixels, and indicates the difference
between these values before and after making adjustments to the
previewed image.
To use the Densitometer, place the cursor over an area of the
image in the Preview window to sample a pixel or group of pixels.
A close-up of the area being sampled appears on the right side of
the Densitometer window, and the values of the sampled pixel or
group of pixels are displayed on the left side of the window.
The values that appear in the Densitometer window depend on
the Pixel Depth setting in the Image Type dialog box. If Pixel
Depth is set to one of the color settings, both RGB and luminosity
values are shown. If Pixel Depth is set to one of the gray settings,
only the luminosity value is shown. If Pixel Depth is set to
Black
& White
, then RGB and luminosity values are replaced with a Bit
value.