Mounting the speakers, 2 mounting the speakers – KLING & FREITAG K&F SEQUENZA 10 W User Manual
Page 35
User's manual
K&F SEQUENZA 10 N/W/B & Flying Frame
KLING & FREITAG GMBH © 2014
Version Version 6.1
Page 35 of 70
6.
Align the frame.
Loosen the lock nut (A) on top with
a 24 mm open-end wrench. Turn
the threaded rod (B) with a 17 mm
open-end wrench to adjust the
height. Re-tighten the lock nut. The
upper end of the thread is blank
so that the counternut cannot be
completely removed. Do not try to
clear the thread again.
A
B
12.1.2
Mounting the Speakers
Warning
See the instructions in chapter 'Safety Instructions' from page 11 and in the corresponding
sub-section 'Safety Instructions for Stacked Setups' from page 12.
It is not permissible to stack the speakers on the flying frame without the optionally available
hinged heavy-duty feet!
Caution
Control the secure fit of every ball lock pin during setup. As long as you do not push the
button in the middle of the pin, you should not be able to pull out the pin.
1.
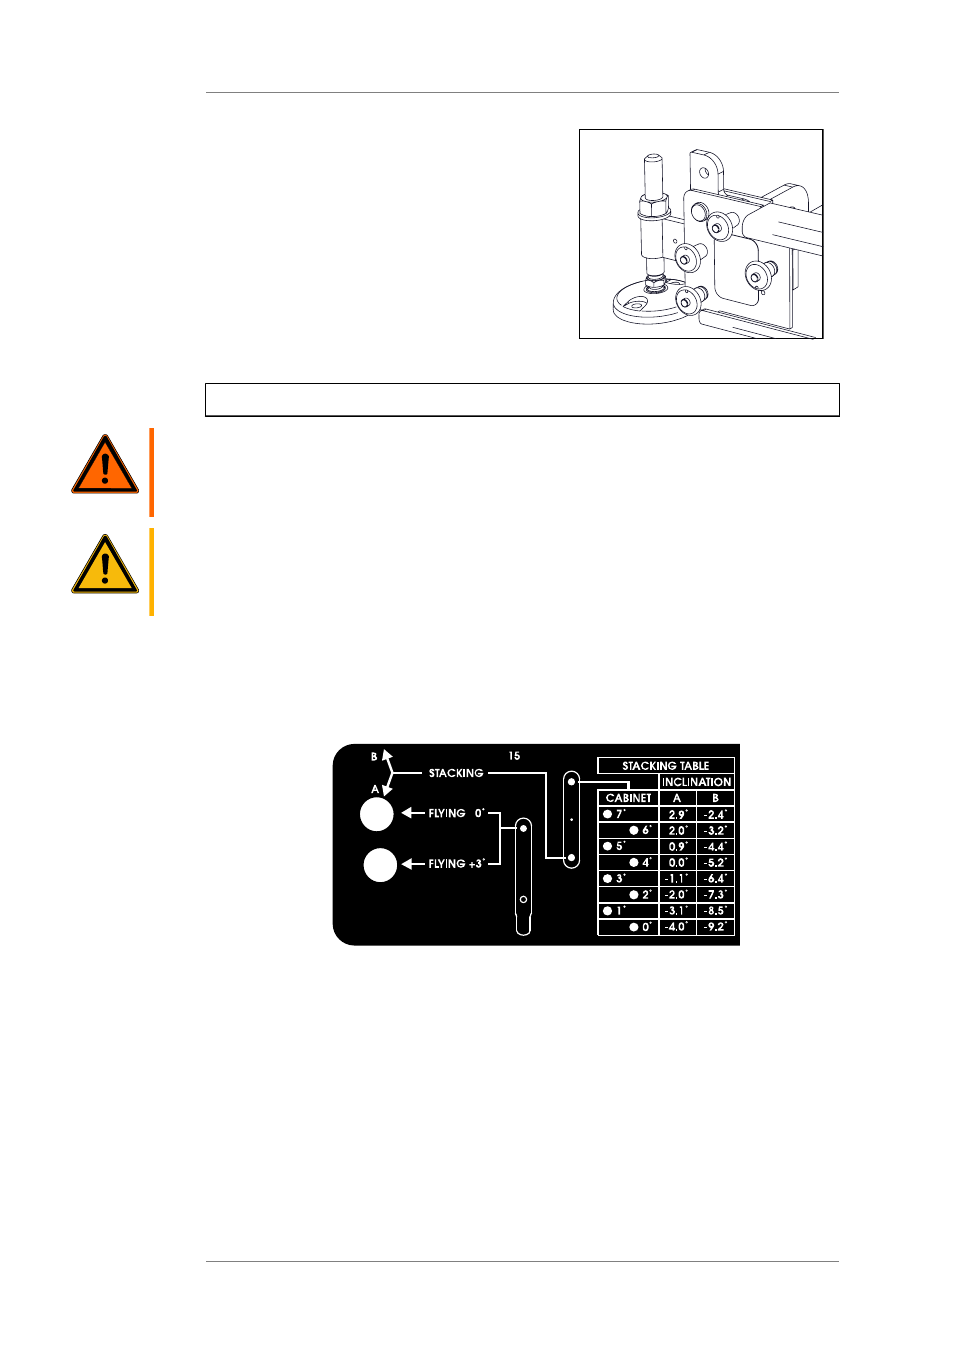
You will get the specifications for the setting angle of the bottom speaker on the frame
from the simulation software CON:SEQUENZA. CON:SEQUENZA(The angle specifications
refer to the centre axis of each speaker.)
To determine the correct drill holes on the speaker and frame for the desired angle, look
for the desired angle in one of the two right colums (see illustration below).
2.
At the top of the appropriate column, the drill hole (A or B) in the flying frame is
indicated where you must insert the Stacking Link.
3.
In the column "Cabinet", the drill hole in the rear joining plate of the speaker is
indicated where you must insert the Stacking Link on the speaker.