1 heat exchanger installa, Surge and reservoir tank installation -1, Heat exchanger installation -1 – Paxton Superchargers GM 8.1 HD Truck/SUV User Manual
Page 41: Heat exchanger installation
16-1
P/N: 4809642
©2004 Paxton Automotive
All Rights Reserved, Intl. Copr. Secured
28SEP04(4809642 v1.2)8.1GMTruck
Section 16
HEAT EXCHANGER INSTALLATION
A.
Remove the plastic pushpins securing the
radiator core support cover to the vehicle.
Remove the core support cover.
B.
Use a screwdriver to unsnap the four twist
snaps securing the grill. Remove the last
screw so that it is possible to unsnap the
grill and remove it from the vehicle.
C.
Remove the remaining two screws holding
the hood latch and let the hood latch hang
out of the way.
D.
Remove the two upper screws securing the
transmission cooler to the core support.
Remove the two plastic pushpins securing
the bottom of the transmission cooler to the
core support.
E.
Remove the plastic pushpin holding the
turquoise and green air temperature sensor
on the driver’s side of the transmission
cooler.
F.
Keeping the sensor in place, move the trans-
mission cooler toward the driver’s side until
the lower mounting hole lines up with the
hole of the sensor. Use a plastic pushpin to
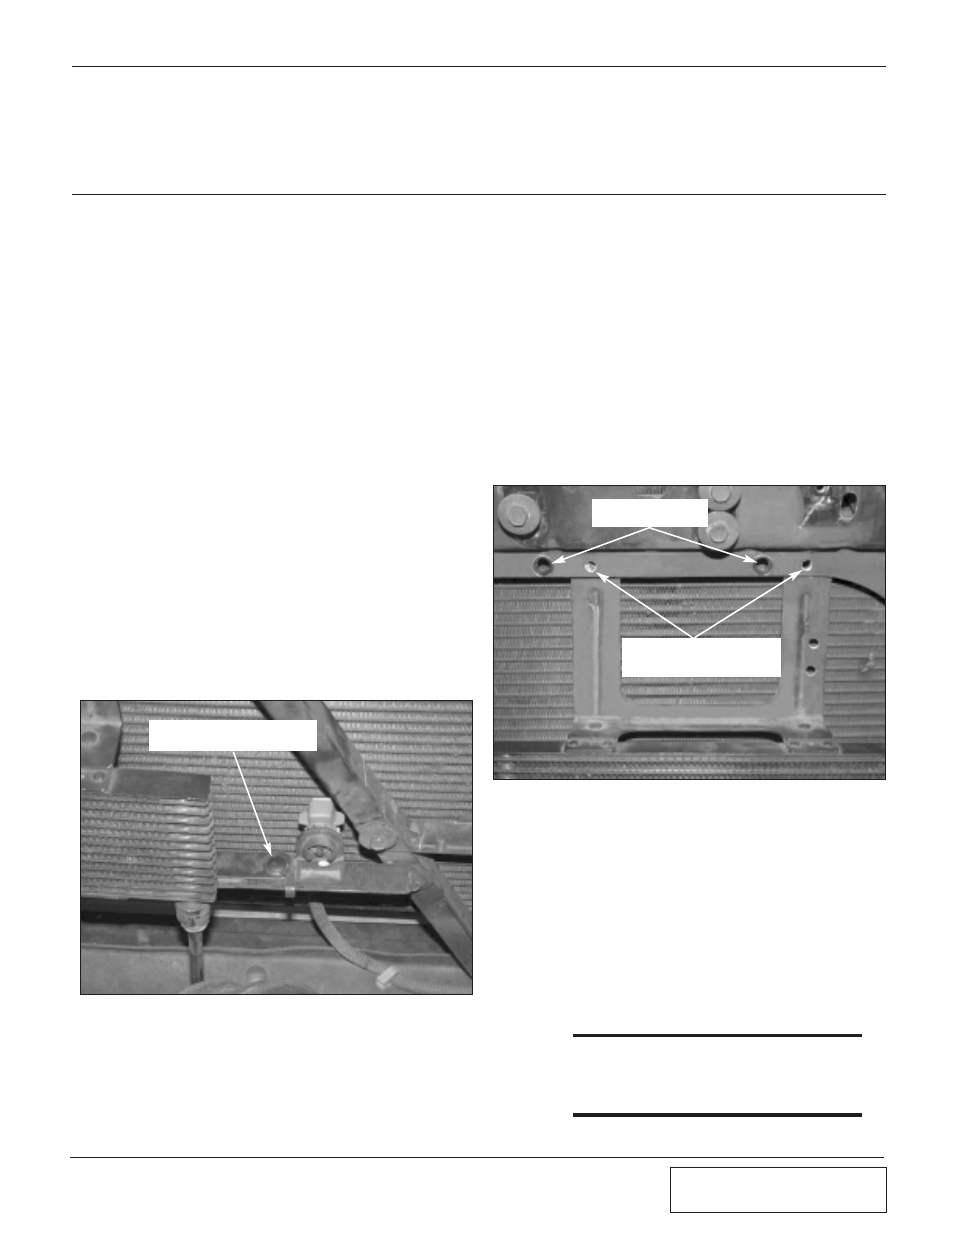
secure both items in place. (See Fig. 16-a.)
Fig. 16-a
Fig. 16-b
16.1
HEAT EXCHANGER INSTALLATION
G.
With one side of the transmission cooler in
place, mark the other lower mounting hole
on the core support keeping the transmission
cooler as close to the radiator as possible.
Center punch and drill a 9/32" hole. Use a
plastic pushpin to secure that side of the
transmission cooler.
H.
Temporarily place a thin piece of metal (for
protection) between the core support and the
radiator. Center punch and drill two 9/32"
holes where the two top mounting points of
the transmission cooler are relocated. Move
the factory nut clips to the two newly drilled
holes. Use the factory screws to secure the
upper mounting points of the transmission
cooler into the factory nut clips. Re-install
the two stock screws securing the hood
latch. (See Fig. 16-b.)
I.
Using 1/4-20 x .75" hardware, secure the
lower heat exhanger bracket to the heat
exchanger. Using sealant on the threads,
install two 90° brass fittings in the inlet and
outlet of the cooler. Point both fittings fac-
ing the driver’s side.
J.
Align the bracket/heat exchanger assembly
on the core support keeping the heat
exchanger close to the radiator and transmis-
sion cooler. This will be to make clearance
for the grill
***NOTE***
Make sure that the heat exchanger does not
rub on either the radiator or the transmission
cooler, when marking for mounting hole loca-
tions.
NEW LOCATION SECURED WITH
A PLASTIC PUSH PIN
NEW MOUNTING LOCATIONS
WITH COOLER MOVED TO
THE RIGHT
STOCK MOUNTING
LOCATIONS