Uno series - quick start guide – Xilica Uno Series User Manual
Page 14
Uno Series -
Quick Start Guide
XILICA AUDIO DESIGN CANADA / EUROPE / ASIA – www.xilica.com
Pag
e
14
(b) As shown below, we have added source and playback audio components. We are able to label
the Uno processor and audio components
as well as connecting cable types and ID’s by clicking
them and using the Component Properties menu at the right. If you click the white work area to
open the Project Information section in the Component Properties menu you can type a project
description (project name) and project notes into that section of the menu. If you select Project in
the top menu and select Export Bill of Materials to File you can create/print a bill of materials
listing the Uno components along with the cable types and other information from Project View.
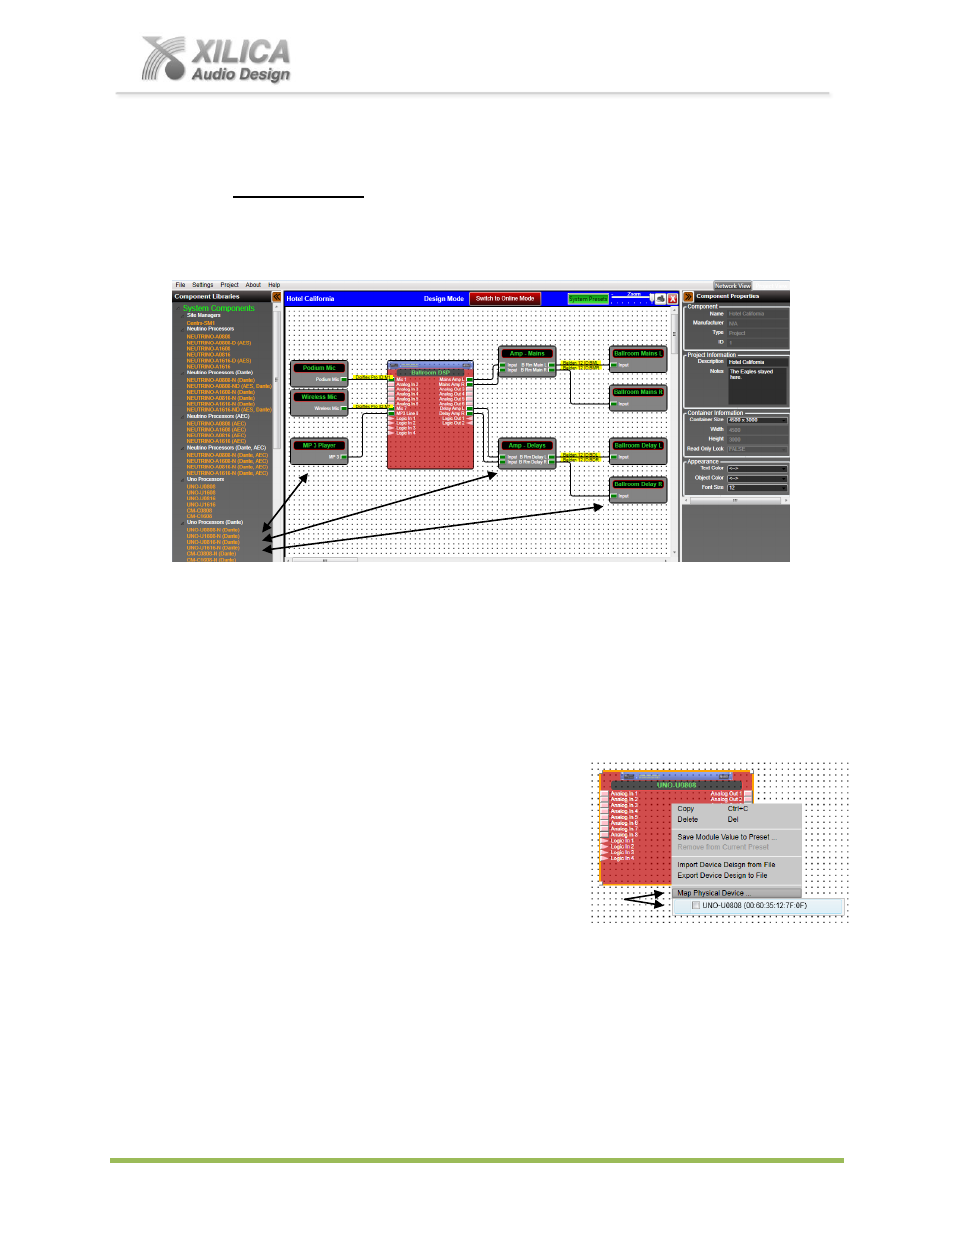
Map Physical Device
(a) Next, with the red Uno U0808 processor module for this application placed in the Project
View/Design Mode work area as shown above (and when the processor device is connected to
the NeuConsole software) we need to Map or connect the Uno
’s software processor module in
the work area with the actual physical Uno processor device that is connected to the PC.
(b) To Map Physical Device, right click the red Uno U0808
processor module in the work area. Select
“Map Physical
Device” as shown at right and select the processor device
model you are working with from the drop down list. Once
done as shown below on page 15, notice that the
processor module in the Project View/Design Mode work
area has turned from a light see through red color to
solid
red
– indicating
Map
success.
Importing a Pre-Designed Uno App (Device Design) into your Processor Module
(1) Again, right click the red Uno U0808 processor module in the Project View/Design Mode work
area and select
“Import Device Design from File” - as shown below left on Page 15.