Uno series - quick start guide – Xilica Uno Series User Manual
Page 17
Uno Series -
Quick Start Guide
XILICA AUDIO DESIGN CANADA / EUROPE / ASIA – www.xilica.com
Pag
e
17
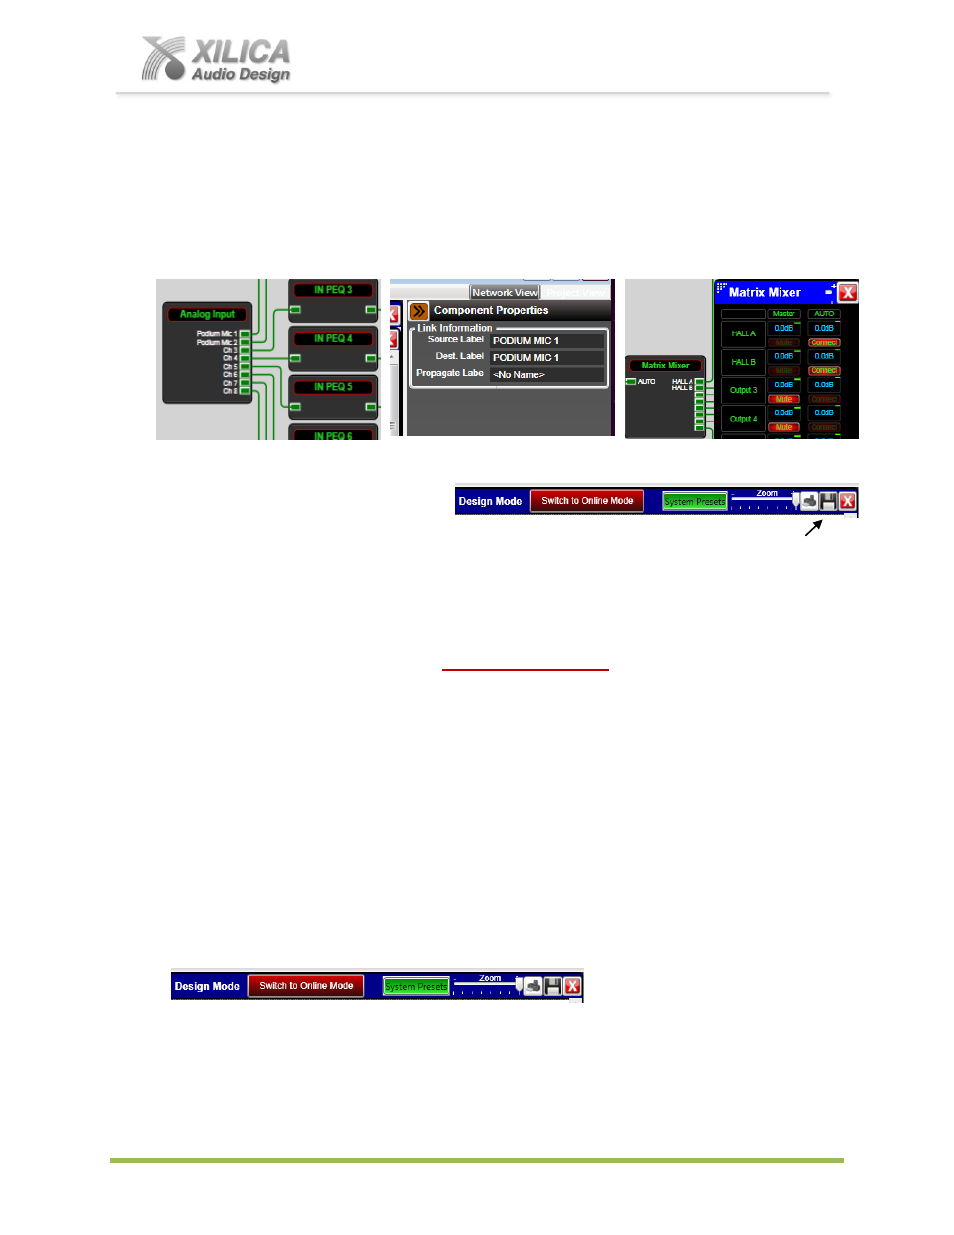
17. Label DSP Module Source and Destination Connections:
During or after completing your parameter adjustments - spend some time labeling the DSP
module I/O Source and Destination connections (as well as labeling possibilities in Project
View). Point & click on any wire to highlight it then type a new label name in the Component
Properties menu / Link Information Source and Destination label area at the right of the
work area. As shown in the Matrix mixer at the far right - Source/Destination labels will
populate opened DSP modules
– like the matrix mixer- see Hall A / Hall B labels.
18. Save Project:
(a) Click the
“Save Project” Disc located to the right of the zoom control at the top of the
Project View
work area to “Save Project As” or “Save” your DSP design project (each time a
DSP parameter adjustment or any change is made the Save Project Disc will re-appear) OR
Select
“Save Project As” under the File menu at the top left of the application to name and
save your design project and
“Save Project” to save as you work.
Note: This saves the DSP design project you are working on to your PC (not to the
physical processor device). See Switch to Online Mode below to accomplish that.
(b) We recommend that you Save As the project file twice. Once to create a Master File and a
second time to create a Work File. Continue working with the Work File, update the Master
File appropriately and the Master File is protected. At the end of the project
– continue
running the system with the Work File, rename it to Master Ver 2, or other.
19. Switch to Online Mode:
(Transfer/Save DSP design project to the physical device)
Once your DSP design project parameter adjustments are completed (and saved to your
PC) you can transfer/save your work to the connected physical processor device. To do this,
(a) Click the red
“
Switch to Online Mode
” button at the top of the Project View / Design Mode work
area page
– as shown below (not visible if a network interface is not detected – you are working
Offline)
(b) This button selection actually performs two functions at the same time
– it transfers or saves your
DSP design project to the connected processor device and that processor is now Online and
active (live).