Neupanel series - mini - quick start guide – Xilica NeuPanel Series User Manual
Page 10
NeuPanel Series - Mini -
Quick Start Guide
XILICA AUDIO DESIGN CANADA / ASIA / EUROPE
Pag
e
10
7. If you set up your Mini devices as per step 13 & 14 on Page 8 & 9 above, you will now see
them appear online and connected in Network View in the NeuConsole software.
Note:
Each Mini device (and processor device) also has a software based Remote Reset
function to augment its physical IP Reset switch but the physical IP Reset procedure is more
reliable.
If you have already installed Mini controls and need to do an IP Reset, try using the software
Remote Reset procedure first before removing it from the wall to do a physical Reset.
To accomplish a software Remote Reset,
Right click the Mini device (or processor device) in Network View and select Remote Reset.
15. Firmware Upgrade to Mini Series Wall Control Device:
Once the Mini control and the NeuConsole software are connected and operational and before
you start programming the Mini device - make
sure it’s Firmware is compatible with the software.
Check device firmware version in Network View. See
– verify, download latest
firmware, save file to your PC
– and proceed below if you need to upgrade the Mini’s firmware.
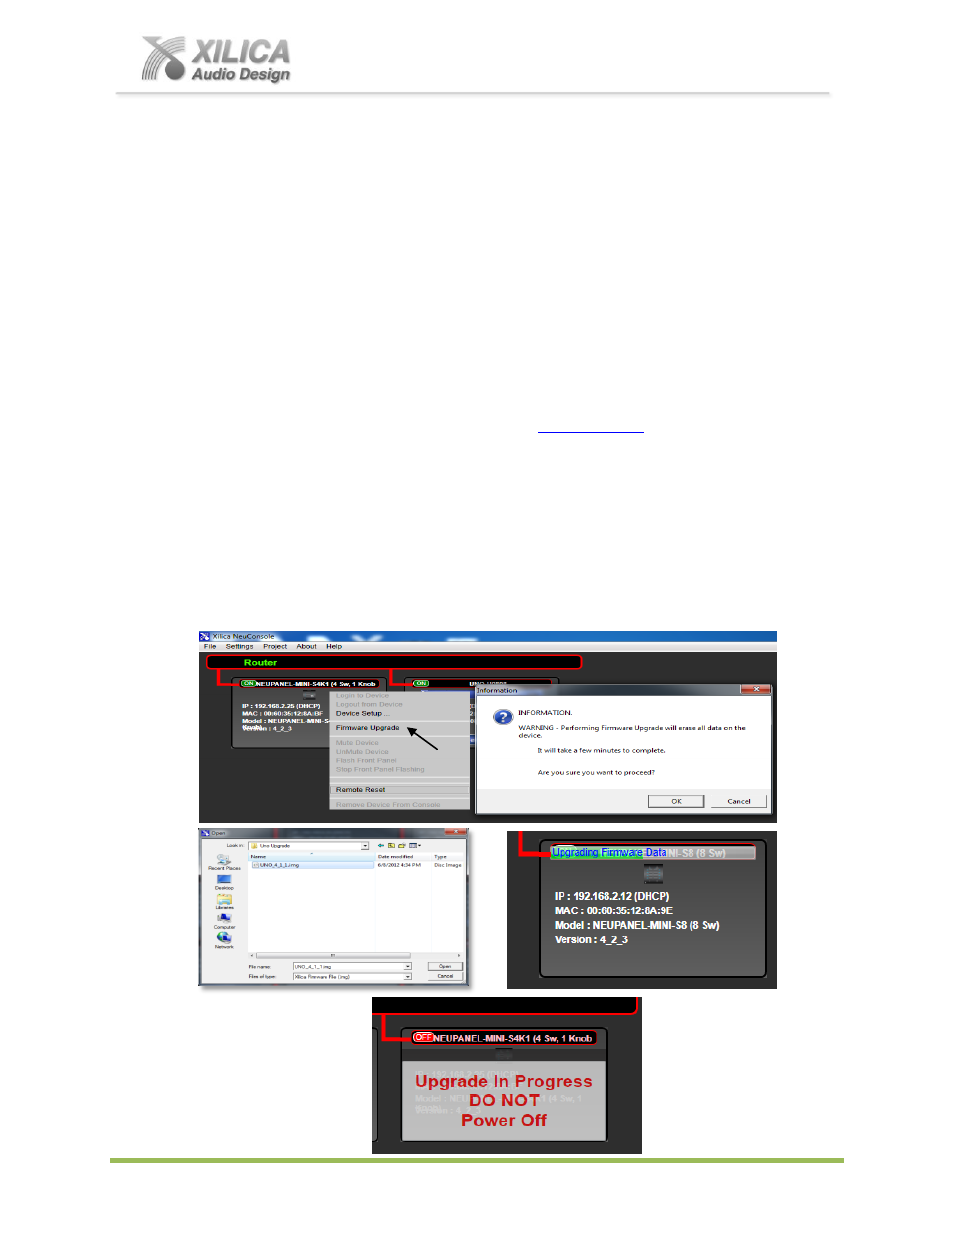
Power must not be disrupted during a firmware upgrade procedure
In Network View
– Right click the Mini device, Select “Firmware Upgrade” from the menu
and follow the instructions to install your saved firmware update as shown below.
Note:
As indicated with a safety message during the firmware upgrade procedure
– a
firmware upgrade will erase all saved data on the device. Thus perform this procedure
before you program your Mini control device (or re-transfer/save a saved project design file to
the Mini device after the firmware upgrade is complete).