Neupanel series - mini - quick start guide – Xilica NeuPanel Series User Manual
Page 17
NeuPanel Series - Mini -
Quick Start Guide
XILICA AUDIO DESIGN CANADA / ASIA / EUROPE
Pag
e
17
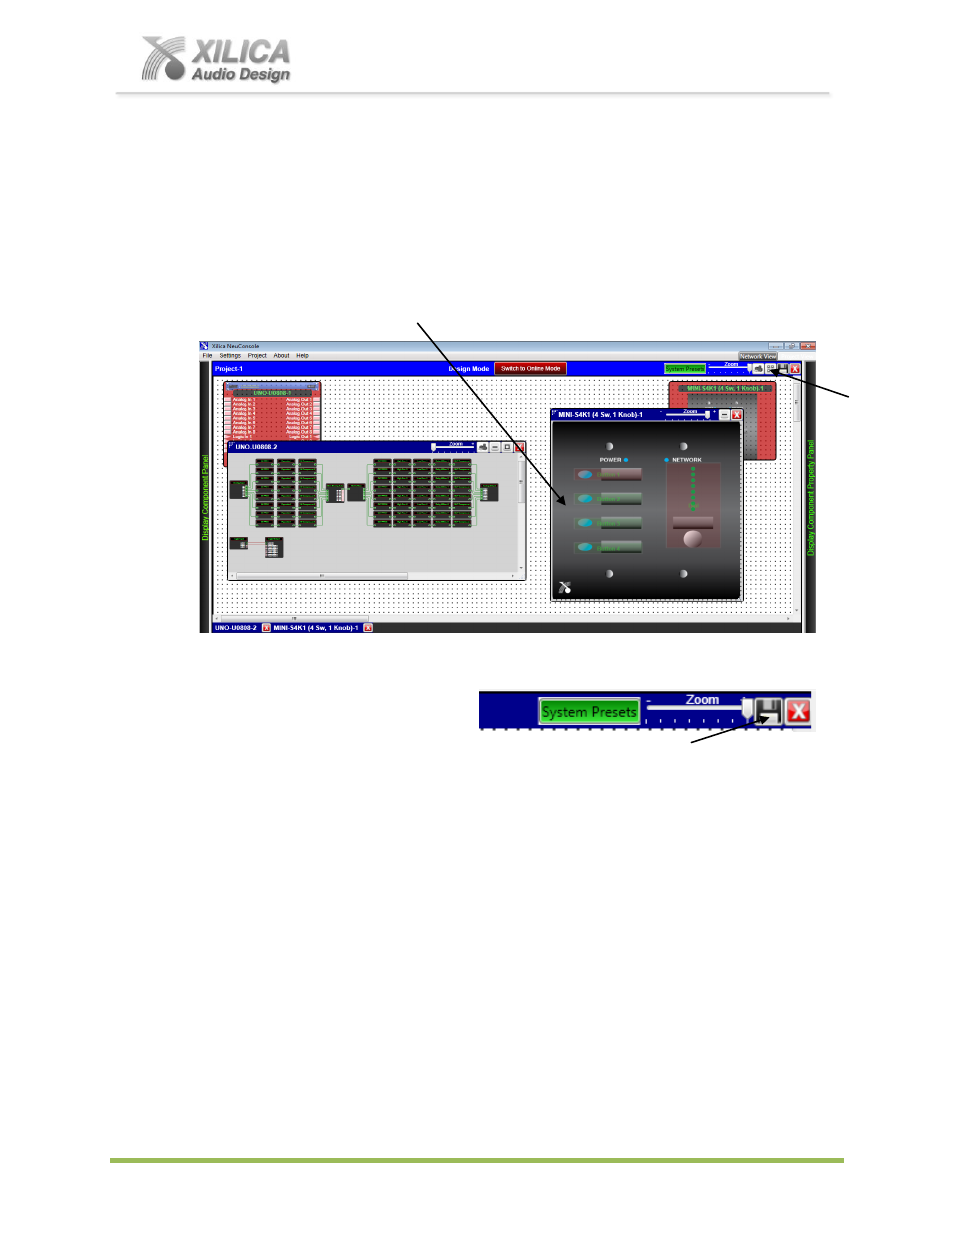
You have now successfully programmed two separate DSP parameter control
functions into the Mini S4K1 wall control.
For our example and as shown below - I will now click on the Child Tile Window again to
remove the Child Windows and return the processor and Mini control to their normal positions
within the Project View/Design Mode work area.
Notice that Mini controls Level and first On/Off push button are light red in color to indicate
that they have been programmed and the Mini wall controls 3 remaining On/Off push buttons
remain light green in color as indicated
– ready to be programmed with other On/Off functions
and Preset controls.
18. Save Project:
Click the
“Save Project” Disc located to the right of the zoom control in the Project View
work area to
“Save” your Mini control programming and the DSP design project work to your
PC. Each time any programming or DSP adjustment is made the Save Project Disc will re-
appear. OR - Select
“Save Project As” or “Save Project” under the File menu at the top
left of the Project View page to save your work.
Note:
This saves the Mini programming (and DSP design) you are working on to your
PC/Computer but not to the physical Mini device (or processor device) itself. See
“Switch to Online Mode” below to save your work to the physical Mini and processor
devices.
Note:
We recommend that you Save As the project file twice. Once to create a Master File
and a second time to create a Work File. Continue working with the Work File, update the
Master File appropriately and the Master File is protected. At the end of the project
–
continue running the system with the Work File, rename it to Master Ver 2, or other.