Remote transmitter connect web interface – American Time Wireless Remote Transmitter User Manual
Page 14
© American Time
14
Wireless Remote Transmitter Installation Manual
Glossary
Appendix
Tr
oubleshooting
Clock
Installation
Transmitter and System Setup
Intr
oduction
Remote Transmitter Connect
Web Interface
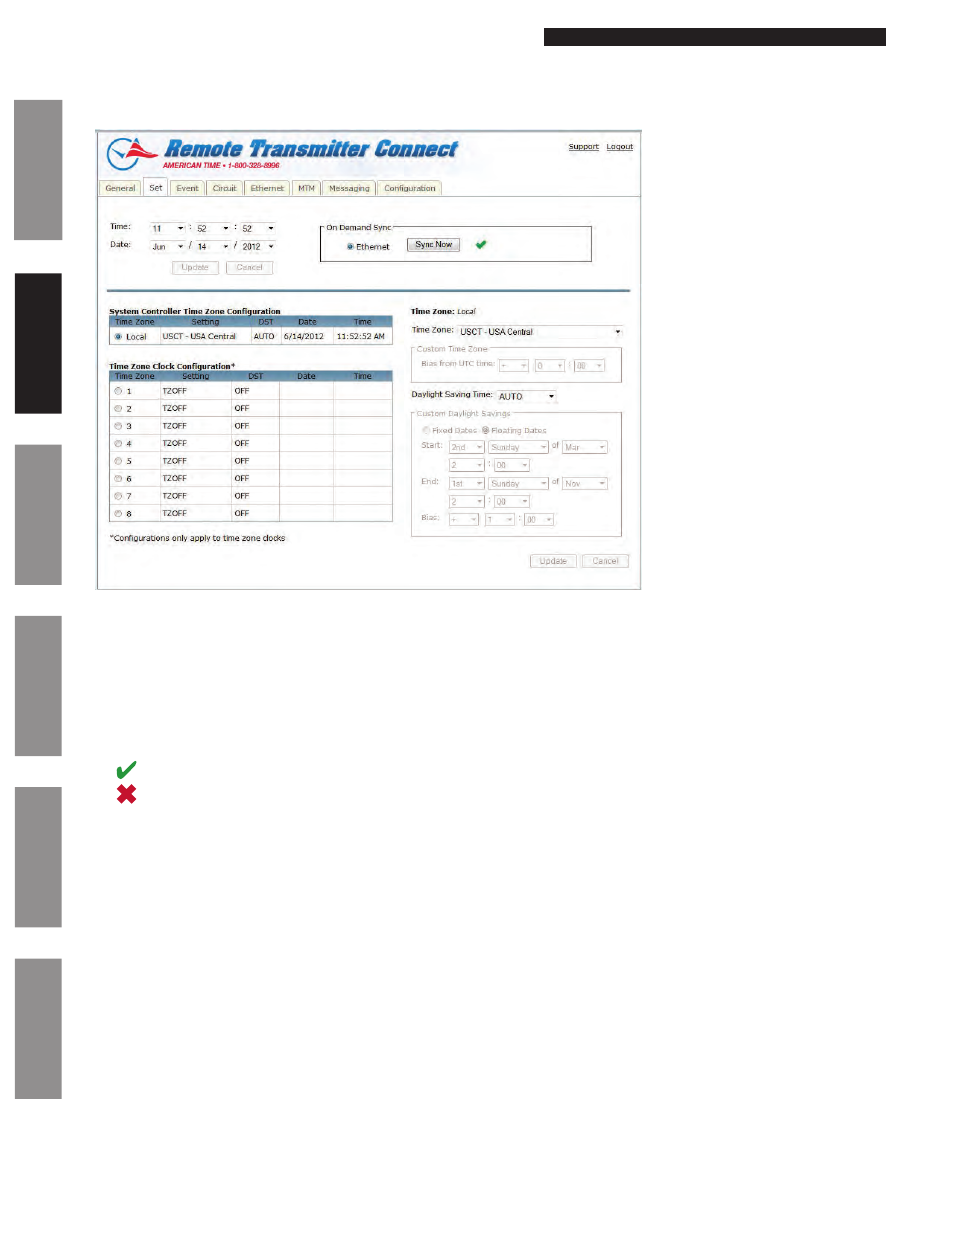
Set Tab:
The Set Tab allows you to set the time zone, daylight saving time, date, and time for your local clocks and time zone clocks.
Figure 2
1. Time: This allows the user to set the time in the following format HH:MM:SS. After selecting a time change, the Update button must
be pressed to take effect.
n
Note: Time will always be in military time.
2. Date: This allows the user to set the date. After changing the date, the Update button must be pressed to take effect.
3. On Demand Sync: The synchronization options configured on the Remote Transmitter will be displayed. The user may choose the
option in which they would like to synchronize their time and press
Sync Now. The time and date will be updated automatically if
successful.
indicates a successful sync.
indicates a failed sync.
4. Remote Transmitter Time Zone Configuration: When this is selected, the Time Zone and Daylight Saving Time settings can be
configured. The Update button in the lower right hand corner must be pressed for any changes to take effect.
—Time Zone: This drop down contains a list of all time zones.
—Daylight Saving Time: This drop down contains AUTO, CUSTOM, or OFF.
5. Time Zone Clock Configuration: There are 8 selectable time zone clocks. Each time zone clock can be configured to a time zone and
DST. The Update button in the lower right hand corner must be pressed for any changes to take effect.
—Time Zone: This drop down contains a list of all time zones.
—Daylight Saving Time: This drop down contains AUTO, CUSTOM, or OFF.