Wireless analog clock installation – American Time Wireless Remote Transmitter User Manual
Page 22
© American Time
22
Wireless Remote Transmitter Installation Manual
Glossary
Appendix
Tr
oubleshooting
Clock
Installation
Transmitter and System Setup
Intr
oduction
Wireless Analog Clock Installation
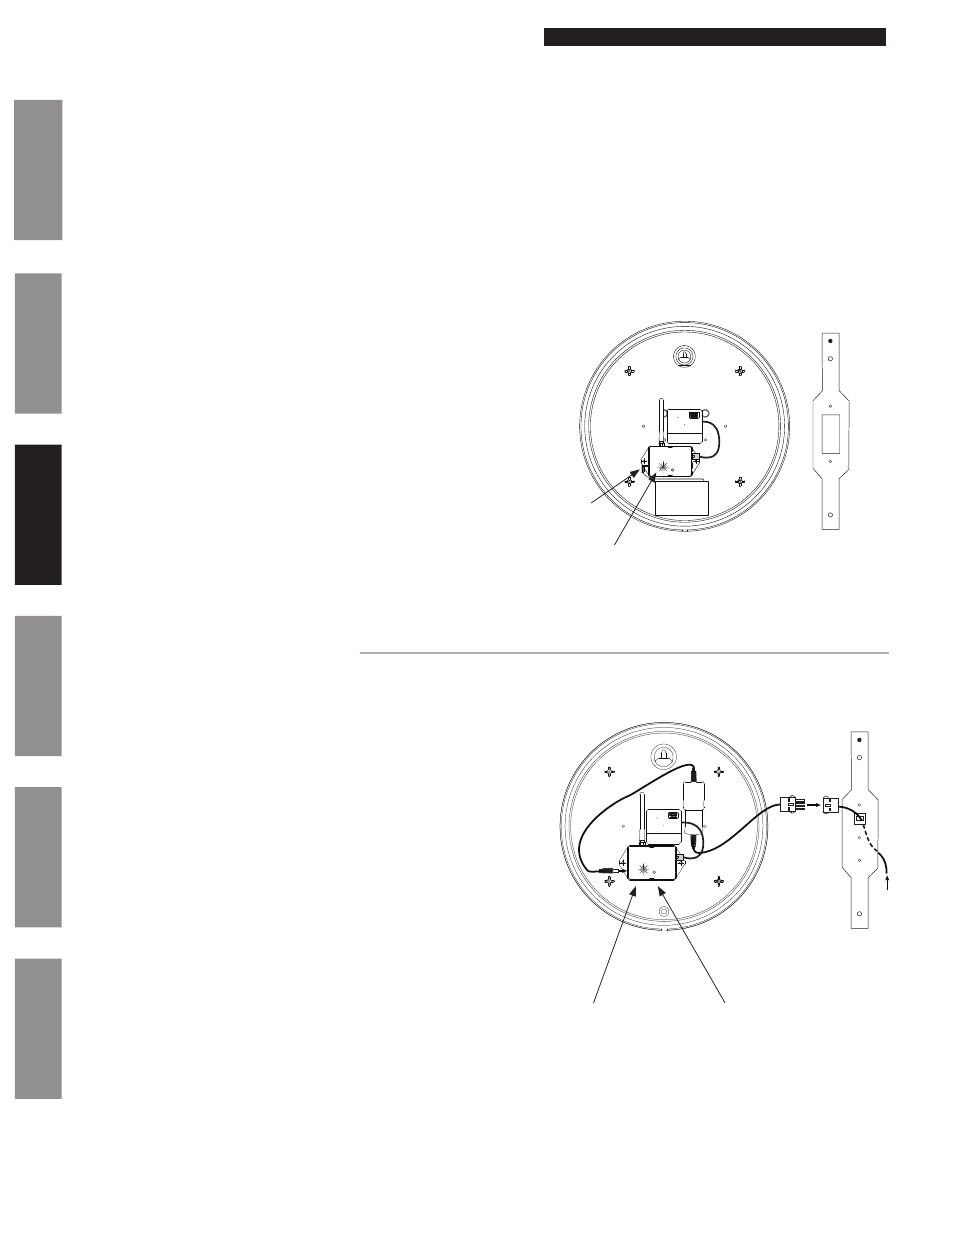
Wireless Analog AC Clocks
Wireless Analog AA Battery Clocks (DC)
u
To activate the clock, connect barrel jack plug of battery pack to wireless
receiver. The LED on the back of the clock will flash red within 30
seconds of power-up to indicate receiver is
n
Note: If the LED does not flash within 30 seconds, remove barrel jack plug
of the battery pack, wait for 5 seconds and reconnect it. The LED should
begin flashing within 30 seconds.
v
When the signal is received, the LED will flash green. Be patient. The
clock hands will rapid advance to the correct time. This may take up to
15 minutes.
w
Hang the clock after rapid advance is complete using the keyhole hanger
on the back of the clock or the security bracket (sold separately).
x
Continue clock installation. Follow steps 1-4 for the remainder of your
clocks. You may skip step 3 and confirm clock synchronization after
some or all clocks have been hung.
n
Note: Clocks will only attempt to sync to the Remote Transmitter at
approximately 2 (am & pm) and 8 (am & pm)
as displayed on the
clocks and after initial power up.
Note: Do not connect power to the clocks until the Remote Transmitter is
installed and transmitting.
u
Connect clocks to AC power with cord kit or Molex kit and confirm green
is lit after power-up.
n
Note: If the LED does not flash within 30 seconds, disconnect the
barrel plug on the clock receiver, wait for 10 seconds and reconnect it. The
LED should begin flashing within 30 seconds.
v
When the signal is received, the LED will flash green. Be patient. The
clock hands will rapid advance to the correct time. This may take up to 15
minutes.
w
Hang the clock once signal reception is verified and clock is operating
correctly using the keyhole hanger on the back of the clock or the
security bracket (sold separately).
y
Continue clock installation. Follow steps 1-4 for the remainder of your
clocks. You may skip step 3 and confirm clock synchronization after
some or all clocks have been hung.
n
Note: Clocks will only attempt to sync to the Remote Transmitter at
approximately 2 (am & pm) and 8 (am & pm)
as displayed on the clocks
and after initial power-up or reset.
AC
DC
To
wiring
box
AC
DC
To
wiring
box
LED
Optional
Security
Bracket
(12" shown)
Reset
Button
LED
120vac model shown
For both battery and AC clocks, we recommend first installing one clock near the master and then one at the furthest location. Then install the
remaining clocks in their designated locations. This will simplify system troubleshooting.
Clocks should be installed within 24 hours of installing the Remote Transmitter. After 24 hours, the Remote Transmitter will enter Quiet Mode.
Quiet Mode can be manually toggled off. Reference Appendix F for more details on Quiet Mode.
Barrel
Jack
Input