Network printer, Web browser screen capture – Audioscan Axiom User Manual
Page 36
Axiom
®
User's Guide Version 1.8
May 2015
Change the folder
Change the folder permissions on the server
Change the subfolder
Create the subfolder on the server
Change the subfolder permissions on the server
Once you have selected or entered all of the required details, click
to save the Windows Share settings.
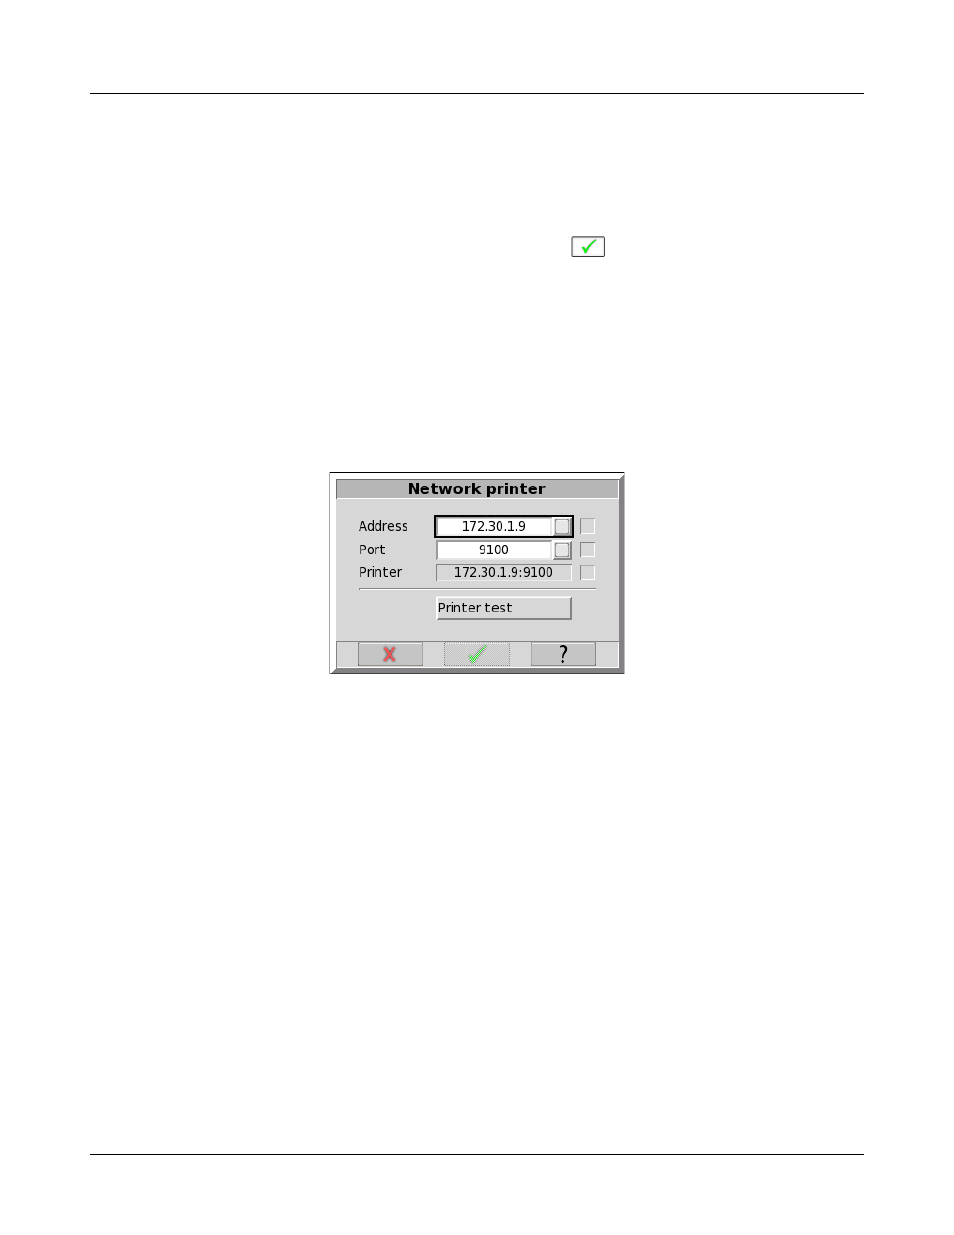
Network printer
If your chosen printer connects directly to the local area network through its own network interface and cable,
then select the Network connection option. Ask your network administrator for the network printer's IP address
and port that you enter in the Network printer details.
In Printing Setup, select Network for the connection and click the [Details] button. Enter the address (e.g.,
172.30.1.9) and the port (e.g. 9100). To test the Network printer details, click the [Printer test] button. If the test
fails, the Printer entry will be marked with a red X. If the test passes, the Printer will be marked with a green
check and the printer will print the setup details on a sheet of paper.
Network printer details – Printer test passed
Web browser screen capture
You can capture the
Axiom
screen image at any time using a web browser. Through the browser, you can print
or save the image using the computer's printer or file storage.
Enable the
Axiom
networking as described above in Network Setup. Enter the
Axiom
network address in the
browser address bar (e.g., 172.30.1.57). Select the Capture the screen link shown in the browser window.
Alternatively, enter the direct link to the screen image in the browser address bar (e.g., 172.30.1.57/screen). The
browser will display the current
Axiom
screen image. Use the browser features to save or print the image. In
many browsers, you can right-click on the browser window, or open the browser menu.
36