Digital Alert Systems DASDEC-II QUICK START UP GUIDE User Manual
Page 16
Quick Start Guide for Your DASDEC II
Page 16 of 40
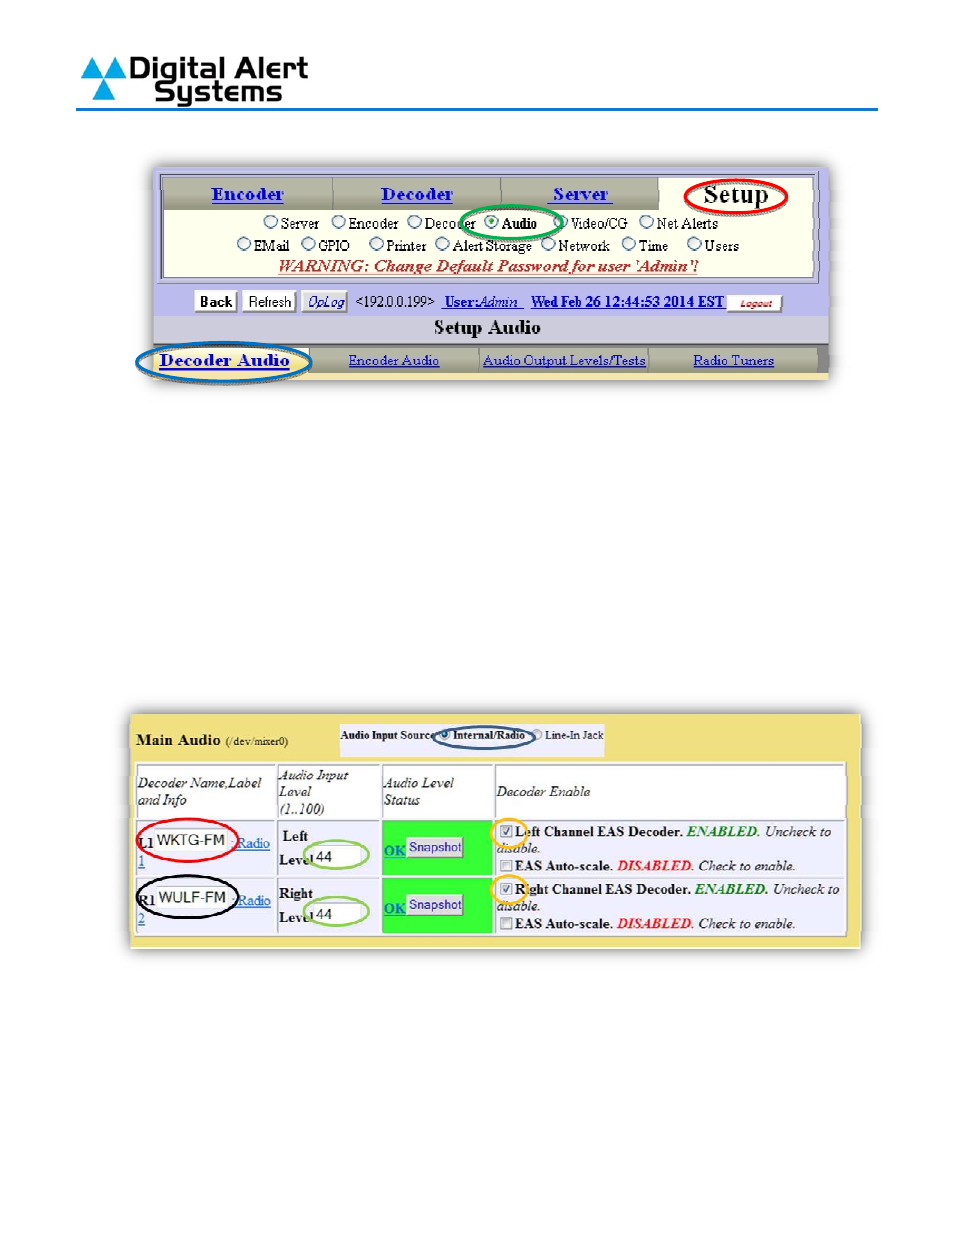
On the Alert Decoding Audio Configuration page, scroll down to the Main Audio heading.
Select the “Internal/Radio” radio button (circled in blue). Enter the call letters of the station
programmed on Radio 1 into field “L1” (circled in red). Then enter the call letters of the
station programmed on Radio 2 into field “R1” (circled in black). The call letters entered in
these fields will appear on the alert log. After entering the call letters ensure that the check
boxes (circled in orange) have a check mark in them to enable the decoder on that channel.
6)
The field under the table heading Audio Level Status will change to give a visual indication
of the level going into the decoder on that channel. If that box turns yellow or red and show
the words “Elevated” or “High” reduce the gain of that channel by reducing the number in the
field circled in green; if the level status is shown as “Low” then increase the number in the
field circled in green. The gain of each channel can be adjusted independently of the others.
7)
Radio 3 and the auxiliary audio input on the main audio terminal block can be set under the
heading “Auxiliary Audio 1” on the “Alert Decoding Audio Configuration” page. In the
example picture Radio 3 is tuned to a NOAA station so I used call letters “NWS”. Notice that
I have the fourth audio input disabled in the picture below. The fourth audio input is on the
Audio Terminal Block on the rear of the DASDEC-II and will accept any unbalanced line-level
signal.