Digital Alert Systems DASDEC-II QUICK START UP GUIDE User Manual
Page 7
Quick Start Guide for Your DASDEC II
Page 7 of 40
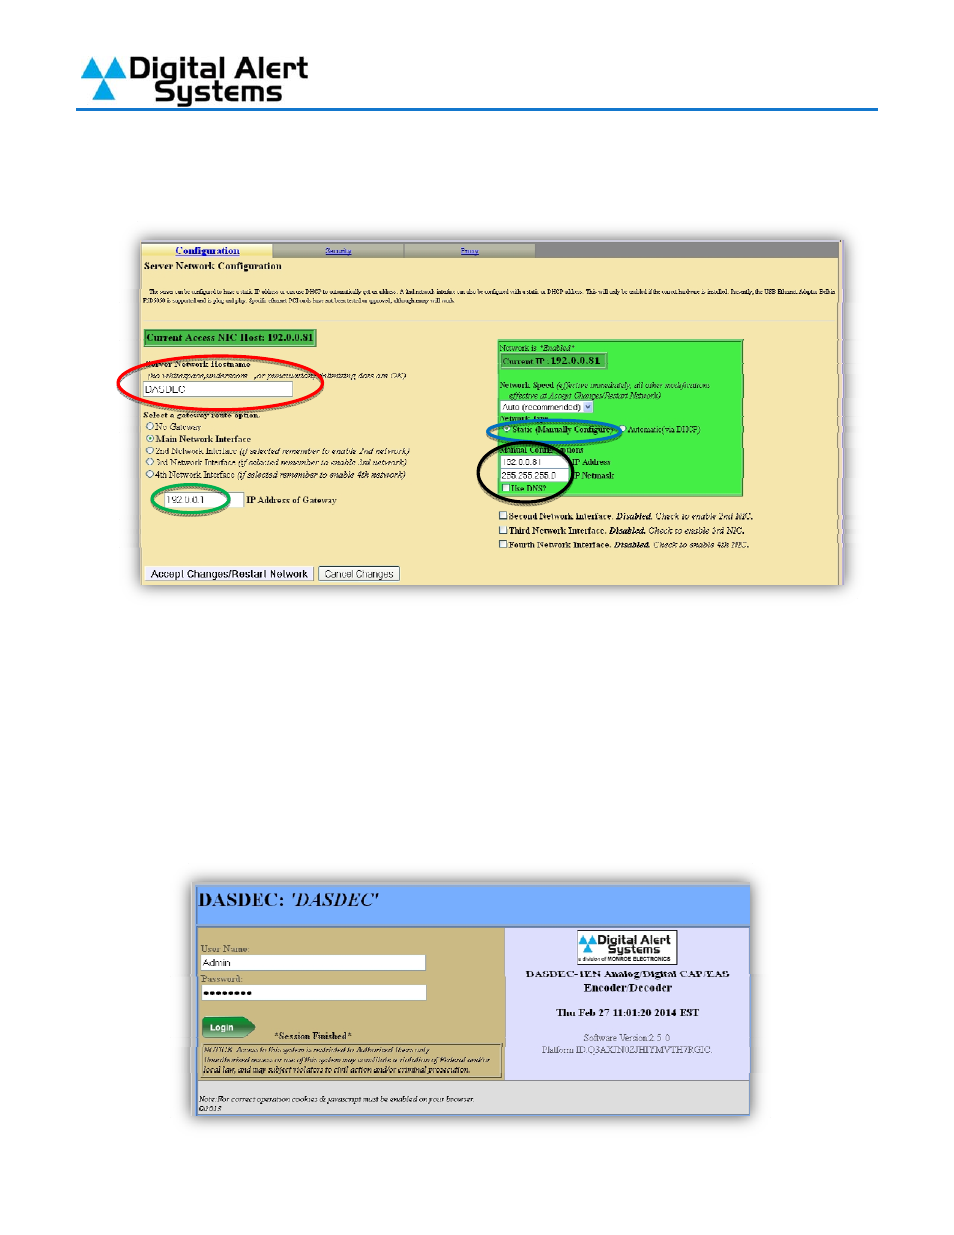
Gateway in the field provided (Circled in green). Finally click “Accept Changes/Restart
Network” (note – after clicking this button your computer won’t be able to reload the page,
this is normal).
9)
Verify that the display on the front of the DASDEC-II now shows the IP Address you entered;
you can now connect the DASDEC-II to an open port on one of your buildings Ethernet
switches using a regular network cable.
10) On the computer, restore the network connection settings that were changed in step 3 to
their previous settings.
11) With the DASDEC-II powered up and connected to the network launch a web browser on a
computer which is connected to the same network. In the address field enter the IP Address
you have given your DASDEC-II. You will then be brought to the login screen.