Digital Alert Systems DASDEC-II QUICK START UP GUIDE User Manual
Page 19
Quick Start Guide for Your DASDEC II
Page 19 of 40
3)
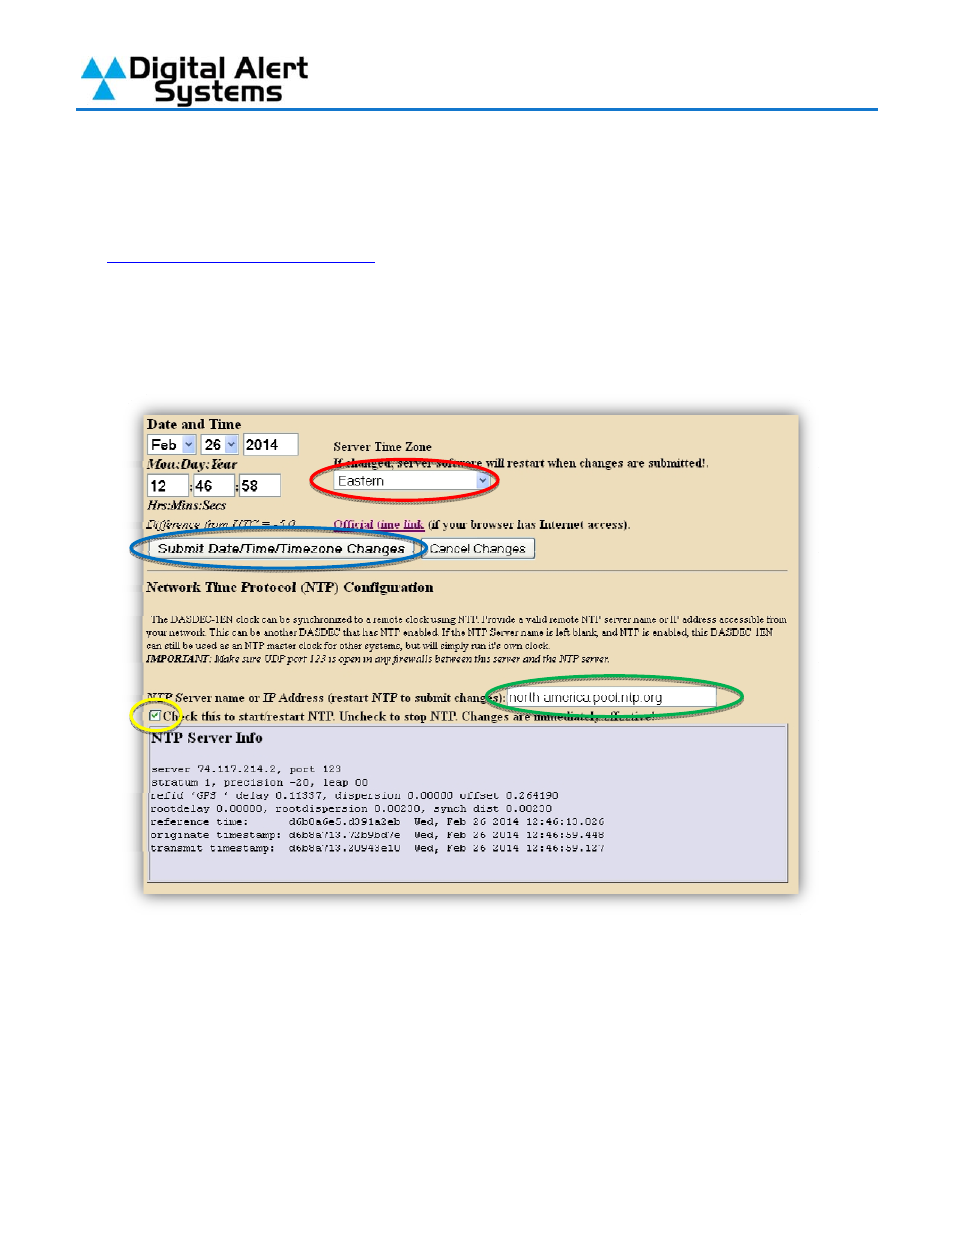
On the “Setup > Time” page set your time zone (circled in red) and then click the “Submit
Date/Time/Time zone Changes” button (circled in blue). Under the heading Network Time
Protocol on this page is where you can set an internal or public NTP Server address.
NIST.gov keeps a list of public NTP servers which you can find by following this link:
http://tf.nist.gov/tf-cgi/servers.cgi
(note: you will need to enter the IP Address of the server
you wish to use in the field provided unless you have enabled DNS in the DASDEC-II
network setup). After entering the IP Address of the NTP server you wish to use in the field
provided (circled in green) click on the Check Box (circled in yellow) to enable NTP (note –
you may need to check, clear and check the box again to properly turn on this service and
set the time).
4)
Your DASDEC-II should now display the correct date and time on the front panel display. As
long as the NTP server you have selected remains active and reachable by the DASDEC-II
you should not need to adjust the clock for drift or Daylight Savings Time.