2 1 3 4 x – Digital Alert Systems DASDEC-II QUICK START UP GUIDE User Manual
Page 5
Quick Start Guide for Your DASDEC II
Page 5 of 40
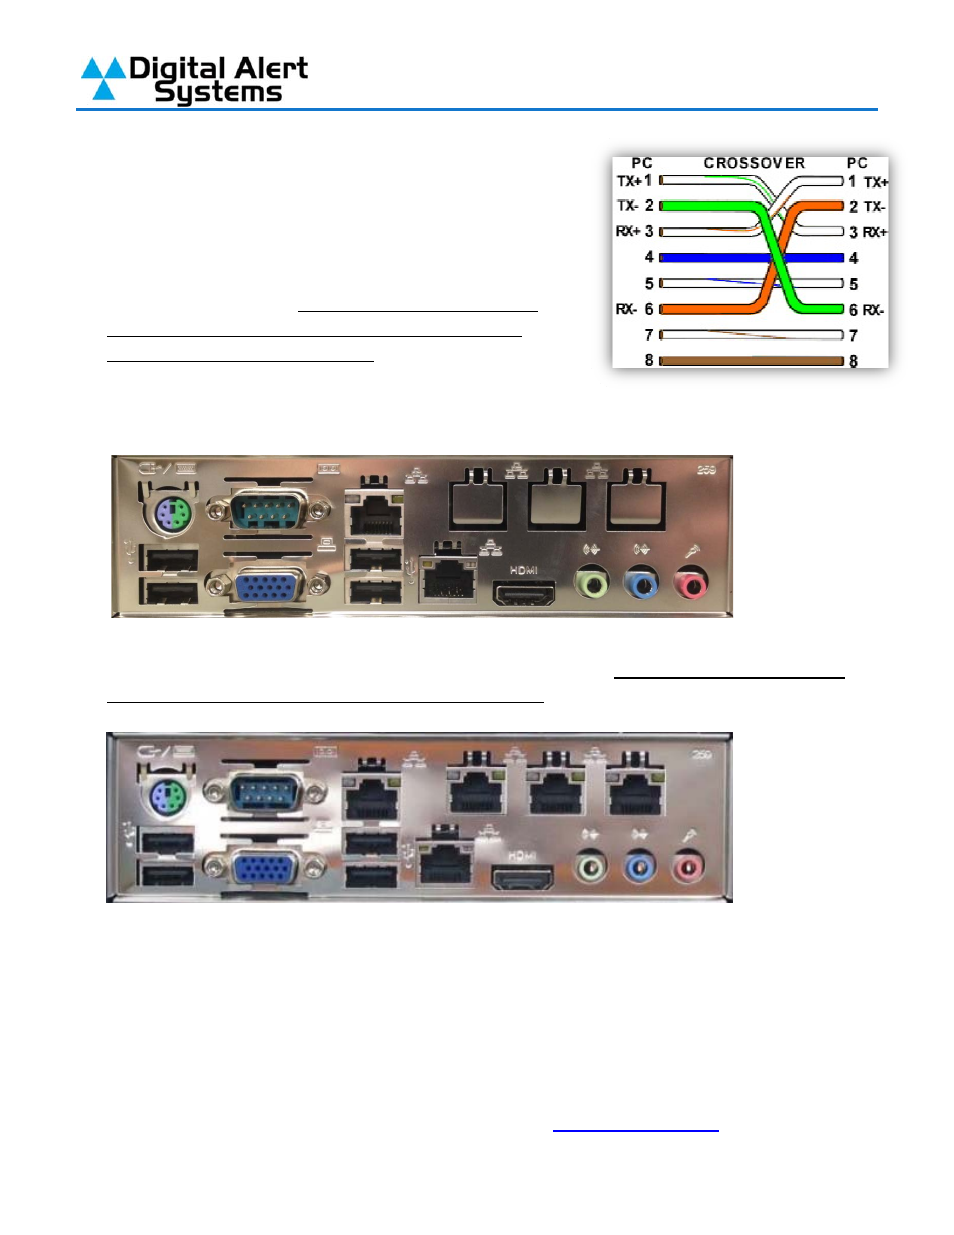
Your DASDEC-II shipped with a CAT-5 network
Crossover cable; this cable allows you to connect
directly between the network card setup in the previous
steps and the network port on the DASDEC-II. Before
directly connecting the computer and your DASDEC-II
verify you are using a crossover cable by referencing
the picture to the right. If you do not use a crossover
cable the connection will not work and one or both
network ports may be damaged.
4)
Plug one end of the network crossover cable that your DASDEC-II was shipped with into the
computer. Plug the other end into Network Port 1 on the back of the DASDEC-II.
If the optional EXP-3NICGIG Gigabit Ethernet Expansion is installed, there is a third and
fourth network interface available (as shown in figure below). Note: Although a fifth port is
available the DASDEC-ll software does not support it.
5)
Turn on the DASDEC-II and wait for it to finish booting. When the DASDEC-II has finished
booting the display will show “DASDEC: ON” along with its current IP address and the
system date and time (the date and time may not yet be accurate).
6)
On the computer launch an Internet Browser such as Firefox or Internet Explorer (the
browser may indicate it cannot find your home page, this is normal). In the address bar of
your browser enter the IP Address of the DASDEC-II:
http://192.168.0.200
, this will bring you
2
1
3
4
X