Digital Alert Systems DASDEC-II QUICK START UP GUIDE User Manual
Page 6
Quick Start Guide for Your DASDEC II
Page 6 of 40
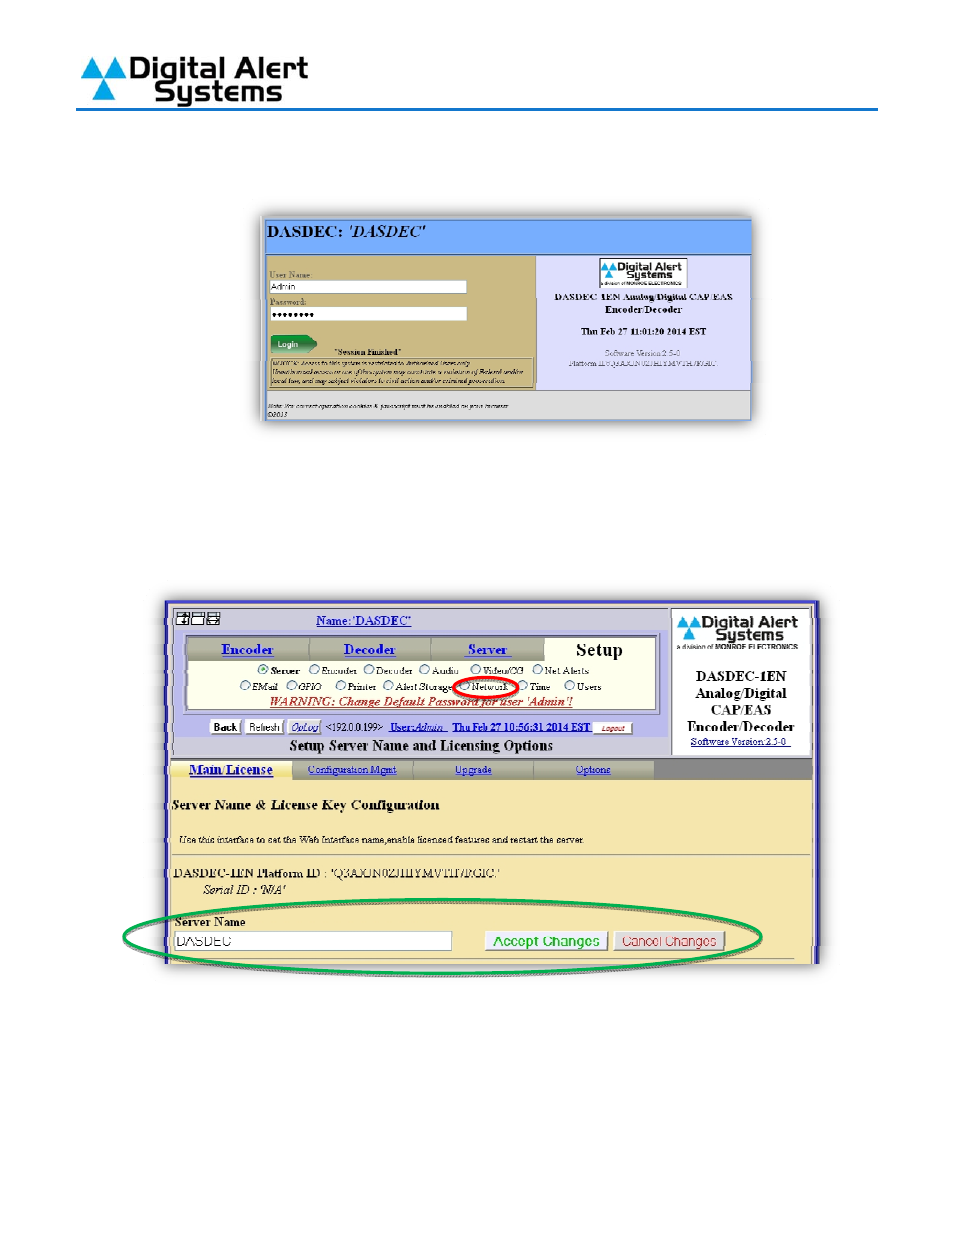
to the DASDEC-II’s login page. Enter the default user name “Admin” and default password
“dasdec”, and then click “Login”.
7)
The first time you log into the DASDEC-II it will bring you to the “Setup > Server” page. On
this page you can change the display name (circled in green) of your DASDEC-II; this unit is
named “DASDEC”. After changing the name and clicking “Accept Changes”, click on the
“Network” radio button (circled in red).
8)
On the “Setup > Network” page enter a network hostname for the DASDEC-II (circled in red).
Next, set the “Network Type” to “Static” (circled in blue), the “Network Speed” (above the
Network Type) is recommended to be set to “Automatic”, enter the IP Address you want the
DASDEC-II to use in the “IP Address” field (circled in black) and your networks Subnet mask
(likely to be 255.255.255.0). (The following screenshot shows a unit using one network
interface, with a static IP address) Then enter the IP Address of your networks Internet