Quick start guide for your dasdec-ii, Step 1 – setting the ip address – Digital Alert Systems DASDEC-II QUICK START UP GUIDE User Manual
Page 4
Quick Start Guide for Your DASDEC II
Page 4 of 40
Quick Start Guide for Your DASDEC-II
The official Digital Alert Systems manual for your EAS system can be found here:
http://www.digitalalertsystems.com/pdf/DASDEC_II_manual.pdf
Step 1 – Setting the IP Address
When the DASDEC-II is shipped from the factory its IP Address is set to 192.168.0.200 by
default, in most cases this IP address will need to
be changed. To change the IP address, a
computer whose IP setting can be changed will be
required.
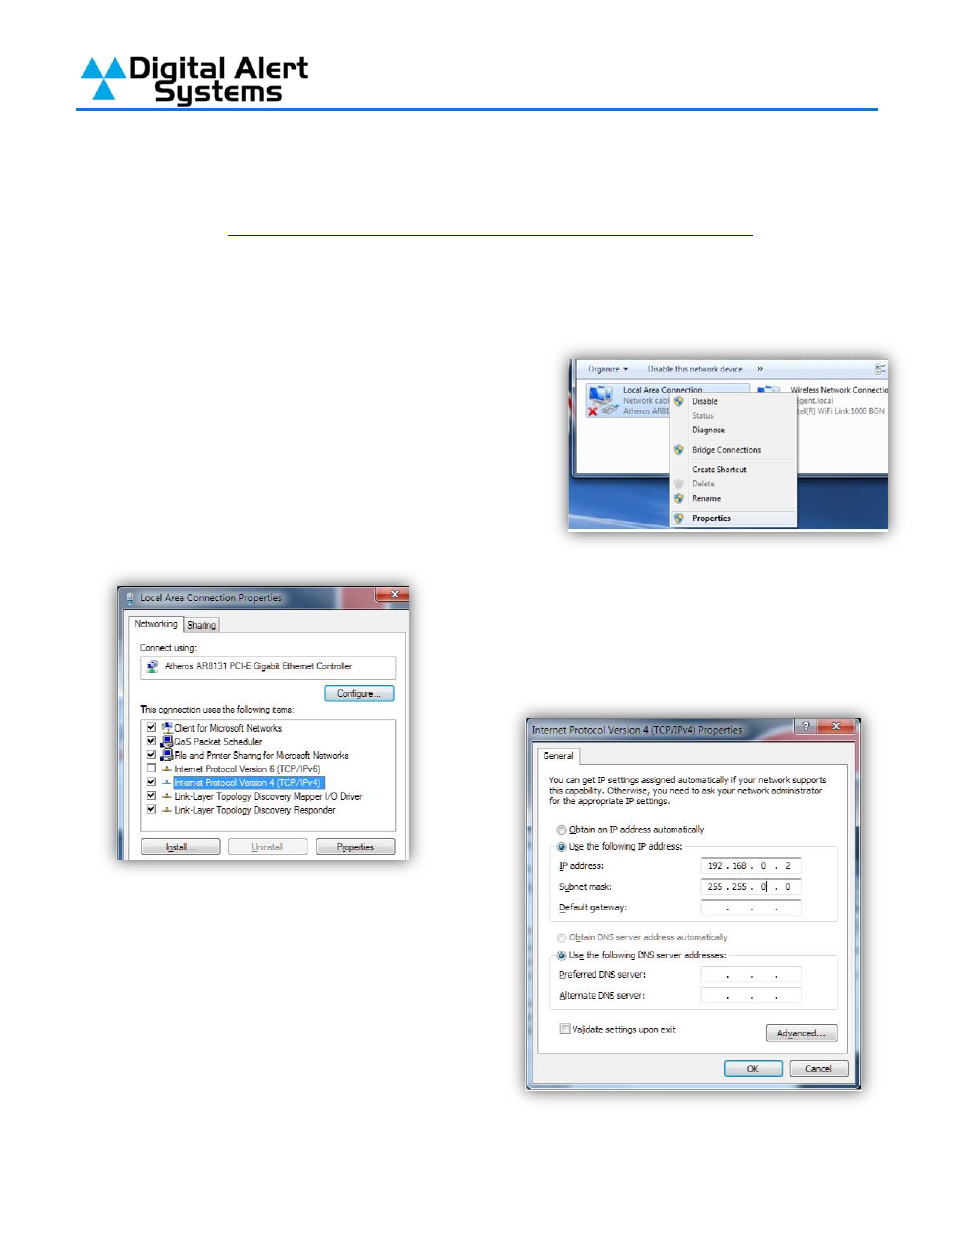
1)
On the computer (Windows 7 for this example)
open “Control Panel”, and then open “Network and
Sharing Center”. On the left, click on Change
adapter settings. Right click on the network
connection you will be using to complete the setup
and select properties.
2) From the Network Connection Properties
screen click on “Internet Protocol Version 4
(TCP/IP), then click on the “Properties” button.
3)
Make a note of the current settings in the
“Internet Protocol Version 4 (TCP/IP)”
properties page that opens so you can reset
the computer to these settings after setting
the IP Address of the DASDEC-II. Next, click
the Radio Button for “Use the Following IP
Address”. In “IP Address” field enter
192.168.0.2. In the “Subnet Mask Field” enter
255.255.0.0. Leave the “Default Gateway”,
“Preferred DNS Server” and “Alternate DNS
Server” fields blank. Click OK and close the network connection properties page.