Working with secure desktop – equinux VPN Tracker 8.1.1 User Manual
Page 24
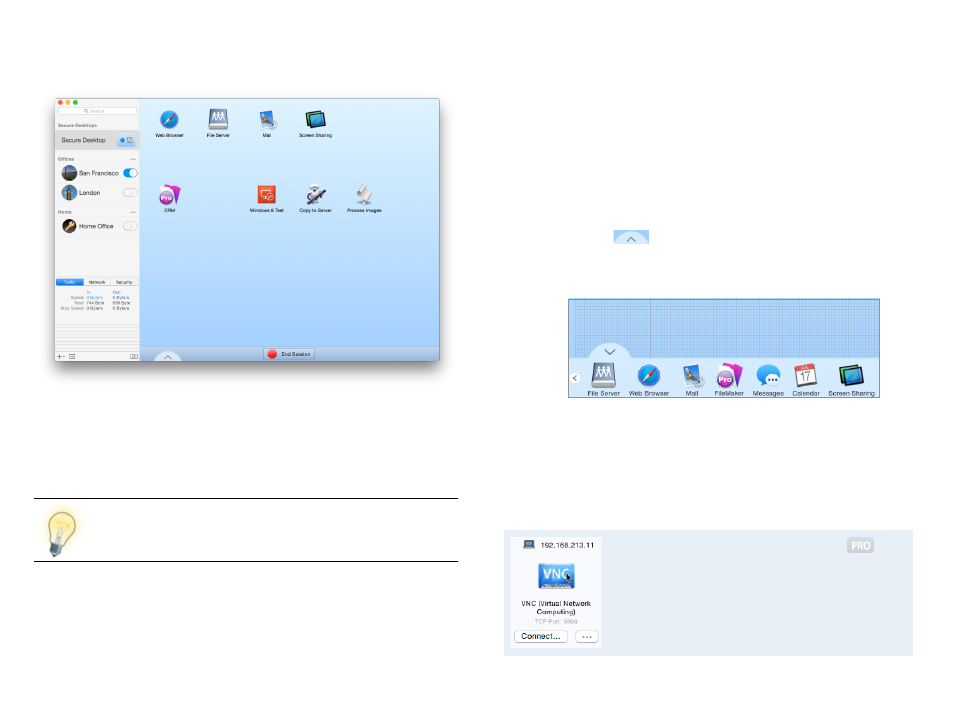
Working with Secure Desktop
Starting a Secure Desktop Session
Click one of the icons on your Secure Desktop to start working with that ap-
plication, file server or website. VPN Tracker will automatically connect any
necessary VPN connections, and then open your application, connect to your
file server, website, etc.
To use Secure Desktop when your Mac is physically connected to
your VPN’s remote network (e.g. at the office), teach VPN Tracker
to recognize your remote network using
Ending a Secure Desktop Session
Once you’re done working over VPN, simply end your session by clicking the
large red button at the bottom of the window. VPN Tracker will take care of
disconnecting file servers and disconnecting your VPN.
Multiple Secure Desktops
You can have more than one Secure Desktop (e.g. for different clients, de-
partments or tasks). To add a new Secure Desktop, choose File > New Secure
Desktop from the menu bar on top of your screen.
Editing Your Secure Desktop
You can easily add, modify or remove Secure Desktop items.
To edit your Secure Desktop:
‣ Select the Secure Desktop that you would like to edit.
‣ Click the triangle
at the bottom to switch to edit mode
‣ A drawer with new items will open. Drag an item to your Secure Desktop to
add it. Or drag an existing item outside your Secure Desktop to remove it.
Adding Items from the Network Scanner
You can add new items to your Secure Desktop right
from the Network Scanner!
Just click the … button and choose “Add to Secure
Desktop”, or drag the services straight to a Secure
Desktop in the sidebar.
24