Charging the battery – Fronius Selectiva 8 kW User Manual
Page 20
18
Charging the battery
Charging
Plug the charger into the electrical mains supply.
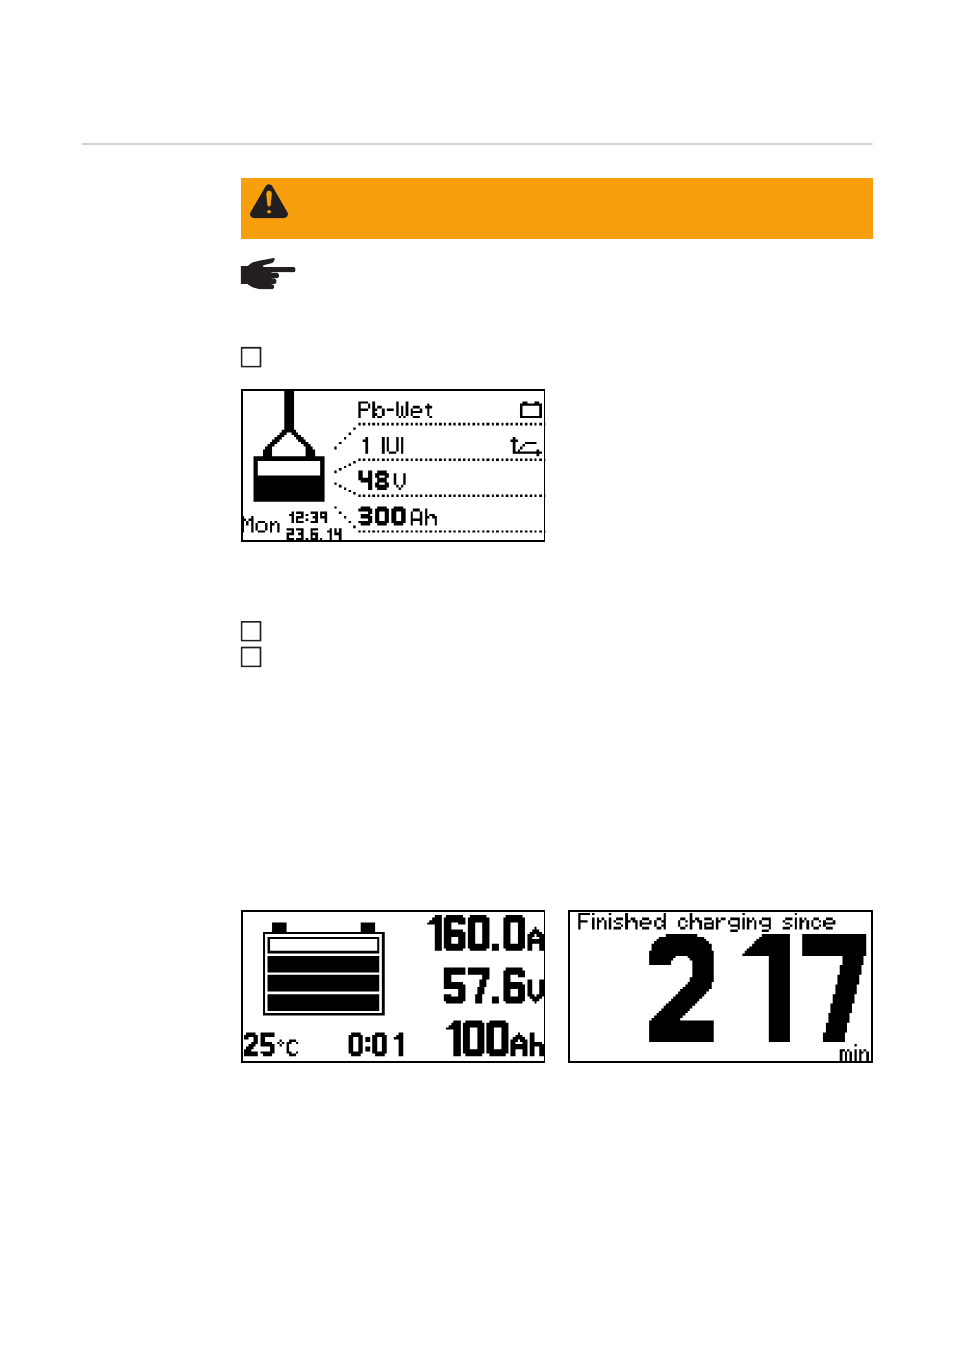
The display appears in standard mode. The
monitor displays the charging parameters:
-
Type of battery (e.g. wet)
-
Charging characteristic (e.g. IUI)
-
Battery voltage (e.g. 48 V)
-
Capacity (e.g. 300 Ah)
-
Day of the week, date and time
The charging parameters can be set individually. For more information, see "Configuration
mode" in the "Display" section.
Connect (+) charger lead to positive pole on battery or connect charging plug
Connect (-) charger lead to negative pole on battery or connect charging plug
The charger detects that the battery is connected and starts charging. If start-up delay is
activated, then charging will start at the end of the set delay time. For more information,
see "Configuration mode" in the "Display" section.
During the charging process the display shows the following values:
-
Current charging current (A)
-
Current charging voltage (V)
-
The charge already input (Ah)
-
Battery temperature with the "temperature-controlled charging" option
-
The time (hh:mm) since charging started
The battery symbol indicates the current state of charge. The greater the number of bars
that are displayed, the further advanced the charging process is. As soon as the battery is
fully charged, a minute counter will appear (see figure on right). This counts the minutes
since the end of charging; when a number of chargers are being used, this makes it easier
to decide which battery will have already cooled down most.
WARNING! Danger of serious injury or damage from battery acid escaping or ex-
plosion if faulty batteries are charged. Before charging, ensure that the battery to
be charged is fully functional.
NOTE! The device may be damaged if the charging plug contacts are very dirty.
The resulting increase in contact resistance can lead to overheating and subse-
quent destruction of the charging plug. Keep the charging plug contacts free from
impurities and clean them if necessary.
1
2
3