Ivoclar Vivadent UTS 3D User Manual
Page 13
13
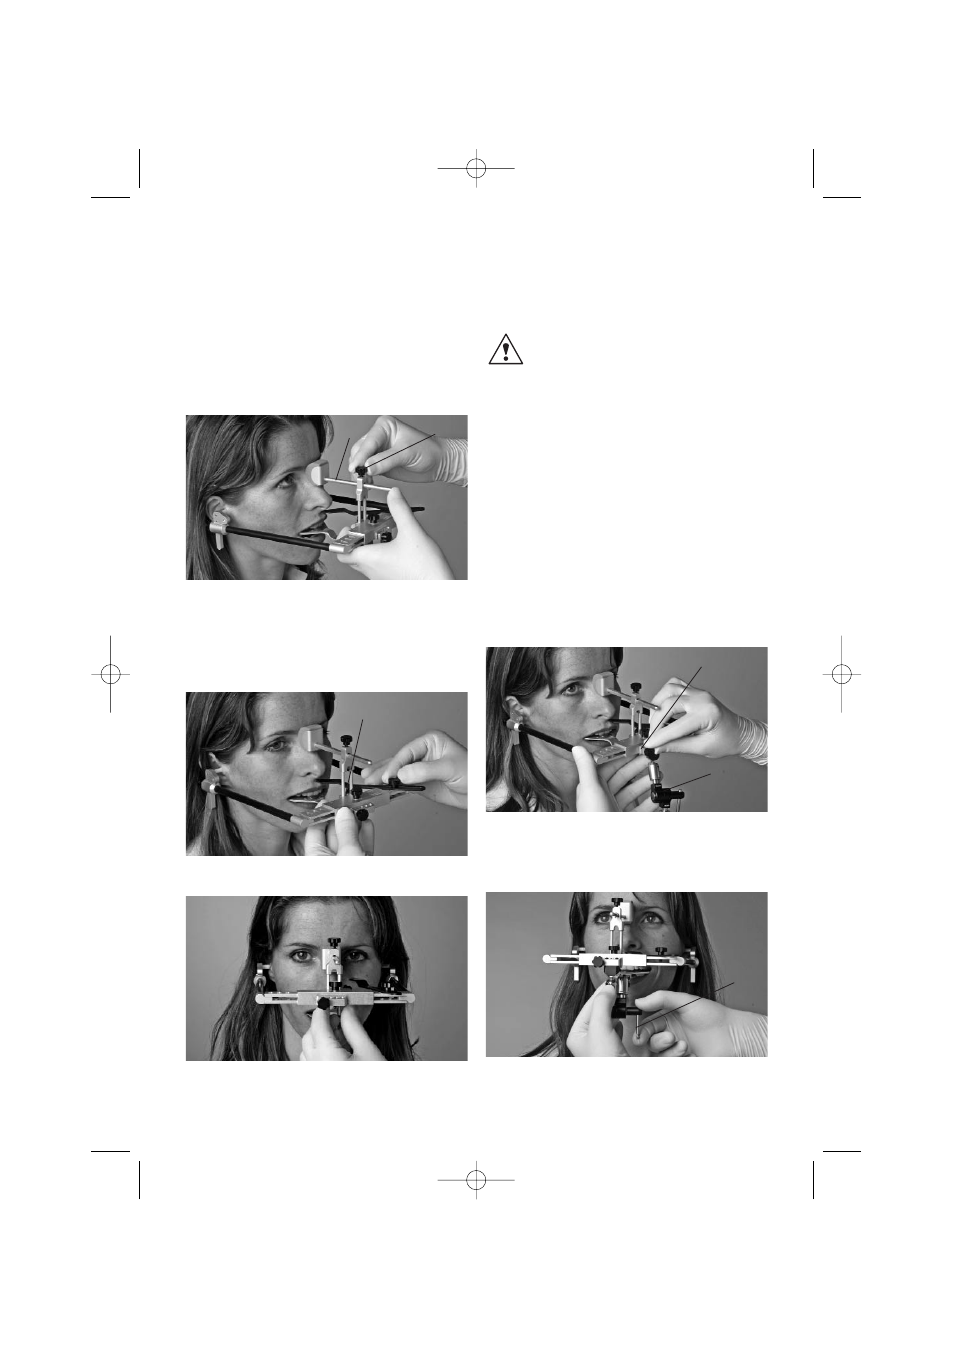
6.4
Positioning the nosepiece
With the 'nosepiece' screw open (2.4), exert slight
pressure with the thumb to position the nosepiece rod
(2.2) on the glabella so that the bow sits firmly.
6.5
Aligning the transferbow
Align the transferbow by vertical adjustment of the
nosepiece, pointing with the reference indicator either at
the spina nasalis (for CP) or at the orbital point (for FH).
CP version = spina nasalis
FH version = orbital point
When manipulating the reference indicator
(3.0), make sure to observe a certain distance to
the eye of the patient in order to prevent injury.
6.6
Other versions
By means of the vertically adjustable earpieces, the UTS
3D-transferbow is also suitable for model transfer
according to specific coordinates. Please refer to the
literature for further details on this subject.
6.7
Securing the 3D-registration joint
Check again if the transferbow is tightly positioned with
regard to the relevant reference points. Attach the 3D-
bite fork (8.0) to the open 3D-registration joint (7.0) and
position the 3D-bite fork on the mandibular tooth row.
Additional support for the 3D-bite fork may be provided
by cotton rolls. The 3D-registration joint (7.0) is now
secured at the 3D-registration joint connection (1.8).
Tighten the tommy screw (7.2) for the rotary joint.
The registration procedure is now complete and the
corresponding parameters are recorded in the 3D-
registration joint.
1.10
1.8
7.0
7.2
2.4
2.2
UTS 3D-BA-WE1.qxd 07.04.2005 15:27 Uhr Seite 13