Basic settings, Setting the time, Using the timer – Marantz M-CR502 User Manual
Page 19
15
NAMES AND FUNCTIONS
BASIC
CONNECTIONS
BASIC
OPERA
TIONS
BASIC
SETTINGS
PRACTICAL
CONNECTIONS
ADV
ANCED
OPERA
TIONS
IF YOU EXPERIENCE
PROBLEMS
MISCELLANEOUS
BASIC
SETTINGS
ENGLISH
SETTING THE TIME
Operations are performed using the remote
controller.
1.
2. 3.
1. 2.
3. 4.
1.
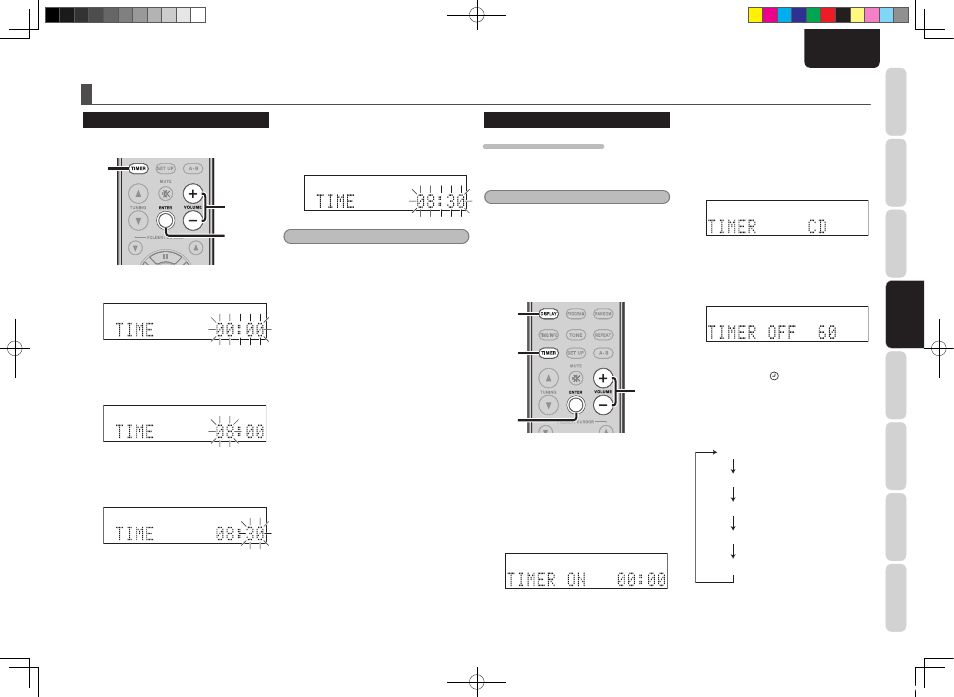
Select “TIME” by pressing the TIMER
button and then press the ENTER button.
2.
Adjust the hour setting using the VOLUME
+/– buttons while the hour indicator is
flashing on the display panel and then
press the ENTER button.
3.
Adjust the minute setting using the
VOLUME +/– buttons while the minute
indicator is flashing and then press the
ENTER button.
BASIC SETTINGS
4.
Confirm the time setting and exit time
setup by pressing the ENTER button while
the hour and minute indicators are flashing.
The hour and minute indicators will switch
from flashing to constantly lit at this time.
Note:
The time setting is invalid if the time is not entered
or the ENTER button is not pressed within 10
seconds while the hour and minute indicators are
flashing.
USING THE TIMER
SETTING THE WAKE-UP TIMER
This function turns on the power of this unit and
plays the selected input source when the specified
time arrives.
Notes:
• Be sure that the unit has been set to the correct
time before setting the timer.
• Be sure that a CD has already been loaded
beforehand if the input source for the timer is set
to CD.
• Be sure that a USB device that contains MP3 or
WMA music files has already been connected
beforehand if the input source for the timer is set
to USB.
7.
1.
1. 2.
3. 4.
5. 6.
2. 3.
4. 5.
6.
1.
Press the TIMER button twice, select
“TIMER,” and then press the ENTER
button.
2.
Select “ON” using the VOLUME +/– buttons
while the “OFF” indicator is flashing and
then press the ENTER button.
3.
Set the hour setting using the VOLUME +/–
buttons while the hour indicator is flashing
and then press the ENTER button.
4.
Set the minute setting using the VOLUME
+/– buttons while the minute indicator is
flashing and then press the ENTER button.
5.
Set the input source for the timer using the
VOLUME +/– buttons while the input source
is flashing and then press the ENTER
button.
6.
Set the activation time for the timer using
the VOLUME +/– buttons and then press the
ENTER button. This ends timer setup.
The set time can be selected from 30 to 90
minutes in 10 minute intervals.
• Cancel the timer by selecting “OFF” in
Step
2.
above. This will cancel the timer
and cause the indicator on the display
panel to go out.
7.
Check the timer setting by pressing the
DISPLAY button on the remote controller.
The display shows the following each time
the DISPLAY button is pressed.
Current input source
Current time
Set time for the wake-up timer
Input source for the wake-up timer
Activation time for the wake-up timer
M-CR502N_01_ENG.indd 15
08.8.7 5:28:24 PM