Installation instructions, Warning, Notices – Paloma PHH-32 part 2 User Manual
Page 7: Notice, Venting, Vertical vent installation, Air intake condensate trap
43
Venting
INSTALLATION INSTRUCTIONS
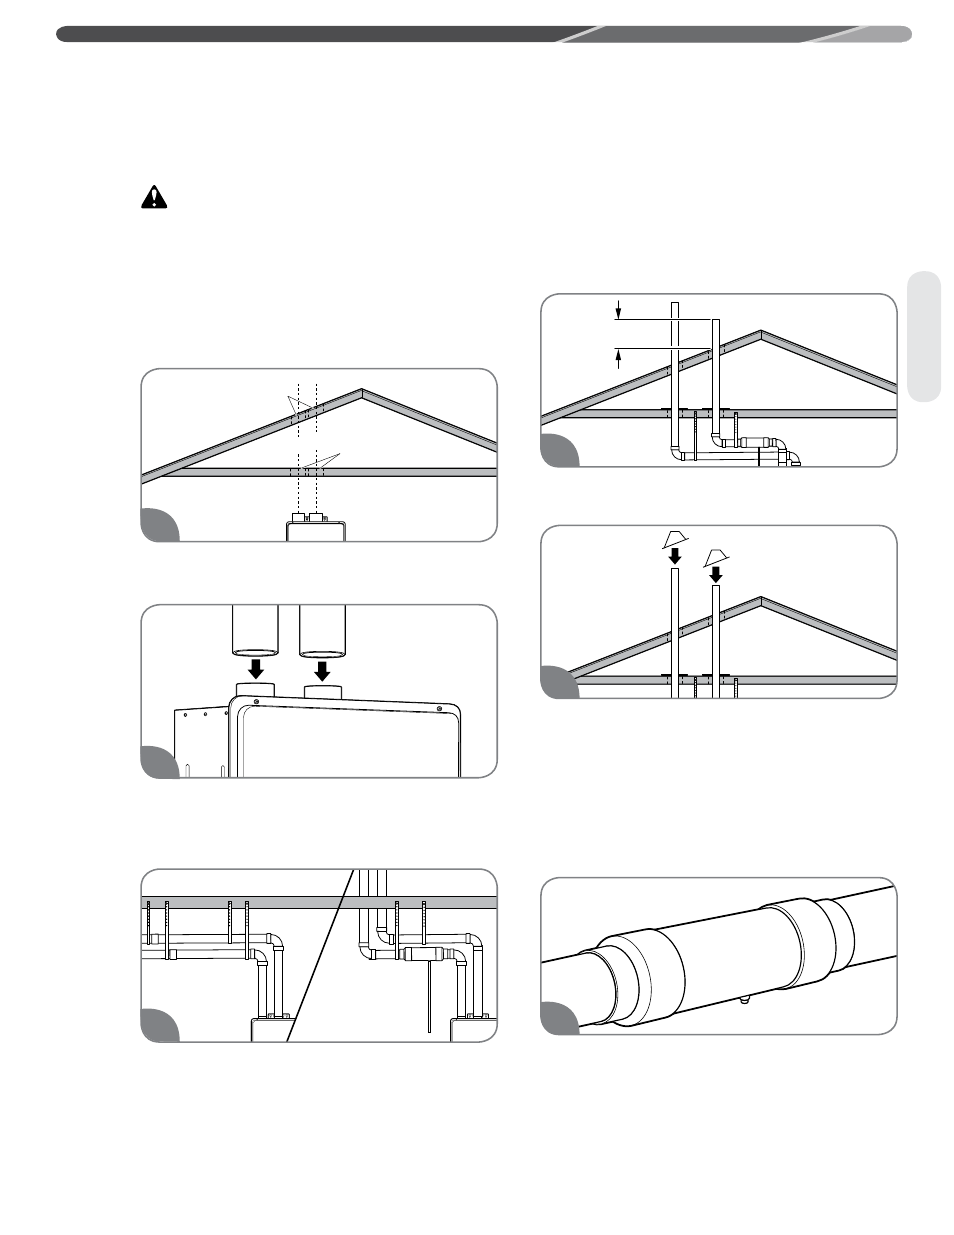
Vertical Vent Installation
WARNING:
Improper vent
installation can result in death, personal injury,
product damage, and/or poor performance.
NOTICES:
• Only Rheem-approved termination and parts
should be used during installation.
• Maintain the recommended air space clearance
to combustible materials and building insulation.
Cut a hole through the roof and interior ceiling to
accommodate the vent pipes.
Complete the vent pipe installation to the water
heater’s vent connector fittings. Use cleaner-
primer and PVC cement where the vent pipes
join the water heater.
Support vertical and horizontal runs as
described on page 35. Vertical supports are
required every 4 ft. (1.2 m) along a vertical pipe
route, after every transition to vertical, and after
every offset elbow.
NOTICE:
Free-standing vent pipe that
penetrates a roof/ceiling requires another means of
support from a second location.
Determine the vent terminal height and install
the vent pipe accordingly. Refer to “Vertical Vent
Terminal Location” on page 44 for clearance
requirements.
Install adequate flashing where the vent pipe
passes through the roof.
Air Intake Condensate Trap
For vertical terminations or where the air intake
pipe slops down towards the water heater, it is
recommended to install a drain tee assembly. This
is to prevent any condensate or liquid water from
entering the intake of the water heater. Connect
the trap drain line to a suitable drain. Do not
connect it directly to the condensate drain line
from the water heater.
One trap method: Glue a 3” by 4” adapter
coupling to each end of a 4” PVC pipe length.
Drill a ½” hole in the side of the larger diameter
pipe. Tap and thread for a ½” barbed fitting,
install fitting. Install the collector with the fitting
facing down. Connect a drain hose to the fitting
and clamp, run hose to a suitable drain.
Hole
Through Roof
CL
Hole
Through Ceiling
CL
1
2
A, B, C, D
4
5
3
1