QuickLabel CU-30 User Manual
Page 27
23
10
Attach the new cutter blade to the support blocks
using the four Phillips screws removed in step 9.
Ensure that the cutter blade is against the two
locating brackets on the support blocks.
11
Position the replacement cutter-blade assembly for
installation and reattach the assembly to the cutter
using the two Flat-head screws that were removed
in step 8.
Ensure that the cutter-blade assembly is straight
and that the assembly’s cutting action is linear.
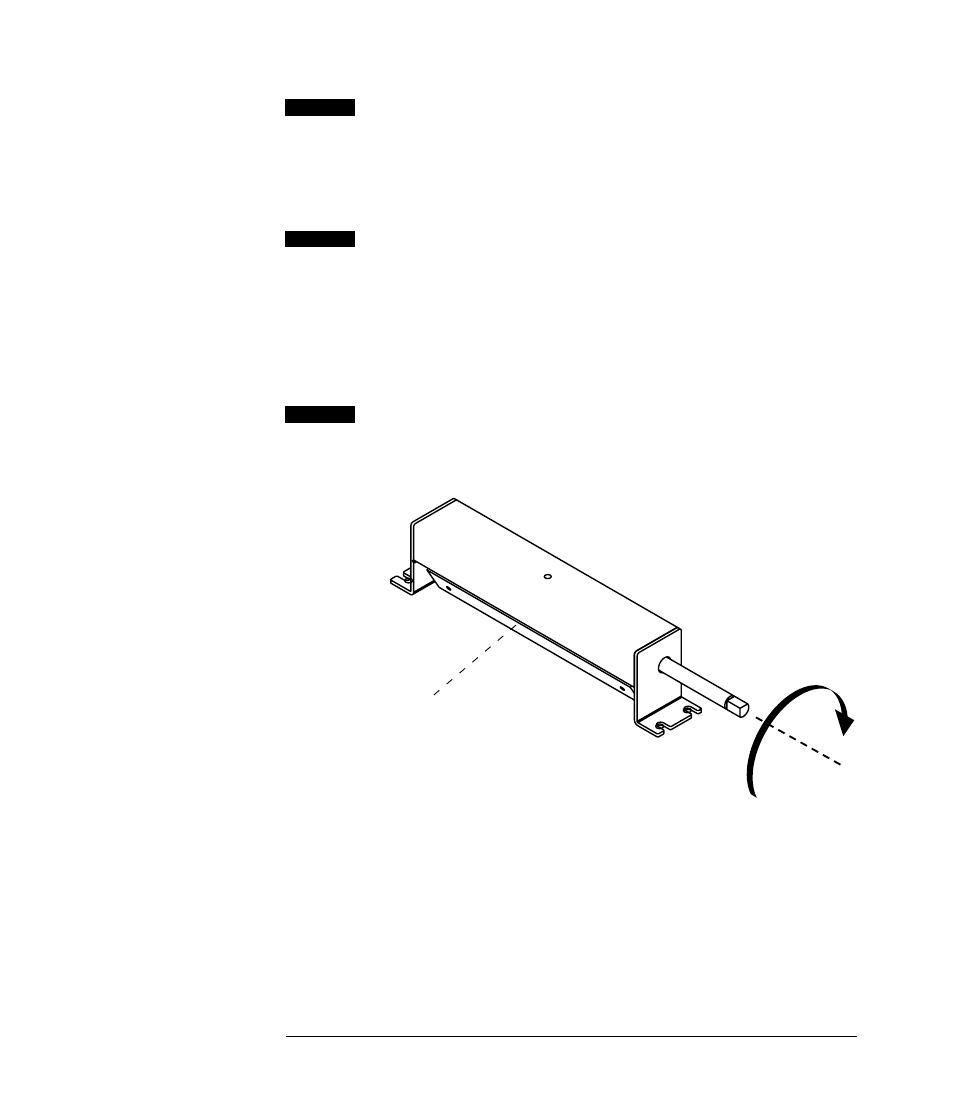
12
Adjust the position of the cutter blade by rotating
the cutter-blade shaft until the blade is lifted so that
you can clearly view daylight beneath the blade.
This adjustment is necessary to ensure that the
cutting edge of the blade will have maximum
momentum when cutting begins. The more mo-
mentum the cutting blade has, the greater its ability
to sever the tag stock when making its initial cuts.
check that light is visible
adjust the orientation
of the cutter blade