Remote control (tascam rc-10), 2 – names and functions of parts – Teac DR-100MKII User Manual
Page 15
TASCAM DR-100MKII
15
2 – Names and Functions of Parts
m
AUTO/LIMITER switch
Set this to ON to activate the automatic gain control or
limiter. (See “Using the level control function” on page
32.)
,
+48V (phantom power) switch
Turn this ON to provide +48 V of power when a
condenser mic is connected to the XLR (MIC/LINE 1) IN
L/R connector.
CAUTION
Do not connect or disconnect mics when the +48V switch
is ON.
.
SPEAKER switch
Set this to ON to output sound from the built-in
speaker.
NOTE
Even when ON, no sound is output during recording, in
recording standby or when headphones are connected.
/
Tripod attachment screw hole (1/4-inch)
Use this to attach the unit to a tripod or mic stand.
CAUTION
Tighten the unit securely to the tripod or mic stand to
•
prevent it from falling off.
Place the tripod or mic stand on a level surface when
•
using it with this unit.
Some tripods use different types of screws, so it might
•
not be possible to attach the unit directly. In such a case,
purchase and use a suitable adapter.
Screws longer than 4.5 mm cannot be used with this.
•
!
Battery compartment cover
@
AA battery compartment
This compartment can hold two AA batteries that can
power the unit. (See "Using AA batteries” on page 20.)
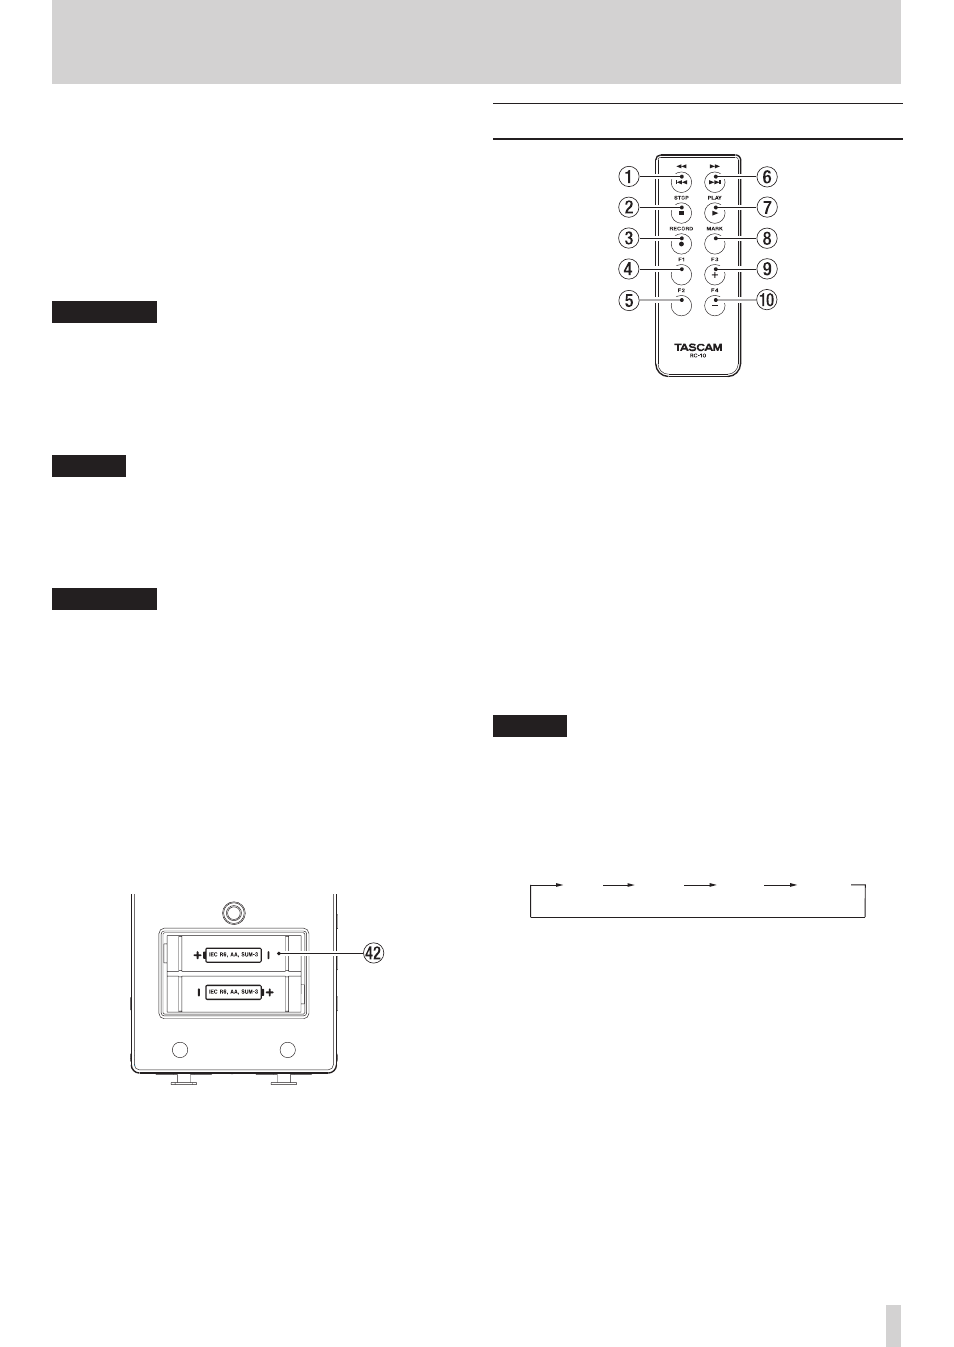
Remote control (TASCAM RC-10)
1
m/. button
Press this button briefly to return to the start of a file.
If the playback position is already near the start of a
track, it will skip to the start of the previous file.
Press and hold this to search a track in reverse.
2
STOP [8] button
Press to stop playback and recording.
3
RECORD [0] button
Use to start recording standby and recording, as well as
to pause recording.
4
F1 button
Use this with the automatic recording function. Unlike
the button on the main unit, this button alone can put
the unit into recording standby.
NOTE
Use the main unit to make various AUTO REC function
settings.
5
F2 button
Use to set the low-cut filter. Each time you press this
button, the setting value changes as shown below. (See
“Making analog input settings” on page 30.)
OFF
40 Hz
80 Hz
120 Hz
6
,// button
Press this button briefly to move to the start of the next
file. Press and hold this to search a track forward.
7
PLAY [7] button
Press to start playback.
8
MARK button
Press during recording or playback to add a mark
manually.
9
F3 button
This has the same function as the I/O LOOP button on
the recorder. (See “Loop playback” on page 45.)
0
F4 button
Use to switch the backlight setting between
ALWAYS
(always lit) and
OFF
(always unlit). (See “Automatic