Adjusting the analog input level, Manually adjusting the analog input level, 4 – recording – Teac DR-100MKII User Manual
Page 31
TASCAM DR-100MKII
31
4 – Recording
Adjusting the analog input level
Before starting recording, the analog input level should be
adjusted to prevent the recorded sounds or signals from
being distorted due to excessively large input signals or
from being inaudible due to excessively low input signals
compared to noise.
In addition to manual adjustment, the unit has the
following two level adjustment functions: auto gain control
and limiter. Any of these can be used as required.
TIP
In addition to adjusting the analog input level, try changing
the distance and angle between the microphone and the
sound source. The angle and distance of the microphone
can also change the character of the recorded sound.
Manually adjusting the analog input level
The following procedures explain how to set the levels.
NOTE
When the level control function is set to auto gain control
(
appears at the top left of the recording screen), the
analog input level cannot be adjusted manually. If you
want to adjust the analog input level manually, set the
LEVEL CTRL
item to
LMT
on the
INPUT SETTING
screen. (See
“Using the level control function” on page 32.)
1 Move the MIC GAIN switch on the bottom of the
recorder to the setting you want.
MIC GAIN
L (LOW)
Use to record band performances and other loud sounds
or close sound sources.
M (MID)
Use to record acoustic guitars and wind instruments, for
example.
H (HIGH)
Use to record meetings, voices and other quiet sounds or
distant sound sources.
NOTE
The DR-100MKII has been designed with high gain to
•
enable it to record even very quiet sounds. For this
reason, if using an AC adaptor when the MIC GAIN is set
to H (HIGH), touching the mics could cause noise (hum
or modulation) to be heard depending on placement
conditions. To avoid this, do not touch the built-in mics
when recording with them.
When the input is set to
•
LINE 1/2, the MIC GAIN setting
is disabled.
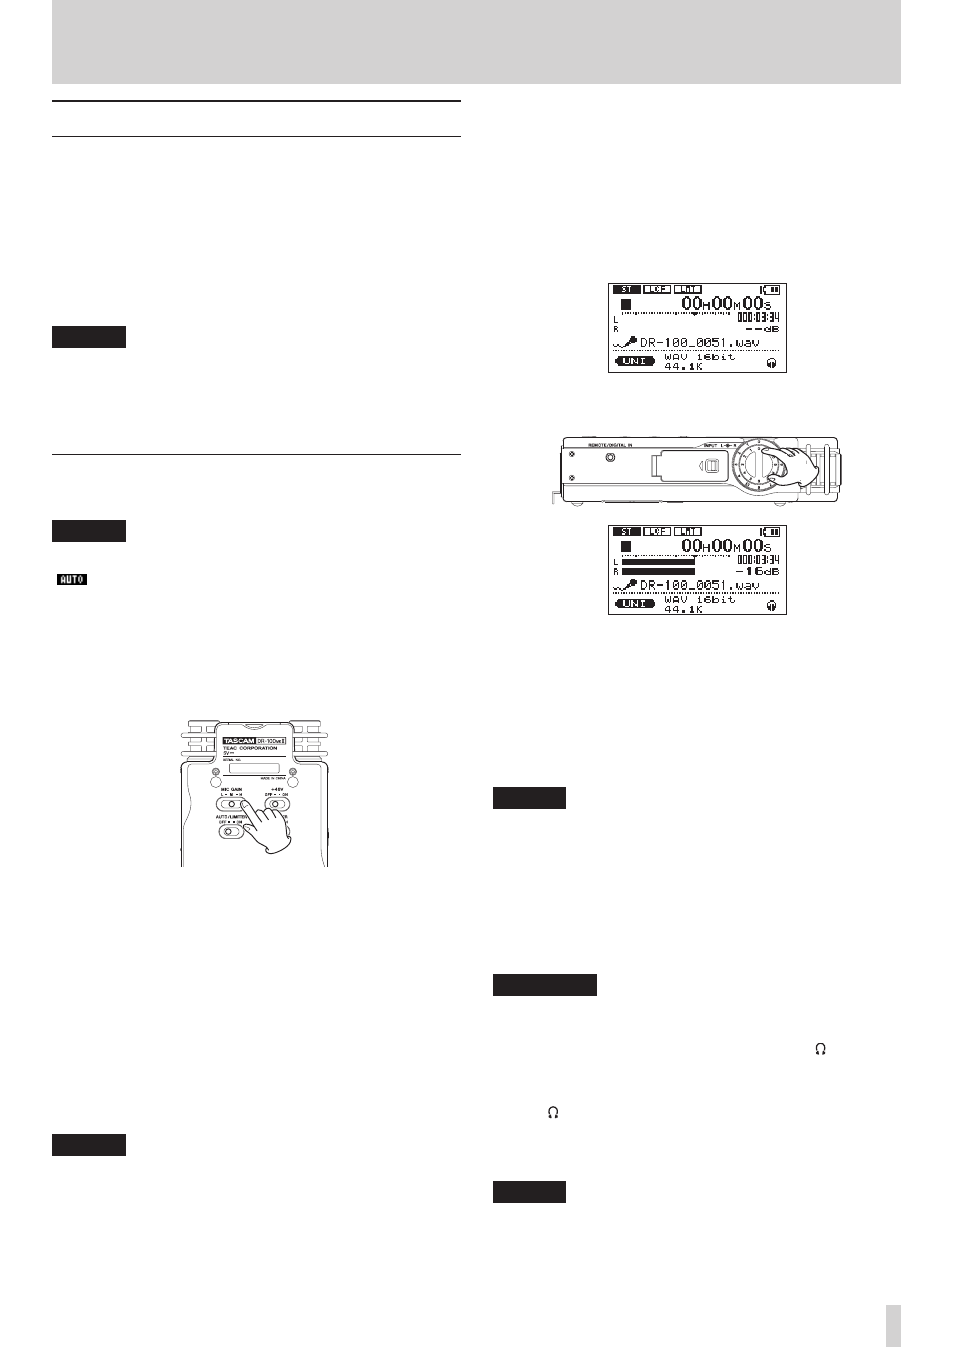
2 Press the RECORD [0] button to start recording
standby.
The RECORD indicator will blink and the recording
screen will open.
3 Adjust the analog input level using the INPUT knob
on the right side panel.
The PEAK indicator to the left of the display lights red
when the input level is too high.
A b mark is provided at –16 dB on the level meters. Set
the analog input level so that the indicator bars move
to and fro with this mark at about the center without
causing the PEAK indicator to light red when the
loudest sounds occur.
NOTE
Press the
•
STOP
[
8
]
button to exit recording standby.
When the
•
MIC GAIN switch is set to M (MID), if the
level meters do not extend very far even as the INPUT
volume setting approaches 10, set the MIC GAIN to
H (HIGH). On the other hand, if the level meters stay
extended even as the INPUT volume setting approaches
0, set the MIC GAIN to L (LOW).
CAUTION
When in recording standby or during recording, the
speaker does not output sound even if the SPEAKER
switch is enabled. Connect headphones to the jack on
the left side panel if you want to adjust the level or record
while monitoring the input.
Use the /SP OUTPUT volume control to adjust the
monitoring volume. This does not affect the sound to be
recorded.
TIP
In addition to adjusting the input volume, try adjusting
•
the distance and angles between the mics and sound
sources.