Using the level control function, Recording, 4 – recording – Teac DR-100MKII User Manual
Page 32
32
TASCAM DR-100MKII
4 – Recording
Use the auto gain control and limiter functions to
•
prevent loud sound sources from distorting when
recording. (See “Using the level control function” on
page 32.)
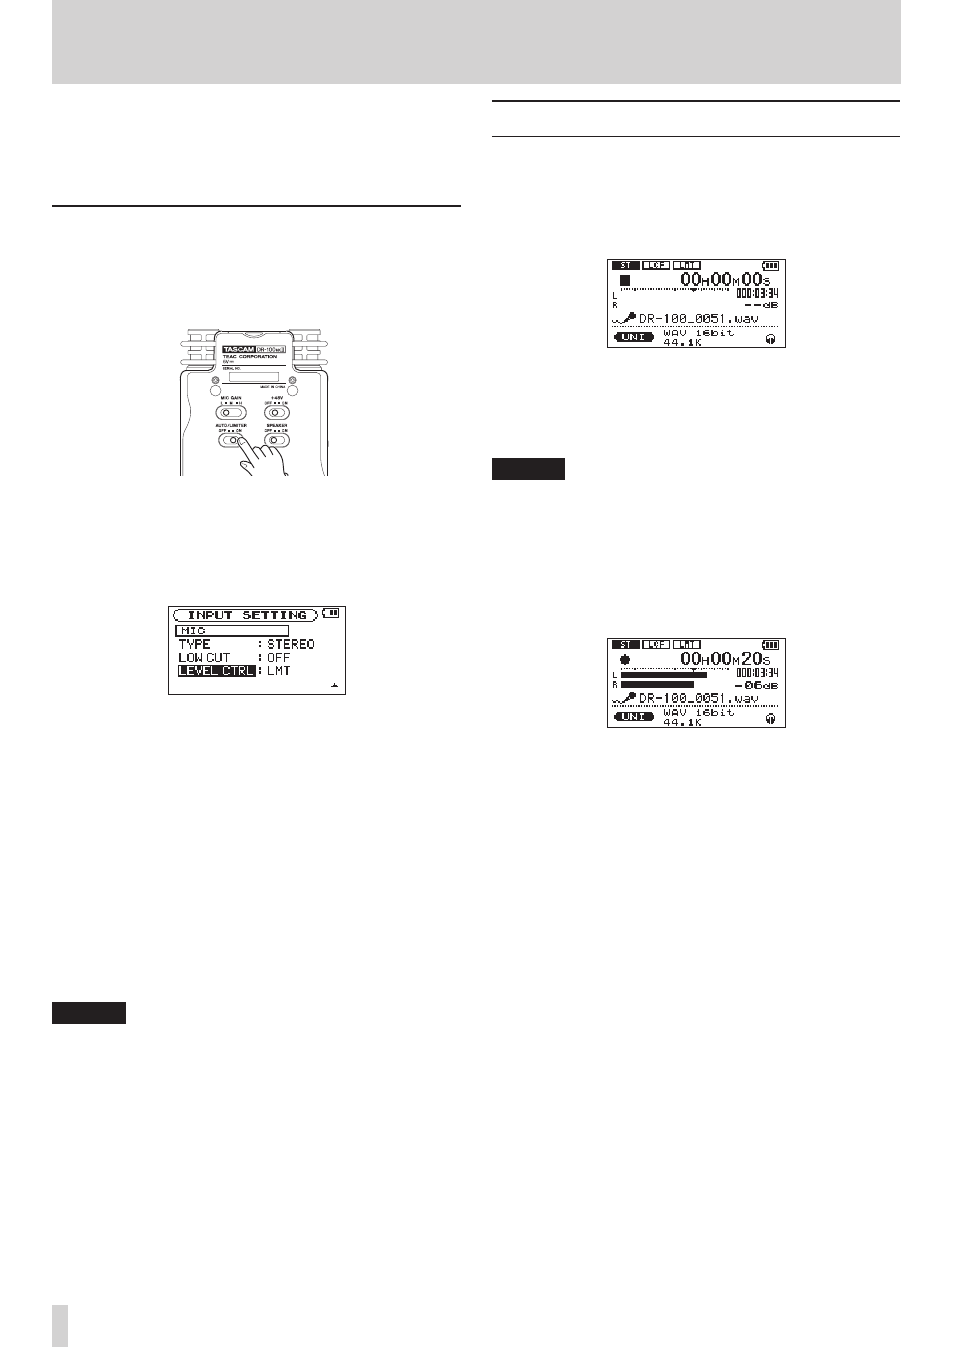
Using the level control function
Set the recording level control function to be used with
microphone input.
1 Set the AUTO/LIMITER switch on the bottom of the
recorder to ON.
2 Press the MENU button to open the
MENU
screen.
3 Use the wheel to select the
INPUT SETTING
menu,
and press the ENTER/MARK button to open the
INPUT SETTING
screen.
4 Use the wheel to open the following screen.
5 Use the . and / buttons as well as the wheel
to set the
LEVEL CTRL
item.
LMT (default)
The input gain is adjusted in response to the analog
input level, so that even if the input volume is very loud
recording will occur at a level without distortion.
AUTO
The gain is automatically adjusted to make the volume
as even as possible. The gain increases for low-level
input signals, and the gain decreases for high-level
input signals. This is useful for recording at the same
level people in a meeting who are at different distances
from the microphones, for example.
NOTE
When set to
•
AUTO
(auto gain control), the input gain is
adjusted automatically, so the INPUT volume control
has no effect.
When the input is LINE 1/2, regardless of the setting, it
•
will always function as
LMT
(limiter).
Recording
The following explanation assumes that you have already
set the input source and adjusted the analog input level
and that the Home Screen is open.
1 Press the RECORD [0] button to put the unit in
recording standby.
The screen shows the recording file name, the input
source, the recording audio file type and sampling
frequency. Please confirm that these are as desired
before starting recording.
NOTE
When the
MONITOR
item is set to
ON
on the
INPUT SETTING
screen so that input sounds can always be monitored, a
popup menu where you can turn overdubbing ON or OFF
will appear. In this case, select
OFF
before proceeding to
step 2.
2 Press the RECORD [0] button again to start
recording.
When recording starts, the RECORD indicator lights
continuously, and the display shows the elapsed
recording time and the remaining recording time.
3 Press the STOP [8] button to end recording and
create the audio file.
To pause recording, press the RECORD [0] or PLAY/
PAUSE [ y/9] button. Press the RECORD [0]
or PLAY/PAUSE [ y/9] button again to restart
recording in the same file. If you press the STOP [8]
button after pausing a recorded audio file up to the
moment that you paused recording is created.