Select the file you want to overdub, Monitoring input signals, Adjusting the input and playback sound levels – Teac DR-100MKII User Manual
Page 34: Recording an overdub, 4 – recording
34
TASCAM DR-100MKII
Recording playback and input sounds
together (overdubbing)
When an audio file is playing back, you can record the
playback sound together with the input sound. This creates
a new file and does not overwrite the playback file.
NOTE
You cannot overdub if input monitoring is OFF or the
•
PRE REC function is ON.
You cannot overdub WAV files with 96kHz sampling
•
frequency.
When overdubbing, the automatic recording function is
•
disabled.
When overdubbing, you cannot start new files manually.
•
You cannot pause during overdubbing. (You cannot use
•
the RECORD [0] button.)
The file type/sampling frequency of the playback
•
file is preserved regardless of the file type/sampling
frequency setting for overdub recording.
Select the file you want to overdub
Use the . and / buttons or the
BROWSE
screen to
select that files that you want to overdub.
NOTE
See "5 – Working with Files and Folders (BROWSE Screen)"
on page 39 for selecting files using the
BROWSE
screen.
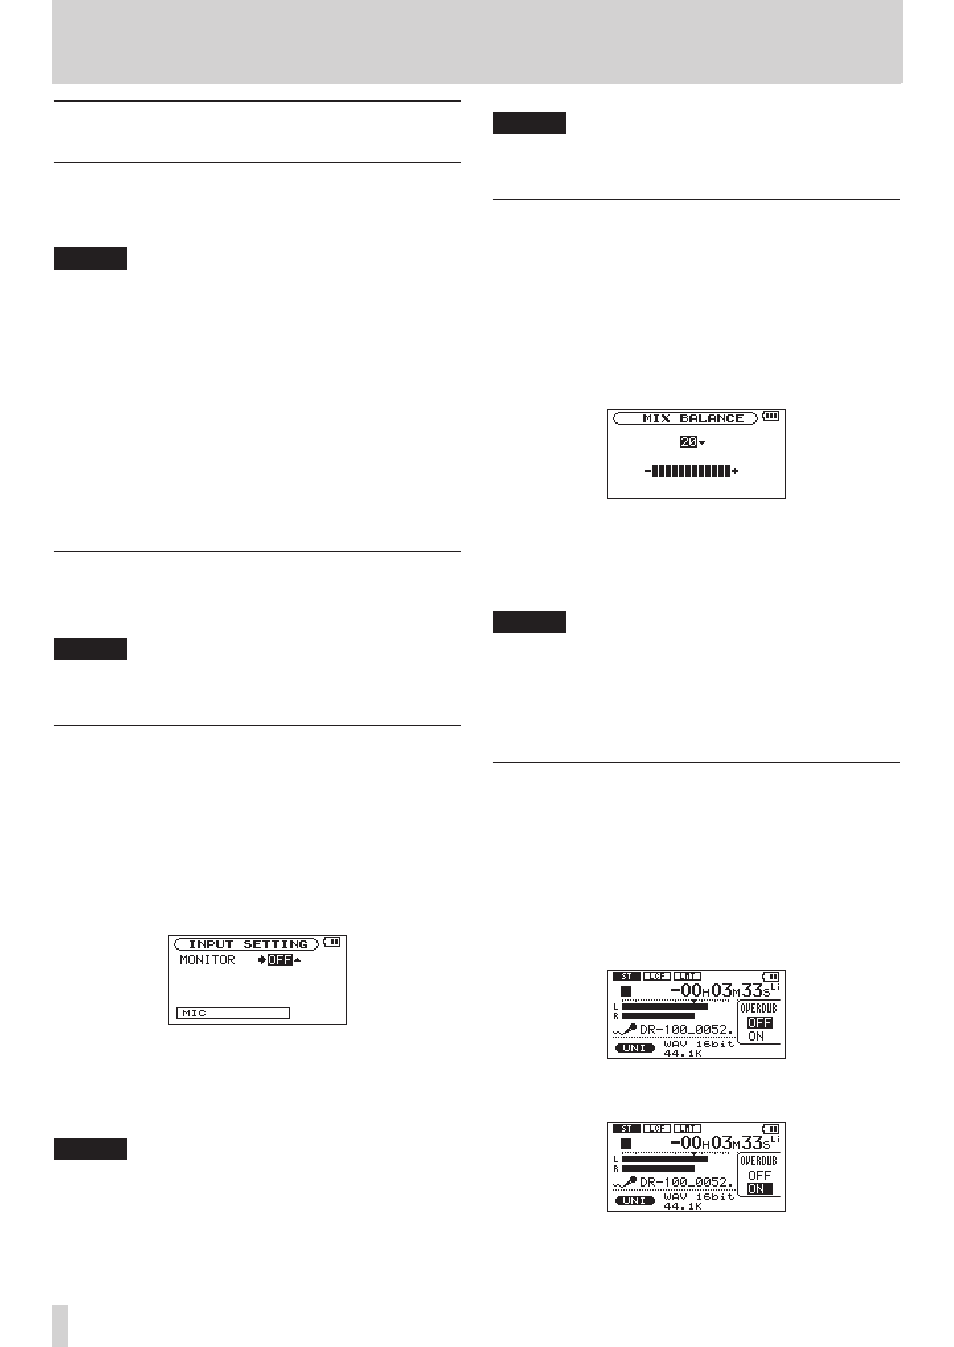
Monitoring input signals
You can set the recorder to allow listening to both the
playback and input signals at the same time.
1 Press the MENU button to open the
MENU
screen.
2 Use the wheel to select the
INPUT SETTING
menu,
and press the ENTER/MARK button to open the
INPUT SETTING
screen.
3 Use the wheel to select
MONITOR
and press the /
or ENTER/MARK button.
4 Use the wheel to set
MONITOR
to
ON
(default value:
OFF
) to enable monitoring of the input signal.
5 After completing the setting, press the HOME button
to return to the Home Screen.
TIP
In addition to overdubbing, you can also use this setting
above to practice singing or playing along with recorded (or
imported) audio files. You can even use it for karaoke.
NOTE
You cannot change this setting during recording or when
in recording standby.
Adjusting the input and playback sound
levels
1 Press the PLAY/PAUSE [y/9] button to start
playback of the file that will be output together with
the input sound.
2 Press the MENU button to open the
MENU
screen.
3 Use the wheel to select the
MIX BALANCE
menu,
and press the ENTER/MARK button to open the
MIX
BALANCE
screen.
4 Use the wheel to adjust the level of the playback
sound. The setting range is
0
–
20
(default:
20
).
5 After completing the setting, press the HOME button
to return to the Home Screen.
NOTE
You cannot adjust this when input monitoring is OFF.
•
(See “Monitoring input signals” on page 34.)
When input monitoring is ON (and during overdub
•
recording), the PEAK indicator shows the maximum
level of the combined input and playback signals.
Recording an overdub
1 Press the RECORD [0] button to start recording
standby.
A popup menu that you can use to set OVERDUB to ON
or OFF appears on the recording screen.
The name of the file being recorded, the input source,
and the format and sampling frequency of the recorded
audio file are shown on the recording screen, so you can
check them before starting.
2 Use the wheel to select
ON
in the OVERDUB OFF/ON
popup menu.
3 Press the RECORD [0] button to start overdubbing.
When recording starts, the RECORD indicator lights, and
the elapsed recording time or the remaining recording
4 – Recording