Canon PowerShot SX540 HS User Manual
Page 121
121
Before Use
Basic Guide
Advanced Guide
6
Playback Mode
7
Wi-Fi Functions
8
Setting Menu
9
Accessories
10
Appendix
Index
1
Camera Basics
2
Auto Mode /
Hybrid Auto Mode
3
Other Shooting Modes
4
P Mode
5
Tv, Av, and M Mode
10
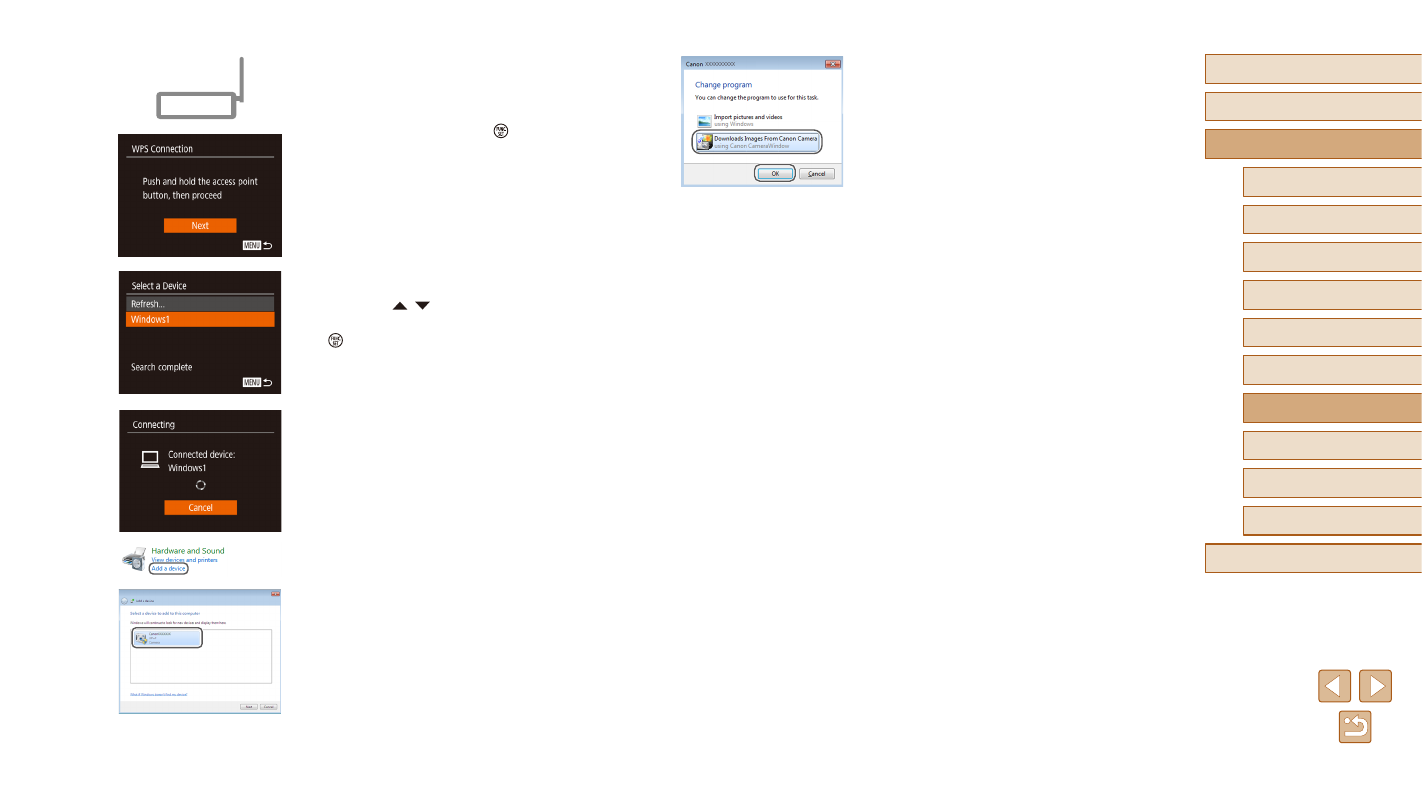
Display CameraWindow.
●
Windows: Access CameraWindow by
clicking [Downloads Images From Canon
Camera].
●
Mac OS: CameraWindow is automatically
displayed when a Wi-Fi connection is
established between the camera and
computer.
11
Import images.
●
Click [Import Images from Camera], and
then click [Import Untransferred Images].
●
Images are now saved to the Pictures
folder on the computer, in separate
folders named by date.
●
Click [OK] in the screen that is displayed
after image import is complete.
●
To look at a image saved on your
computer, use a software (such as one
installed on your computer by default or
general software) that supports images
shot with a camera.
7
Establish the connection.
●
On the access point, hold down the WPS
connection button for a few seconds.
●
On the camera, press the [ ] button to
go to the next step.
●
The camera connects to the access point
and lists devices connected to it on the
[Select a Device] screen.
8
Choose the target device.
●
Press the [ ][ ] buttons to choose the
target device name, and then press the
[ ] button.
9
Install a driver (first Windows
connection only).
●
When this screen is displayed on the
camera, click the Start menu on the
computer, click [Control Panel], and then
click [Add a device].
●
Double-click the connected camera icon.
●
Driver installation will begin.
●
After driver installation is complete, and
the camera and computer connection
is enabled, the AutoPlay screen will be
displayed. Nothing will be displayed on
the camera screen.