Recording/playback – Steinberg UR24C 2x4 USB Gen 3.1 Audio Interface User Manual
Page 28
Using with an iOS/iPad OS Device
UR24C Operation Manual
28
Recording/Playback
This section explains simple recording operations for
using a microphone. Connect a microphone to [MIC/
LINE 2] jack as shown in the connection examples
(
). Turn the [+48V] switch on when using a
phantom powered condenser microphone. The
explanation uses Cubasis (DAW app) as an example.
NOTE
• iOS app may not be supported in your area. Please check with
your Yamaha dealer.
• For the latest Cubasis information, see the Steinberg web site
below.
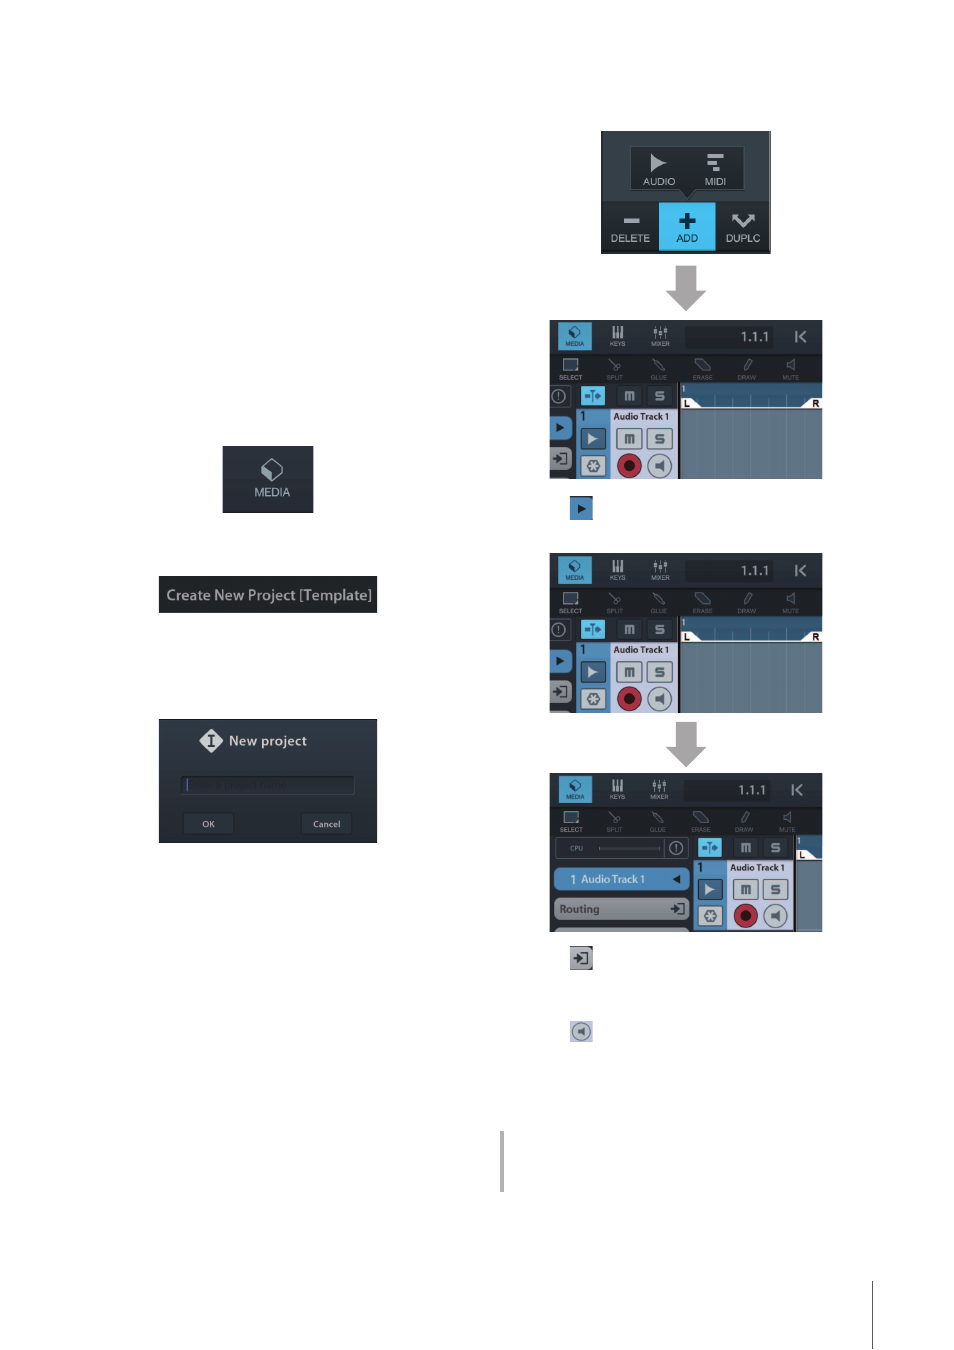
1.
Open Cubasis.
2.
Tap the [MEDIA] tab on the upper left of the
screen.
[Create New Project] is shown in the bottom of the
screen.
3.
Tap the [Create New Project].
4.
Enter a project name and tap [OK] in the
[New project] window.
5.
Tap [+ADD] on the left of the screen, then
tap [AUDIO] to add an Audio Track.
6.
Tap
on the far left of your screen to
show the track inspector.
7.
Tap
to show the details window and set
the input bus for the track by tapping a
number.
8.
Tap
to turn monitoring on (lit).
9.
Adjust the input signal level of the
microphone with the [INPUT 2 GAIN] knob
on the device.
Setting optimum recording levels
Adjust the [INPUT 2 GAIN] knobs so that the [PEAK]
indicator flashes briefly at the loudest input volume.