Commissioning – Casella CEL Nomad portable weather station User Manual
Page 13
Orientation
14.
Guided by the compass supplied, rotate the case on the upright so that
the solar panel faces towards the sun. (Face it towards the centre of
the sun’s anticipated course, when longer measurements are to be
performed.) Then clamp the case securely in place as high on the
upright as possible.
It’s weight will stabilise the tripod, however for additional stability, the
pegs provided can be used to peg down the tripod feet.
Under severe wind conditions, guy lines (not provided) may also be
needed to stabilise the upper part of the tripod when extended.
15.
When additional sensors are to be used, clip the auxiliary box to the
lower part of the tripod.
16.
Loosen the locking screw, then rotate the sensor head and extension
tube, until the red “N” mark on the Wind Direction sensor (weather
vane) is pointing directly north.
17.
Use the compass to confirm that the sensor head cross bar is now
running due north - south.
18.
When the sensor head is correctly aligned, clamp the extension tube
securely in place.
Rain Gauge
19.
Deploy the rain gauge at least 4 m from the tripod.
20.
Release the two catches securing the outer cover to the base of the rain
gauge.
21.
Carefully lift off the cover and stand it in a safe place.
22.
With the base plate mounted in its correct location on site, adjust the
three levelling screws until the built-in spirit level indicates that the
unit is level.
23.
Once the unit is level secure the locknuts.
24.
A restriction, such as an elastic band, may have been fitted to prevent
the bucket from moving during transit.
Carefully remove any restriction
and check that the bucket pivots
freely.
25.
Replace the outer cover and
engage the catches in the cutouts
in the base plate.
26.
When additional sensors are
supplied with a Nomad Special
System, deploy them as required.
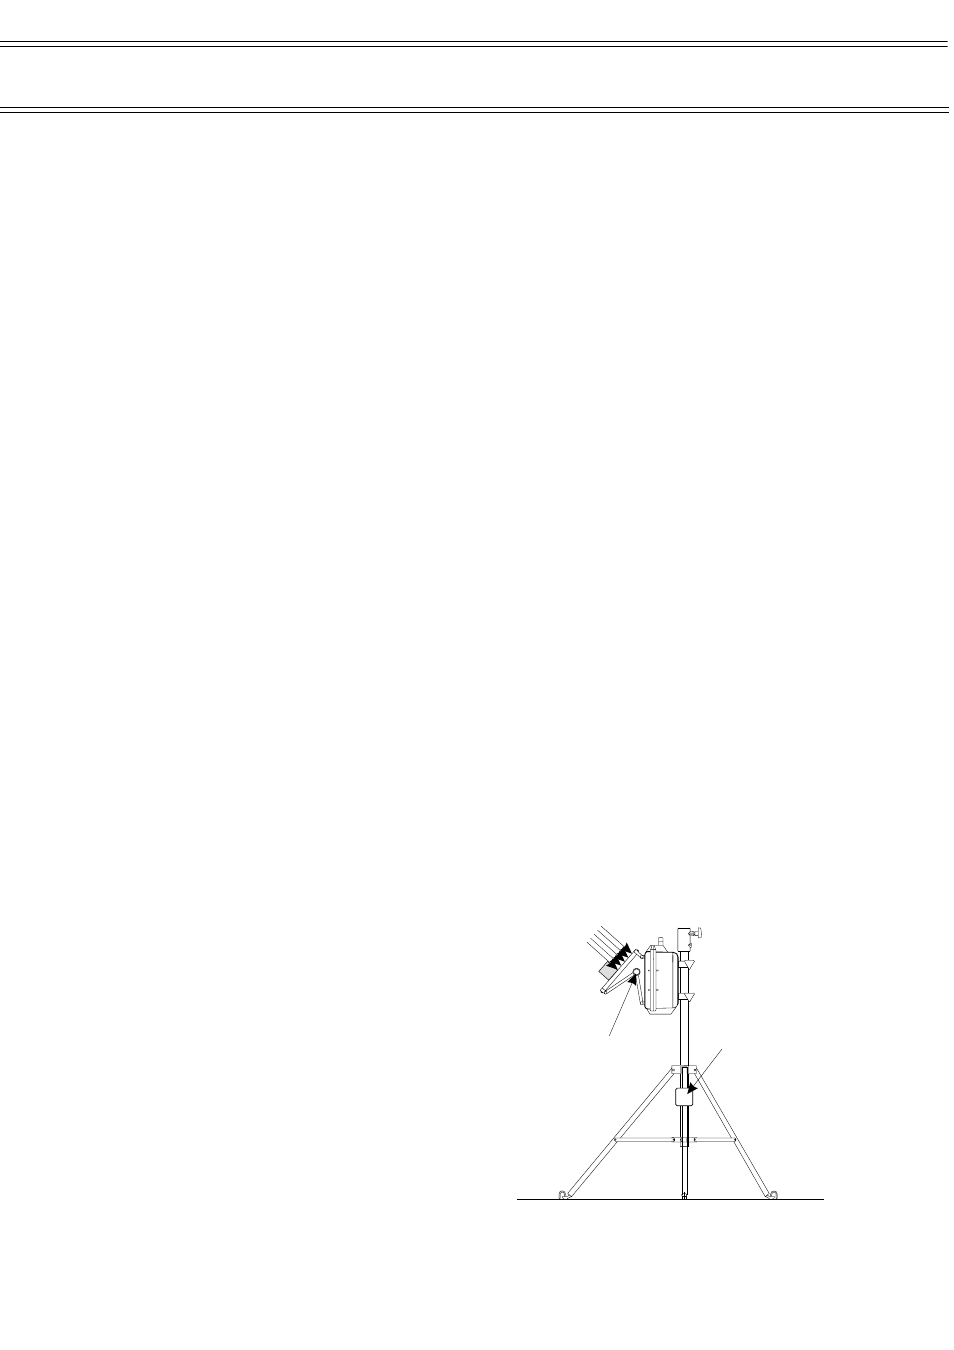
27.
Loosen the locking wheel on the
solar panel attachment and gently
pull the bottom of the panel
outwards until it is at right angles
to the radiation from the sun as
shown in Figure 5.
Commissioning
Sun
Rays
Right
Angle
Locking
Wheel
Aux.
Junction
Box
01055
Figure 5: Adjusting the solar panel
Page 13 of 68
NOMAD Portable Weather Station
Users Handbook