Avalon Firestyles 900 PI-1993 to 1996 User Manual
Page 26
P
AGE
26
I
NSERT
I
NSTALLATION
(C
ONT
.)
C
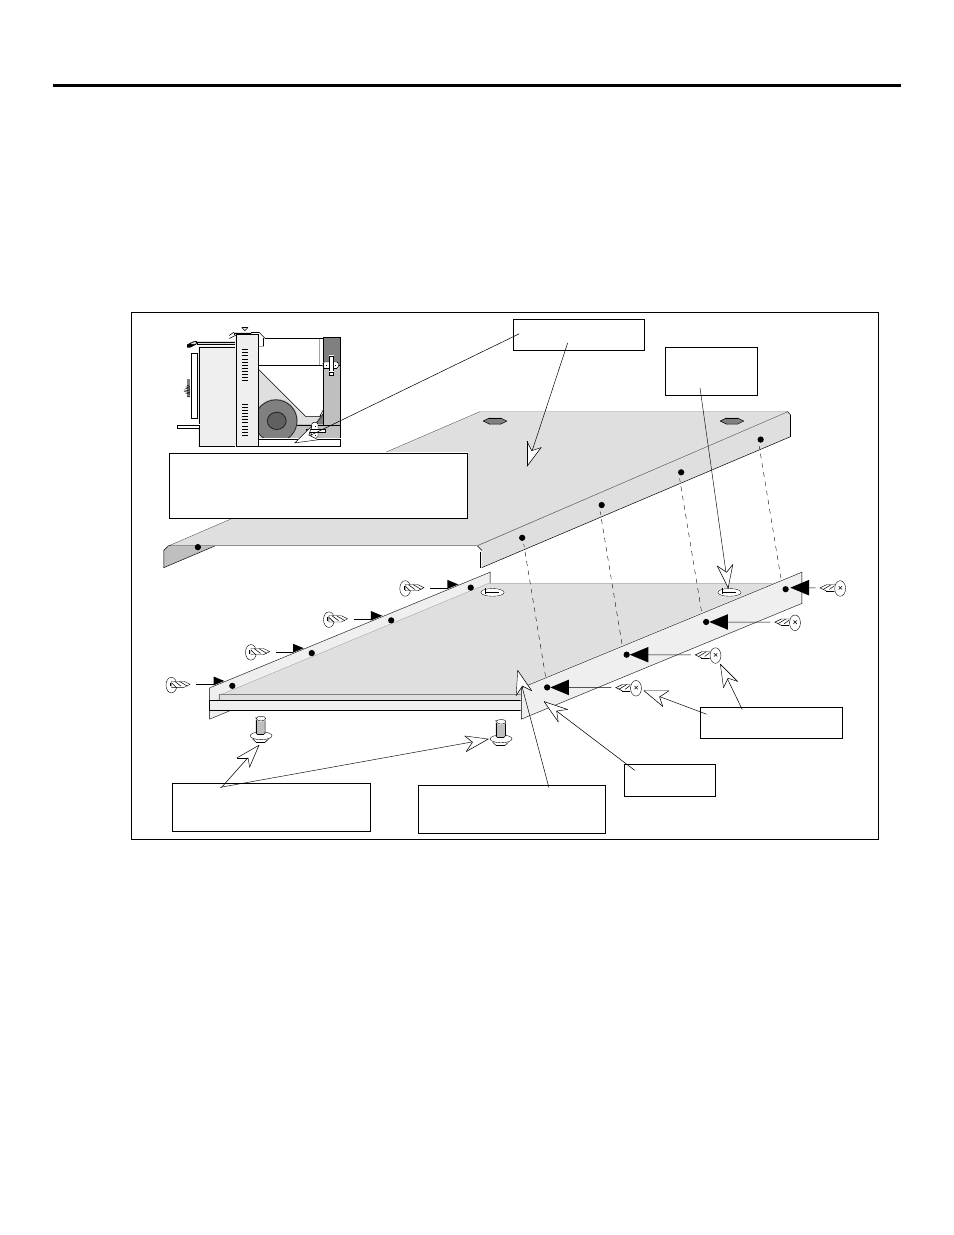
The next step is to install the floor shield kit (see the illustration below). Prop up the
front of the insert approximately one foot. Remove the front and rear leveling bolts if
they were installed. Place the floor shield underneath the insert and line up the holes on
the floor shield with the holes in the insert baseplate, making sure the insulation included
with the floor shield stays in place. Insert four screws (included with the floor shield)
through the floor shield and then screw them into the insert baseplate. These screws are
self-tapping. Repeat for the opposite side. If the front leveling bolts are needed, insert
the two leveling bolts included with the floor shield kit into the nuts on the floor shild. If
the rear leveling bolts are needed, insert the two leveling bolts included with the insert
through the floor shield and into the insert.
Make sure the insulation is
lined up before installing.
Insert Baseplate
Front Leveling Bolts
(included with floor shield kit)
Floor Shield
Attachment Screws
Hole for rear
leveling bolt
NOTE: The insert is attached to the top of the
insert baseplate, but for illustrative purposes
does not appear in the blown-up illustration.
D
Install the outside air connection (if applicable).
E
If the optional igniter is being used, make sure to install it now.
F
The next step is to complete the wall that the insert is placed into. The non-combustible
facing must be installed to meet the requirements (non-combustible facing must extend a
minimum of 12" above the heater). Many installers prefer the 'look' of masonry around
the pellet insert and will build the insert around either tile or brick. If the installation uses
masonry, make sure to include the depth of the masonry into the installation plans.
NOTE: The 10" panel set is the smallest panel set large enough to cover the built-in cavity.
G
Place the insert in its final location, making sure it is centered and that it maintains a 3"
minimum clearance to the back wall. Make sure that all the floor covering (i.e. carpeting,
vinyl floor) has been removed from underneath the insert. Attach the pellet vent and
outside air tube. NOTE: Do not pick the insert up by the hopper or any other internal
component. All joints of the pellet vent must be screwed together and sealed.