2 ptz set, 7 system, 1 general – Bolide SVR9004HD User Manual
Page 31
User Manual
27
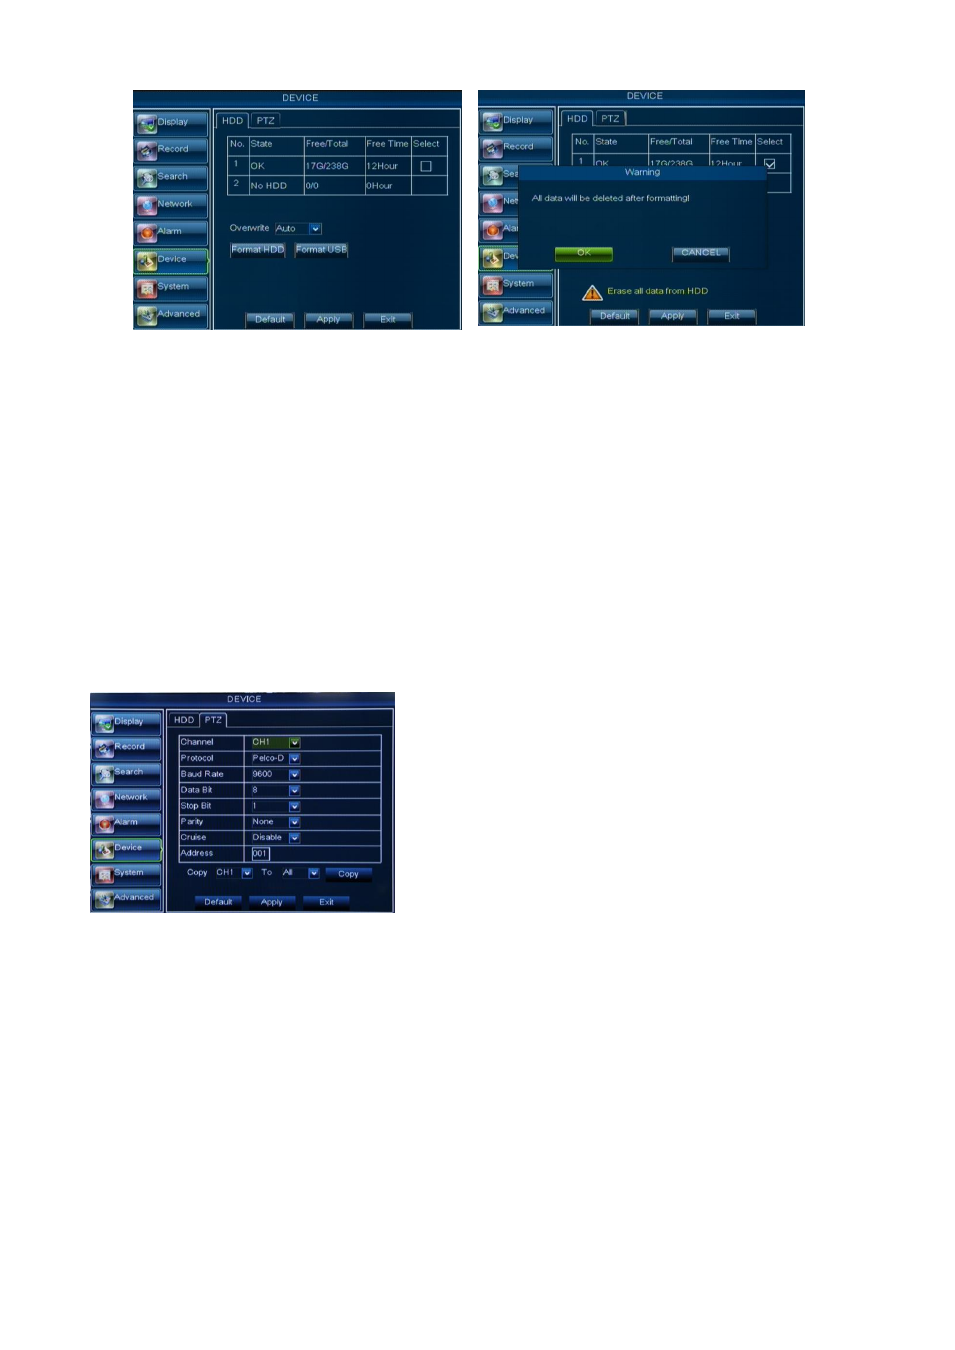
Overwrite
– When set to ENABLE the DVR will record over the oldest files on the hard drive. The DVR will
always be able to record events as they happen, however, it does mean that you’ll need to get important
events off the HDD before they’re overwritten; and if overwrite is set to DISABLE the DVR will stop record once
the DVR is full. Whilst you won’t lose old footage, you run the risk of missing new events as they happen. Be
sure you want to do this before selecting it.
HDD Format
– Formatting the HDD will erase all data (i.e. footage) which is stored on it, and re-create the
FAT (file allocation table).
USB Format - If you have a USB flash drive connected to the DVR, you can format that, too. To do this,
click the [USB Format] button and click [OK].
Note: It is an important first step when configuring your DVR to make sure that the hard drive (HDD)
options are correctly set. So, strongly suggest that you do format the HDD before start the first record.
5.3.6.2 PTZ Set
Click [Main MenuDevicePTZ] to enter into the below window shown as Picture 5-41
5.3.7 System
5.3.7.1 General
Click [Main MenuSystemGeneral] to enter into the interface shown as Picture 5-42.
You will be allowed to modify system date, time, date/time format, language, video format and Menu time
out.
You could select the channel you desire to control and set
PTZ protocol (Pelco-D or Pelco-P), Baud Rate (1200, 2400,
4800, 9600), Data bit (8, 7, 6, 5), Stop bit (1, 2), Parity Check
(None, Odd, Even, Mark, Space), Address Code and Cruise
status respectively. Please note the PTZ device can be
activated only when a channel in connection with the PTZ
camera is selected.
Picture 5-39
Picture 5-40
Picture 5-41