Honestech VHS to DVD 5.0 Deluxe User Manual
Page 49
49. VHS to DVD 5.0 Deluxe
When shortening an audio file, as in the previous example, you are essentially cutting your
audio file. In this situation you may find the audio is cut short, ending prematurely with the
video frame it is connected to.
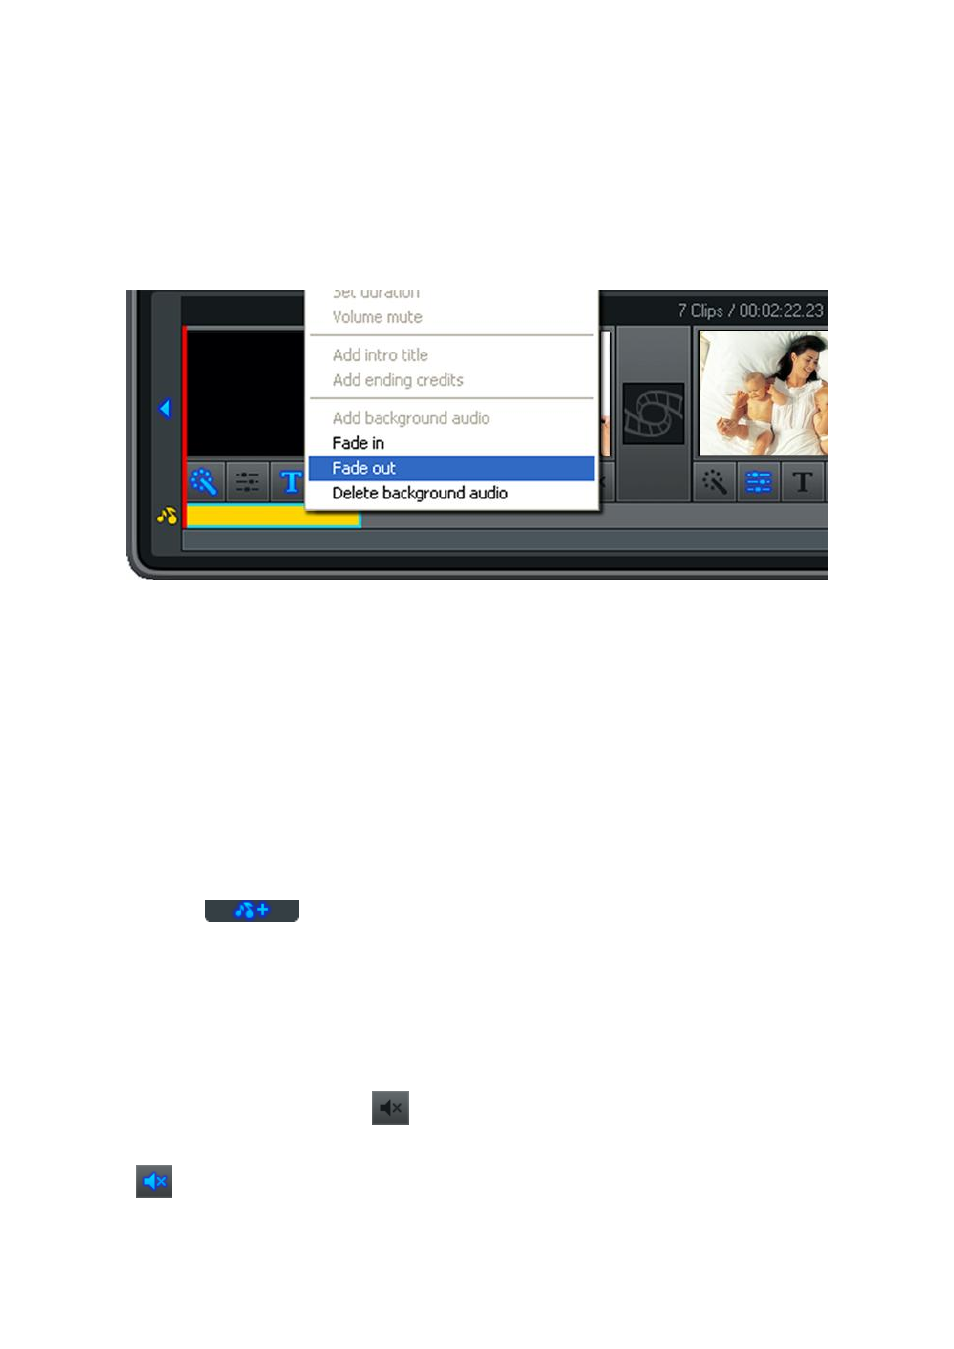
To help alleviate any abrupt endings of your audio, right click the colored bar representing your
audio file an
d select the „Fade out‟ option from the pop-up menu.
You can also use the „Fade in‟ option from the pop-up menu to slowly increase the volume of
the audio during the first few seconds. This can help provide smoother transitions from one
audio file to the next or create a more interesting introduction.
The Delete background audio option, as seen in the picture above, can also be selected from
the pop-up menu if you need to completely remove the audio file from the Audio track.
*Note: Colored bars will always fill the entire space beneath a frame, even if the audio
playtime ends before the video frame does. It is not possible to add more than one
audio file to one frame or adjust a colored bar to less than the entire frame.
To add additional audio files to the Storyboard Panel, simply repeat the steps;
1. Select a frame in the Storyboard.
2. Click the Add background audio button, and select your file.
3. Shorten and Fade if necessary.
It is also possible to mute or disable the recorded audio portion of your frames within the
Storyboard Panel. This can be helpful for hearing background audio better or when trying to
create music video montages.
To mute recorded audio, click the Mute button directly below any frame within the
Storyboard panel.
The Mute button will light up to indicate which segments have been muted.