Honestech VHS to DVD 7.0 Deluxe User Manual
Page 39
39. VHS to DVD 7.0 Deluxe
Playhead
– indicates the preview location within a video clip. The playhead marker can be
dragged left or right to adjust the preview position of your video in the Preview Panel.
*The Playhead also indicates where the split will occur if the split button is clicked.
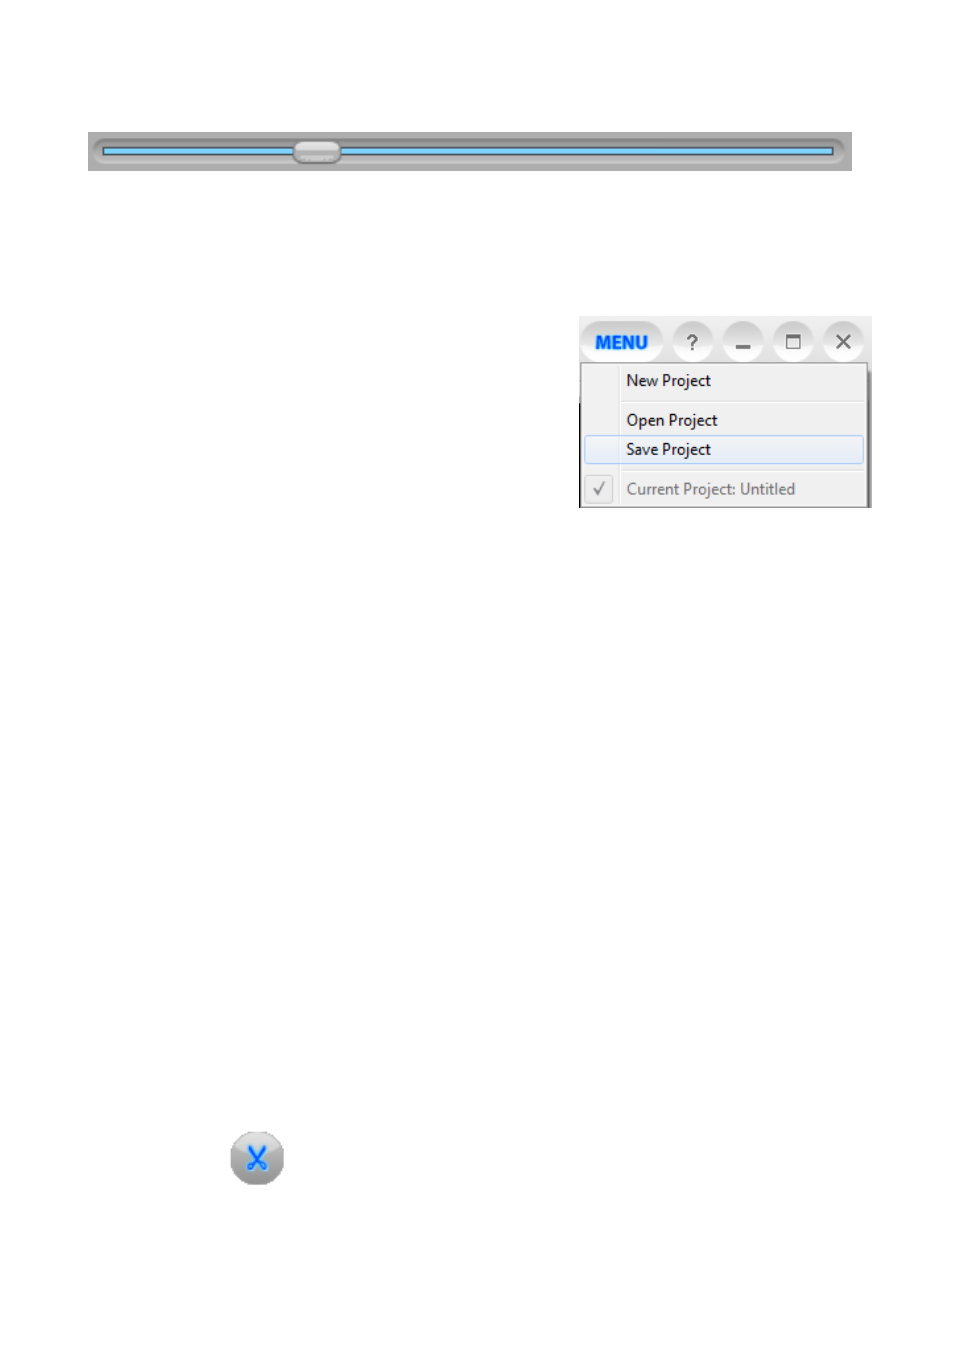
Save Project
– When you need to save your editing progress and finish it at a later time, use
the Save Project option from the Menu button in the top
right corner of the Edit screen.
When prompted, provide a descriptive name that matches
Your project and save it to a familiar location onyour hard drive.
*Your project will be saved as a VHS to DVD Project File, see the Appendix for more
information regarding project files.
7.2.2. Step 2
– Splitting Video
Once you have located a section in your video that requires an edit, whether it is a cut, a
transition, or a special effect, you will want to split your video clip to allow for a transition to be
inserted, or as a way to isolate a section from the rest of your video.
The splitting feature functions similarly to cutting film strips or negatives.
Cutting a physical negative with a pair of scissors divides it in two. Splitting a video in the edit
section works the same, leaving you with two divided clips, that are automatically placed in the
Video Clipboard.
Split
– Use the scissors button to split your video at the current playhead position or
video frame appearing in the panel. Use the Pause, Previous Frame, and Next Frame
controls if necessary, to locate an exact scene or frame to split your video on.